 When I was a kid, it was hard for me to eat pie.
That sounds strange, doesn’t it? But the truth is that at it’s best, pie is quite rich, not to mention the things we top it with. And for some reason as a kid I had problems with very rich foods (and spicy foods) and pie was at the top of that list. In fact, it’s only been in recent years that I’ve come to really enjoy pie and actually crave it sometimes. I still have to be somewhat careful, but I can happily enjoy a piece now and then without trouble…which maybe IS trouble in another way, come to think of it!
All this to say that one reason you haven’t seen much pie other than my mom’s blueberry pie on this blog is that I don’t make it very often for the reasons I just stated. So recently when we were participating in a gathering, I needed to make a dessert. And it just so happened that the friends we were gathering with had given me this wonderful and interesting cookbook. It seemed only right that I should make something from this cookbook to share with them, and that’s how I ended up making this Chocolate Bourbon Pecan Pie.
This recipe is adapted from one in Martha Stewart’s very recent cookbook, Martha’s American Food, which celebrates foods from different regions in the U.S., coast to coast. It’s a great read and filled with fun tidbits of background information on how these dishes came to be. This particular pie is one associated with the South, and it’s a pie I’ve wanted to make for a long time.
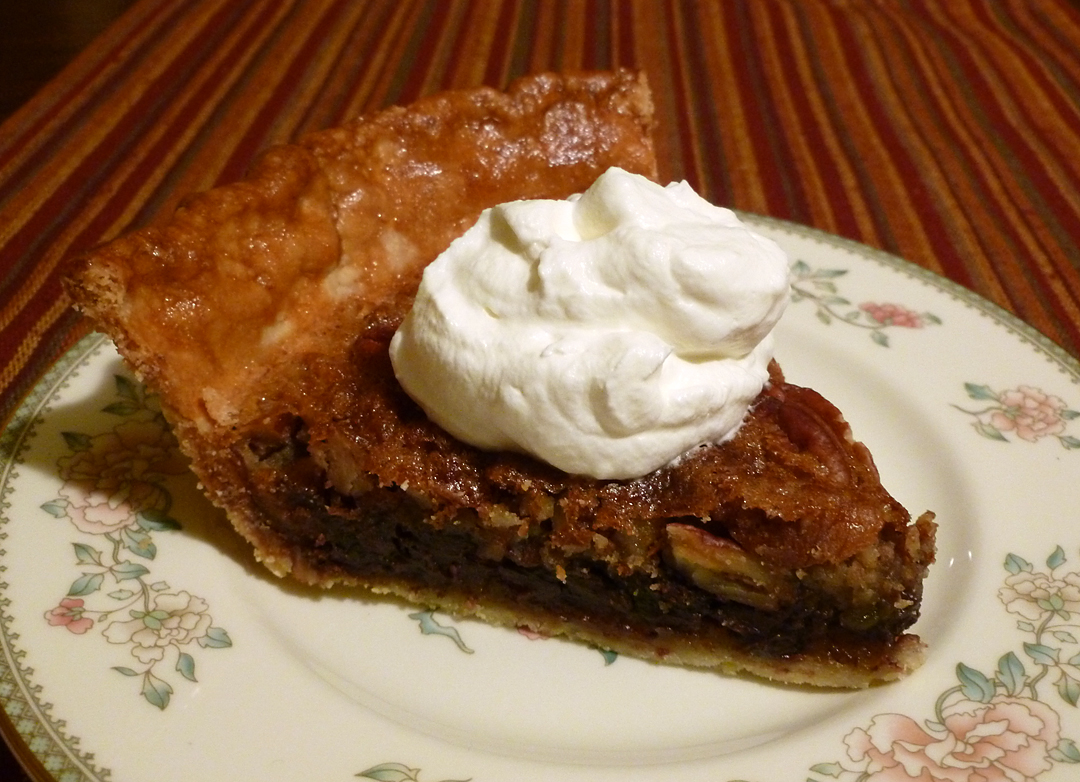
I have to say this makes a beautiful and delicious pie, but words can’t really describe how good this is. And making her crust is key. I don’t make a lot of pie crust and quite frankly, it’s usually my least favorite part of a pie, but this one is terrific. Imagine this sweet filling, enhanced by a touch of bourbon and the crunch of beautiful toasty pecans, with a thin layer of rich chocolate on the bottom, all bound together by a buttery and flavorful crust. Uh, huh…I know you want it. Yessireee, good eating. I mean if you’re gonna make and eat a piece of pie with all of those calories, you might as well go for broke. I served this topped with a dollop of locally made Fleur de Sel Vanilla ice cream and that little kick of salt and vanilla really brought forth the nuttiness of the pecans and enhanced all of the flavors. A work of art.
Then, just to see if we could make a great thing any better, we revisited the pie with a dollop of whipped cream, scented with a little bourbon…oh, my!
So far I’m loving this cookbook, though I’m certainly not being paid to say so, nor am I a reviewer. It has a lot of great recipes in it and is just plain fun, especially if you live in the U.S. or love old-fashioned, American regional foods. And because I love it, I’m adding it to my bookshelf on this blog. Check it out!
In the case of this pie, I did find the need to adapt ever so slightly, as sometimes instructions and proportions just aren’t all they seem to be, or should be, in my opinion. All a part of cooking.
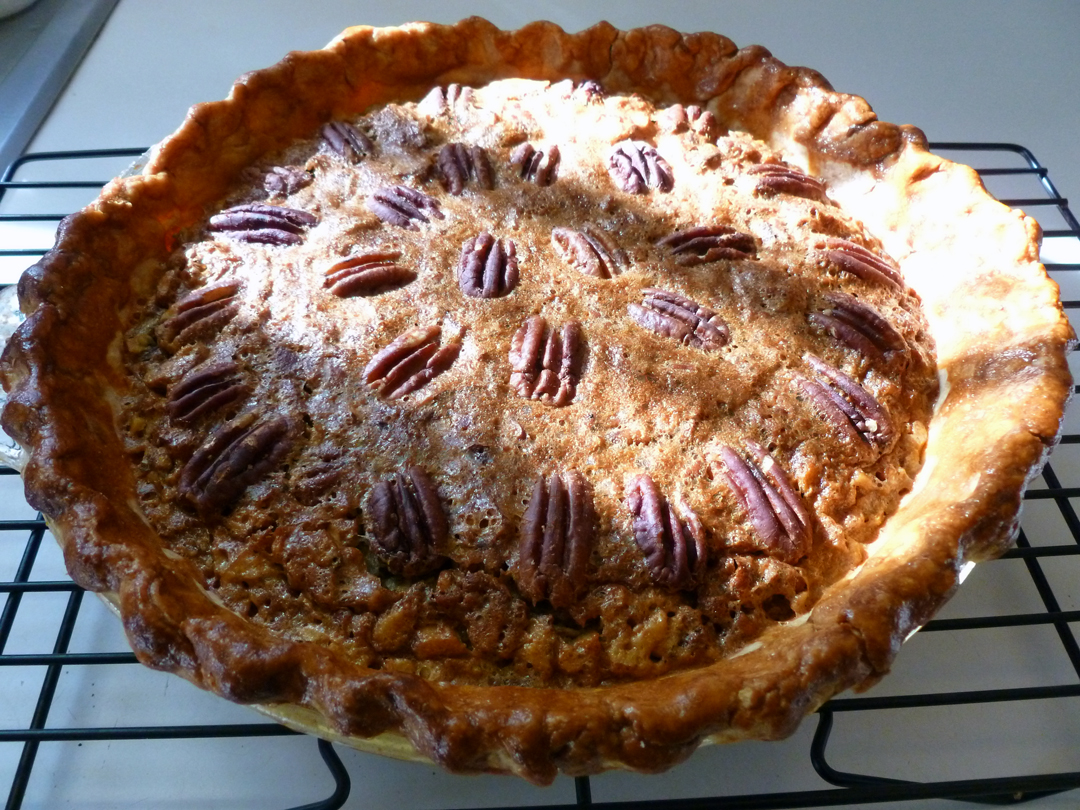
Is there anything more inviting than a freshly baked pie? No, perhaps not.
Chocolate Bourbon Pecan Pie
(Slightly adapted from Martha’s American Food)
Makes one 9-inch pie which serves 6-8
Crust, makes two and you’ll need one for the pie, freeze the other:
3 cups flour
1 teaspoon regular salt
1 tablespoon + 1 teaspoon sugar
1 cup plus 2 tablespoons of cold unsalted butter cut into small pieces
1/4 cup water, plus 1-2 tablespoons more if needed
In a food processor, pulse together the flour, salt and sugar just to combine. Add the butter and pulse until the mixture is coarse and crumbly with bits of butter still evident. Drizzle the 1/4 cup of water evenly over the dry mixture and pulse until the dough just begins to come together, it shouldn’t be wet or sticky. Add more water, 1 tablespoon at a time if the mixture is too dry and isn’t coming together. I found that one more tablespoon over the 1/4 cup did the trick. Remove the dough, shape into two equal disks, cover with plastic wrap and refrigerate until chilled. Can be frozen for a month and thaw before using. (I found that the dough was quite hard after being in the fridge, and I had to bring it back to room temp to roll it out.)
For the Filling and making the pie:
Flour for dusting and rolling out the pie crust and 1 disk of pie crust dough from the above recipe
1/2 cup unsalted butter, melted
1/2 cup granulated cane sugar
3 tablespoons flour
1/2 cup dark corn syrup
2 large eggs
3 tablespoons good quality aged bourbon
1/4 teaspoon kosher salt
1 1/4 cup coarsely chopped pecans
3/4 cup whole pecan halves
3/4 cup coarsely chopped semisweet chocolate
1 tablespoon heavy cream and 1 egg yolk for egg wash
Preheat the oven to 375 degrees F. Lightly flour a flat surface and roll out the dough into an 11-inch round about 1/8″ thick. (If dough is too stiff, let it come back to room temperature and then roll it out.) Wrap the dough around the rolling pin to transfer to a 9-inch pie plate and fit the dough into the pan, pressing into the edges of the pan. Trim the dough to about 1 inch all the way around the pan, fold it under and crimp the edges decoratively, pinching and pressing with your thumb and fingers, or use a fork. Prick the bottom of the crust several times with a fork. If it’s warm outside and dough is soft, return to the fridge for about 15 minutes.
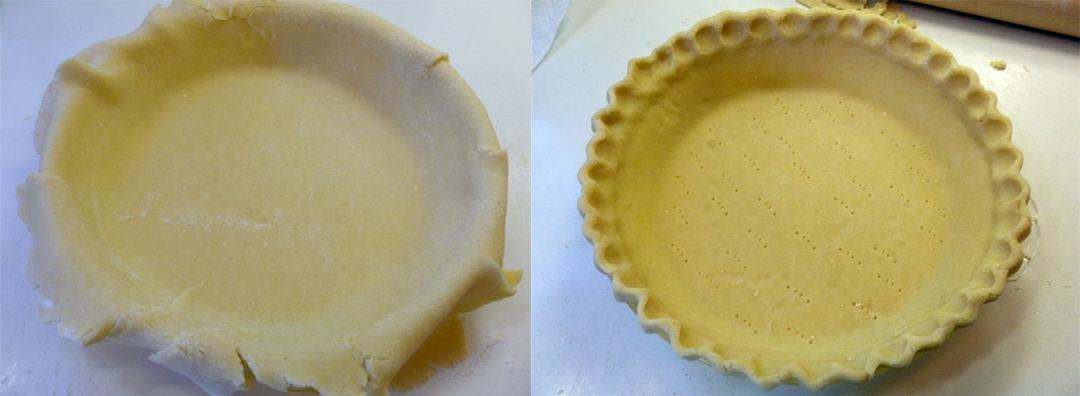
Crust rolled and draped. Pinch together any cracks before crimping.
Line the pie shell with parchment, pressing into the sides of the pan. Fill the parchment with pie weights or dried beans. Bake 20 minutes (you may need to cover the edges of the crust with aluminum foil if they start to brown). Remove the parchment and pie weights and bake another 5 minutes until the crust is dry but not turning brown. Transfer to a wire rack and allow it to cool for at least 15 minutes. Reduce the oven temperature to 350 degrees F.
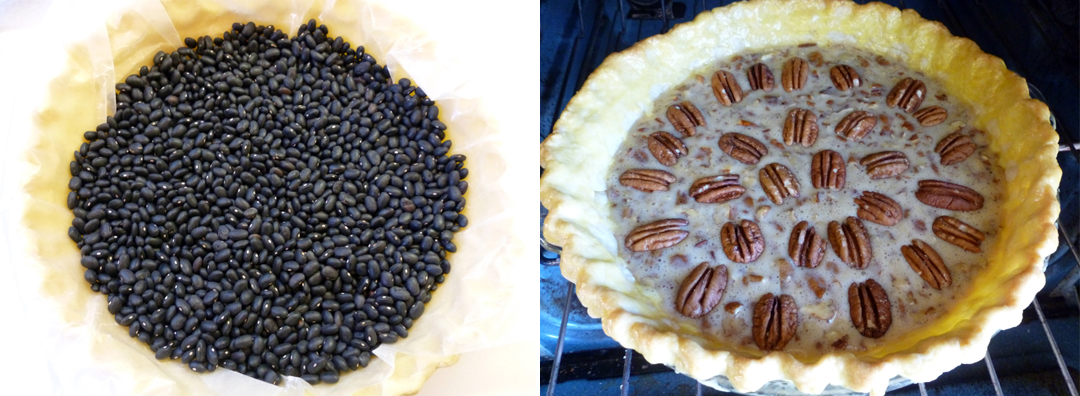
“Blind bake” your crust, cool it and then fill it. Cover your crust edges as needed to keep them from browning too much.
In a medium bowl, combine the melted butter, sugar, flour, corn syrup, eggs, bourbon and salt. Stir in the chopped pecans and the chocolate. Pour the filling into the crust and decorate the top with the remaining pecan halves. In a small bowl, whisk together the egg yolk and the cream and brush over all the exposed edges of the pie. Bake the pie until just set in the center and the crust is golden, about 40 minutes. Tent with foil and/or cover the edges of the crust if browning too quickly. Transfer the pie to a wire rack and cool completely before serving. Cut into 6 to 8 wedges. Top with vanilla ice cream or whipped cream…or eat it plain in all it’s glory.

More pie, please!