
Tuna Melt Flatbread Pizza “all the way!”
I don’t know why it took me so long to realize that a tuna melt and a pizza could truly become one, but necessity has often been the mother of invention in my kitchen. Recently, at the end of a very busy work day I was trying to talk myself out of making dinner when suddenly I spied some very thin flatbread waving at me from my fridge.
Well, pizza is always a fall back position, isn’t it? And I’ve become very fond of using thin and less caloric flatbreads to make quick and easy pizzas—but I had no sauce, no mozzarella, no pesto…none of the ingredients that I usually use for pizza.
What I did have on hand was a couple of eggs, some celery, a bit of leftover red onion, a nub of extra sharp cheddar and a can of tuna. Since mayo and sweet pickle relish are almost always in my pantry, I knew I had the makings of my “Deep South” style tuna salad and, if I used the flatbread and cheese, a tuna melt. Thus, my Deep South Tuna Melt Flatbread Pizza was born.
Now I’ll back up to say that I make this tuna salad a lot and in the past we’ve almost always eaten it as a salad. So imagine my surprise when my tuna melt pizza turned out to be so good that we’ve had it three times since then—the second time with a little baby arugula sprinkled on top to add a “green salad” component…delicious! And you know what? I like this Deep South Tuna Melt Flatbread Pizza better than a regular tuna melt on sliced bread any day. The crispy and thin flatbread is a perfect foil for this approach. It’s where tartine and pizza meet.
This makes a hearty and complete meal unto itself with one flatbread pizza per person, and any leftover tuna salad can be used for the next meal. Since there are just two of us and the tuna salad recipe makes four servings, we had the leftover tuna salad plated on a bed of arugula alongside a cup of soup for dinner the next night. Tuna salad is also wonderful stuffed inside a homegrown summer tomato.
The recipe below is for two pizzas, but to make four, simply double the pizza part of the recipe and use all of the tuna salad divided evenly between the four flatbreads. Just one of you to feed? No problem. Half the tuna salad recipe and the flatbread pizza recipe. Have your pizza one night and tuna salad plate the next!


Roll your cursor over each photo for captions or click on any photo for a slideshow.
For a printable recipe, click here.
Deep South Tuna Melt Flatbread Pizza
Makes 2 Flatbread Pizzas plus 2 extra servings of Tuna Salad
For the Deep South Tuna Salad:
1 – 5 oz. can water packed tuna (preferably no salt added), drained and flaked
2 – hard boiled eggs, peeled and grated on the large side of a box grater
3-4 stalks of celery, washed, trimmed and diced small (about 1 cup)
1 cup sweet red onion, diced small
1/4 cup drained sweet pickle relish (I use Wickles relish)
1/2 cup plus 1 tablespoon mayonnaise (I use Duke’s Mayonnaise)
1/4 teaspoon kosher salt
1/4 teaspoon freshly ground black pepper
More salt and pepper to taste, if needed
For the Pizza:
1/2 recipe of Deep South Tuna Salad (about 2 cups)
1 cup grated extra sharp cheddar cheese
2 thin flatbreads such as Flatout brand rustic white artisan thin pizza crust
Optional baby arugula for finishing
To make the tuna salad, combine all of the tuna salad ingredients in a medium-sized bowl and stir to combine well, making sure the mayonnaise lightly coats all of the ingredients. You want all of the ingredients to be just moistened, but not too wet. Divide the tuna salad in half and use half of it for the pizzas below and store the remaining half in a covered bowl in the fridge to use for another meal. Leftover tuna salad will keep for up to two days in the fridge.
Preheat the oven (and a pizza stone if you use one) according to the flatbread package directions, or 375 degrees F. Even if you don’t use Flatout flatbread pizza crusts which recommend a pre-bake, I’d recommend pre-baking your flatbread before adding toppings to crisp them up a bit. Pre-bake the crusts for 3 minutes, or until they just barely start to color. I use a pizza stone and transfer the flatbread from a pizza peel to the stone, but using a cookie sheet for pre-baking and the final bake instead is fine.
Once pre-baked, remove the flatbreads from the oven with the peel (or leave them on the cookie sheet) and top each crust with half of the tuna salad, dividing it evenly between the two crusts, smoothing it out into a thin layer and leaving about a 1/4 inch border all around the edges. Divide the cheese evenly between the two pizzas, sprinkling 1/2 cup of the cheese over the tuna salad on each.
If using a preheated pizza stone and peel, transfer the topped pizzas to the pizza stone with the peel, or return the cookie sheet to the oven, and bake for about 6-7 minutes for Flatout crusts, or until the edges of the flatbread crusts are light brown and crispy and the cheese is melted and bubbling. I usually turn on the broiler for a minute or less, to finish browning my crust and to get the cheese a little more golden. Watch it very carefully if you do this and do not let the cheese or crusts burn. When the pizzas are done to your liking, remove them from the oven and transfer to a cutting board. If you’re using arugula, arrange a few leaves down the center of each pizza. Cut each pizza into four slices with a pizza cutter and serve.
Note: As an alternative or in addition to topping your pizza with arugula, you can add about 1/4 cup of chopped heirloom tomato on top of the tuna salad on each pizza, then proceed with the cheese and baking.
Quick Flatbread Pizza Variations: Use Swiss cheese instead of cheddar on your tuna melt and proceed with the rest of the recipe as written.

Pesto Veggie Pizza ready for the cheese, please.
Pesto Veggie Flatbread Pizza: Sauté one sliced sweet onion and 8 oz. of fresh, sliced mushrooms in one tablespoon of olive oil. Spread about 1 generous tablespoon of jarred basil pesto (or fresh basil pesto is even better) on each of the two flatbreads. Divide the onion and mushrooms, about one cup of quartered cherry tomatoes and 1 cup of grated mozzarella cheese evenly between the two flatbreads and bake as per the tuna melt instructions. Remove from the oven and top with fresh arugula if you like, or a few torn fresh basil leaves. Cut each pizza into four pieces. (Don’t use fresh mozzarella as the water content will make the flatbreads soggy.)


The latest creation…cheeseburger goodness in flatbread pizza form…yummy!
Cheeseburger Flatbread Pizza: I do this one when we make burgers or sliders and have leftovers. Thinly spread about 1 1/2 tablespoons of your favorite (I like Whole Foods Organic) jarred pizza sauce over each flatbread. Crumble one fully cooked burger patty per pizza or two slider patties per pizza over each of two flatbreads. Divide 1/2 thinly sliced onion and 1 cup quartered cherry tomatoes evenly between the two pizzas. Top with 1 cup grated extra sharp cheddar cheese evenly divided between the two pizzas. Bake per instructions for the tuna melt pizzas. Remove from oven and top with baby arugula. Slice each into four pieces.


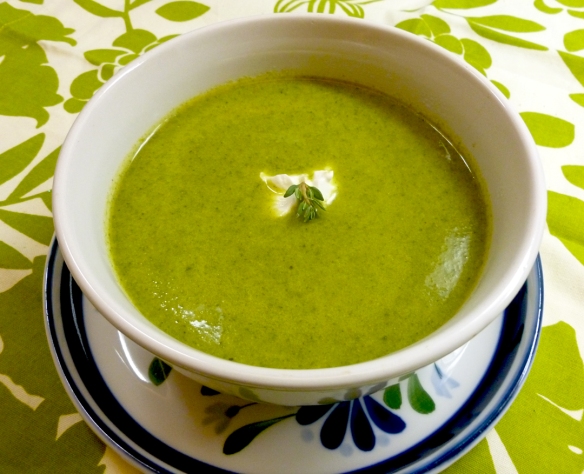
 Veddy Veggie Soup