What’s New? Summer Salad Days.


salad4

Hi there and happy first day of Summer! Okay, I realize it’s been almost a year since last I posted. It wasn’t my intention to take a year off, but you know how it goes…life. It’s really nice to be back now and I hope some of you are still with me.

So what’s been happening in my world you might ask? Work, family, celebrations, play and hiking. In fact, I have just started a new hiking blog, but more about that later. And I’m still cooking, of course!

Of late, I’ve found a lot of healthy inspiration (and fun!) in going to the summer farmer’s markets. The abundance of local fresh produce and cheeses is so enticing that the moment I step into the market, my mind starts racing with possibilities. The sights, smells and sounds make you want to dive in and purchase some of everything you see, then minimally prepare the ingredients to showcase their natural goodness. Colorful and well-composed salads are one of my favorite summer meals and the perfect way to enjoy the beginning of this season’s bounty.

On a recent trip to the farmer’s market at the Carter Center, I found beautiful rose and rainbow colored watermelon radishes, tender young fennel bulbs with the longest mane of fronds I’ve ever seen, sweet miniature butter lettuces, mild baby arugula and fresh local made goats’ chèvre with truffle. I envisioned a gorgeous, cooling salad and how delicious that would taste after a long, hot hike. I also had some ingredients at home to add to the mix – sweet red onion, Kalamata olives, Haas avocado and satsuma orange. And to pull it all together, a light and easy dressing. A little lemon, a little orange, some rice wine vinegar, shallot, a touch of local honey, salt, pepper and some of those amazing fennel fronds, et voilĂ ! A feast for the eyes and food for the soul.

A large composed salad like this one makes a light lunch all by itself, but for dinner – and especially after a long hike – I paired it with my easy to make Tomato, Orange and Tarragon Soup served cold alongside a simple bruschetta of thinly sliced baguette and the truffled goats’ chèvre from the market. Lose the baguette and sprinkle a little of the chèvre on top of the salad or soup instead and you’ll have a fantastic low carb meal.

C’est magnifique!

*****

What else is new? Well in addition to being a year older, I hope I’m becoming wiser about feeding the mind, body and soul. To that end, my husband and I have taken up gentle versions of yoga and Tai Chi, tried to incorporate even more fresh vegetables into our daily diets and we still hike every Saturday that we possibly can. In fact, the name of my new blog is Saturday Hiker and its mission is to encourage folks of all ages, and most especially those of “middle age” who think they can’t hike, to get out there and see what nature has to offer. We are very casual hikers and hike mostly in our own area since we do it every Saturday, but our horizons are expanding and we like to hike on our vacations, too. You can check out the new blog at saturdayhiker.com and even if you aren’t in my area, I hope it will make you think about exploring and enjoying your own surroundings more fully. The site itself has pages with an ongoing list of tips and information as well as the blog.

What’s new with you? Please leave me a comment and catch me up.

*****

To print the recipe click here.

Spring into Summer Farmer’s Market Salad
2 servings

Salad:
3 cups fresh baby arugula, washed and dried
3 cups fresh butter lettuce leaves, washed, dried and torn into bite-sized pieces
1 small fennel bulb and fronds, washed, toughest outer part of the bulb removed, cored and thinly sliced, fronds reserved and chopped
1/4 sweet red onion
, peeled and thinly sliced
4 small colorful radishes, washed, trimmed and thinly sliced (I used 2 watermelon and 2 breakfast radishes)
2 satsuma or mandarin oranges, peeled and segmented
1 Haas avocado, pitted and cubed or sliced into bite-sized pieces
16 Kalamata olives, quartered
1 tablespoon reserved chopped fennel fronds for garnish

Dressing:
1 Tablespoon fresh lemon juice

1 Tablespoon fresh orange juice
2 Tablespoons unflavored rice wine vinegar
1/2 to 1 teaspoon local honey, to taste
1 1/2 Tablespoons shallot, finely chopped 
1 Tablespoon fresh fennel fronds, finely chopped
1/4 cup extra virgin olive oil
Sea salt and freshly ground black pepper to taste (I use about 1/4 tsp. of each)

Combine all ingredients for the dressing in a mason jar, screw on the cover and shake vigorously to emulsify. Set aside until ready to dress the salad.

On two dinner-sized plates, compose the salad in layers, dividing all ingredients equally and artfully between the two. Start with the arugula and lettuce, mixing them together gently, then a layer of the fennel slices sprinkled over the lettuce, then red onion slices. Scatter the radishes so that the colors are mixed across the plate, then do the same with the oranges, avocado, and Kalamata olives. Shake the dressing to recombine, then using a table spoon, drizzle 2-3 tablespoons of the dressing over each salad. Reserve the remaining dressing for another salad.

Finish each plate with a sprinkling of the reserved chopped fennel fronds and serve either alone or with goat cheese bruschetta and/or soup.

cropped dinner 1

Advertisement

Part Three: Chilis, Chowders and Some Extra Ideas for Enjoying Them.

Hi there and Happy Friday! Here’s the final post of my series on Soups, Stews, Chilis and Chowders, featuring two chowders, three versions of chili, and some fun and festive ideas for making other dishes out of chili…just in time for Cinco de Mayo!

I make soups, chowder and chili year round and freeze any leftovers, as they freeze beautifully. There’s nothing like a nice bowl full of homemade chili or chowder on a rainy day, or any day. One of my most favorite things about having some extra chili on hand is being able to use it to make something different and equally delicious. Try using any one of the chilis below to make:

Homemade Nachos, decadent…yes I know, and here’s how: 1) Heat up some of any one of these three leftover chilis on your stovetop and set aside. I just eyeball the amount, but you’ll want it to be proportionate to the amount of nachos you’re making, keeping in mind that you don’t want so much chili that your nachos get soggy, but enough to get some chili in every bite. 2) Line a cookie sheet with aluminum foil and then make an even and single layer of your favorite tortilla chips on top of the foil. Sprinkle them with a bit of grated cheddar, jack, or a Mexican blend of cheese. 3) Pop the pan under a preheated broiler and watch it VERY carefully until the cheese just starts to melt, then pull it out before your chips start to turn brown. 4) Make another single layer of chips on top of the first layer, then distribute your chili evenly on top of the chips, using a slotted spoon to drain off any extra moisture before you put the chili on the chips. 5) Sprinkle some more cheese on top of the chili and then pop the pan back under the broiler until the cheese melts and starts to just turn golden brown, watching the whole time and removing the pan before the chips burn. 6) Customize the nachos with your favorite toppings like shredded lettuce, salsa, guacamole, sour cream and finely chopped red onion, and you have amazing homemade nachos—way better than you can purchase in a restaurant. In addition to using blue corn or regular tortilla chips for this, I’ve used sweet potato tortilla chips with the Turkey chili…yum!

Another quick and easy way to repurpose chili is to make Chili Sloppy Joes. Just heat your chili and toast your favorite burger bun, onion roll, potato roll or split English muffin. Place both toasted halves side by side on your plate and top with chili. Easy-peasy! This knife and fork open-faced sandwich is great as is, or with a sprinkle of grated cheese.

Lastly, you can use your homemade chili to spice up a dip…a cheese dip, that is! Make plain cheese dip into a festive and lively Spicy Chili Cheese Dip by swirling hot, homemade chili into your favorite homemade or purchased queso dip. I suggest putting your chili on top of the warmed cheese dip in your serving bowl just before serving, and then use a table knife to swirl the chili through it decoratively…much like marbling a cake batter. You want to still be able to see streaks of the chili in between large areas of the cheese and ensure that you get both cheese and chili in every bite. Serve hot with tortilla chips for dipping. Gooey goodness gracious, just hand me a margarita and Cinco de Mayo here I come!

I hope you’ve enjoyed reading this recap series and most of all, I hope it’s inspired you to make one of these delicious soups, stews, a chili or a chowder for you and yours. Just click on the name link of the dish below each image to get its recipe and happy eating.

Spooktacular Beef and Italian Sausage Chili may be my best chili recipe to date, though I love them all. Spicy, hearty and oh-so-flavorful, it’s the most traditional of my three chili recipes. If you want to swirl a chili into cheese dip to make the spicy chili cheese dip suggested above, this one is perfect for that. This recipe has the added bonus of feeding a crowd and can be doubled to feed an even bigger crowd, which makes it a terrific party recipe.

A bowl full of chili love.

Vegetarian/Vegan Black Bean Chili is a thick, rich chili that harnesses lots of black bean goodness. Yes, it’s vegetarian, and it’s vegan before you add the toppings, but it sure eats like a meaty bowl and it easily holds its own against any meat-based chili.

Serve with grated extra sharp cheddar, avocado and creme fraiche to make it more decadent.

Betsy’s Holy Mole Turkey Chili is my first original chili recipe and I still love it so much. This tried and true chili which features ground turkey breast is a bit healthier than other meat-based chilis and its dark, luxurious flavor is reminiscent of a Mexican mole. Here’s a little secret about this chili: If you don’t tell anyone it’s turkey, they’ll never guess!

Ham, Potato and Cabbage Chowder makes one of the most flavorful chowders I’ve ever tasted. The marriage of the sweet and salty ham with the cabbage and potato is amplified by a good measure of fresh thyme and a splash…well okay, a good bit of cream. How could you go wrong with this one? All this chowder needs is a little crispy flatbread on the side and you have a marvelous lunch or dinner.

I could eat this every day.

Rustic Roasted Potato, Broccoli and Corn “Chowda” is my take on a classic corn chowder. Roasting the veggies first adds a boat-load of flavor to this chowder, which features the unique addition of broccoli. This meal in a bowl can only get better with a little optional crumbled bacon on top. Cheers!

*****

Next time: Some new and seasonal, quick and easy, and light and healthy recipes full of flavor are on their way, so stay tuned.

Provençal Vegetable Ragout with Soft Cheese Polenta

finished ragoutwpolentaBSpring has popped here in Atlanta and we are leafed out! It’s been so pretty here, but the weather continues to be fickle…hot one day and downright cold the next with freezing temperatures coming this weekend, which is not good for azaleas. Still, the longer days and beautiful spring colors are most welcome.

A few weeks ago as the first buds were starting to show, we took a jaunt up to Cashiers, North Carolina for the weekend. It was still very much winter there, but the hiking was magnificent. Our close proximity to Highlands—which is only 15 minutes from Cashiers—meant that we could check out some very good new restaurants. One of them was Wild Thyme Gourmet. This restaurant used to be in a very small cottage a block or so off the main street of Highlands. They had little to no seating other than outdoors, but we had lunch there a couple of times and it was good. A few years ago they moved into a much larger space right on the main street and expanded their menu. It is now a fine restaurant worthy of reservations!

The night we dined at Wild Thyme Gourmet, both my husband and I were drawn to the vegetarian dishes on the menu. He ordered the ricotta and tapenade stuffed ravioli with fresh basil and tomato sauce. I ordered a Provençal vegetable ragout with soft polenta. The vegetables were meltingly delicious with a slightly smoky and rich undertone and were incorporated into a tomatoey sauce with briney kalamata olives. This was served atop a nutty and cheesey tasting soft polenta with just a few crumbles of soft, fresh goat cheese scattered on top. Both dishes were outstanding, so much so that the taste haunted me all the way back to Atlanta…and you know what that means!

So here’s my recreation of that delicious dish, which started off by making Jacques PĂ©pin’s exceptionally wonderful version of tapenade which you can see here. While it wasn’t exactly like the dish at the restaurant, we thought it was every bit as good. And you guessed it, the next post will be my husband’s ravioli dish, so stay tuned.

finished ragoutwpolenta2

Provençal Vegetable Ragout with Soft Cheese Polenta
Serves 6

For the Ragout:
2 
medium 
uncooked zucchini, split in half lengthwise
2 medium yellow summer squash, split in half lengthwise
1 each red, yellow, orange and green bell pepper, halved, stemmed and seeded
2 Tablespoons olive oil
1 medium red onion, peeled and diced
1 Tablespoon minced garlic
3 medium plum tomatoes, diced
1/4 cup tomato paste
1 1/2 Tablespoons Kalamata olive tapenade, preferably homemade
12 Kalamata olives, pitted and halved
1 1/2 fluid oz. Pernod or Pastis liquor
1 1/2 oz. unsalted vegetable stock, preferably homemade
1 Tablespoon Italian Parsley, chopped
2 teaspoons fresh thyme leaves, chopped
1 Tablespoon fresh basil, chopped, plus extra leaves for garnish
1 Tablespoon soft fresh goat cheese, crumbled

For the Polenta:
3 cups unsalted vegetable stock, preferably homemade
3/4 cup skim or 1% milk
4 Tablespoons half-and-half
1 cup whole-grain yellow cornmeal
3/4 cup grated Parmigiano Reggiano cheese

Freshly ground black pepper and kosher salt

Place the halves of zucchini, squash and peppers on a medium high heat grill or grill pan and grill both sides just until you have nice char marks. Remove from the heat and dice into 1/2 inch pieces.

Place olive oil in a large skillet over medium heat. Add the onion and the garlic and cook until fragrant. Add the zucchini, squash, and peppers and cook, stirring occasionally, until vegetables are starting to get tender. Add the tomato, tomato paste, olives, tapenade, vegetable stock, herbs and the Pernod or Pastis and cook on low heat, covered, until the tomatoes are soft and all the ingredients are integrated, about 10 minutes, stirring occasionally. Season to taste with salt and pepper. Turn off heat and leave covered while making the polenta.

Bring the 3 cups vegetable stock, milk and half and half to a gentle boil. Add the cornmeal slowly while whisking and then turn the heat to low. Continue to whisk until the polenta is creamy and tender to the bite, about 5-8 minutes. Add the parmesan and some freshly ground black pepper. Taste and add salt if needed. Serve 3/4 cup polenta with 1/6 of the ragout on top. Finish with a tiny sprinkle of goat cheese and a spring of basil, if desired.

*****

For those of you “Jones-ing” for spring, rest assured it is on its way. Here are some pics from our yard and neighborhood to tide you over.

This slideshow requires JavaScript.

Broccoli, Mushroom, Onion and Cheddar Frittata

Just out of the ovenWith the new year comes the resolutions, and one of them is always to try and “lean up” a bit after normal eating goes by the wayside in the total decadence of the holidays.

I am one who always has, and always will, fight the good fight with my waistline. We hike every weekend that the weather will allow this time of year, and that’s not only a fun way to get exercise and destress after the work week, but also a healthy and happy penance to other weekend pursuits! Still, one cannot lose weight by exercise alone…and there’s the rub.

It won’t come as a shock to you that I love to eat and won’t be giving up that pleasure any time soon. But there are ways to eat what you want and not gain, or even better, actually lose some weight.

Enter the frittata. What’s not to love about a frittata? You can make one in a snap and you can use up leftovers in your fridge to do it. Frittatas can be made out of most anything as long as it goes with eggs. Frittata is my go-to dish for those nights where I don’t have a lot of time in the kitchen and I want something good, filling and comforting to eat.

My approach to frittata has changed over the years and if you’ve followed this blog for a while, you’ve several versions posted. I began on one end of the spectrum with lots of egg and cheese, with only a few other ingredients added in. Then after reading some of Mark Bittman’s approaches to getting more vegetable and less animal into one’s diet, I switched to the other extreme, which was almost all vegetable and very little egg. Tasty and messy, but not quite as satisfying and “frittata-like” as where I’m landing now. Since eggs have been vindicated and are back in the “good for you” department, this frittata is filled with eggs. And vegetables. And just enough cheese to taste and enjoy. I think it’s perfect. I hope you will, too.

First I roast the broccoli and the mushrooms with no oil, just adding a bit of salt and pepper for seasoning. This results in concentrating the flavor of the vegetables and bringing out a nuttiness in the broccoli which only roasting can do. Then, I use a tablespoon of olive oil in my cast iron skillet to lightly caramelize the onion before adding the roasted broccoli and mushrooms to the party. Eggs are whisked in a bowl with salt, pepper and a goodly dash of freshly grated nutmeg. The nutmeg is really key here because it does two really wonderful things to the frittata. It brings out the natural sweetness of the eggs and the parmesan cheese, and boosts the flavor of the veggies. Lastly, I whisk in equal amounts of full fat shredded extra sharp cheddar and freshly grated parmigiano reggiano cheeses into the eggs, but only just enough for the taste…1/2 cup combined for the whole dish. Pour the egg mixture over the veggies, pop the skillet into the oven for about 12 minutes and you’ve got a healthy, filling dinner entree with very little fat, but lots of protein and veggies. It’s pure gold. Or at least it looks like that in these night time shots!

Another thing to love about frittata? Leftovers, if you have any, keep well in the fridge for up to 3 days. Love.

Happy New Year to you all and I hope yours has started off well. Here’s to your good health…and resolutions!

*****

Below is a little taste of an all too short hiking trip we took for our anniversary in November after Thanksgiving. This is the truly spectacular Falls Creek Falls State Park in the Cumberland Plateau area of Tennessee. A gorgeous, 35,000 acre park with trails, a lake, boating, zipline, fishing, cabins and an inn with a small restaurant, horseback riding and more. Since this was off season and winter, it was rainy and only the trails and accommodations were open, along with the restaurant, but it was still so beautiful and I can imagine it would be any time of year. We will go back for sure!

This slideshow requires JavaScript.

Broccoli, Mushroom, Onion and Cheddar Frittata
Serves 6

Two heads of broccoli crowns, washed and cut into small florets (about 4-5 cups)
8 oz. button mushrooms, cleaned and quartered
1 large onion, peeled and diced
1 Tablespoon of good quality olive oil
10 large eggs
1/4 cup shredded extra sharp cheddar cheese (I use Cabot)
1/4 very finely grated Parmigiano Reggiano cheese
1/4 generous teaspoon freshly grated nutmeg
1/2 teaspoon kosher salt
1/2 teaspoon freshly ground black pepper
more salt and pepper to taste

Preheat the oven to 400 degrees F. Line a cookie sheet with aluminum foil, then make an aluminum foil tray with sides to go into half of the sheet. Place the broccoli florets on the covered sheet and the mushrooms inside the tray. Season the broccoli and the mushrooms with the 1/2 teaspoon salt and pepper, dividing evenly. Place the sheet with tray into the oven and roast for approximately 15 minutes, stirring each side once halfway through, until the mushrooms are tender and the broccoli is cooked through and just starting to brown a little bit. Remove from the oven and set aside.

Crack the eggs into a medium-sized bowl and whisk to combine. Whisk in the nutmeg, a pinch of salt and some freshly ground pepper. Add the two cheeses and whisk to combine.

Heat the oil over medium heat in a 10 inch cast iron skillet. Add the onions and cook for about 4-5 minutes, until they are translucent and just starting to caramelize a little bit. Add the roasted broccoli and the mushrooms and toss together, warming for about 2 more minutes. Pour the egg mixture evenly over the veggies, lifting the veggies gently to allow the egg to run underneath. Place the skillet into the 400 degree oven and cook for about 12 minutes, until the top is just barely set in the middle and firm on the edges. Remove from the heat and allow to sit for about 4 minutes. Cut into six wedges and serve.

Refrigeration Inspiration and a Little Surprise!

It’s that night time shot time of the year again!

A few weeks ago I heard a segment on public radio that I found jarring even though it wasn’t really news to me. It spoke about how much food is wasted or thrown away in the United States. Tons and tons.

No matter how conscientious well all try to be, I think at one time or another, many of us have found ourselves purchasing or even growing more food that we can use or give away. Sometimes it goes to waste because we’re too busy to use it for it’s original intended purpose or recipe. Sometimes it’s because we’re so busy we forgot about the food entirely. While I always try to keep in mind what I have in my fridge and use it up, occasionally it goes to my compost to recycle back into the garden. Better than a total waste, but still not ideal.

However, other times those forgotten contents in my refrigerator become the sole inspiration for what I cook.

I recently opened my fridge to find I had a plethora of arugula, two sad zucchini, some wilting shallots, a large carton of grape tomatoes going south, some rapidly aging brussels sprouts and a couple of portobello mushroom caps mushing it up in my fridge. “So,” I said to myself, “what can I make to use up all of these ingredients fast this week before they become an, er…experiment?”

Following in the answer in the form of my resulting recipes. They start with a wonderfully bright arugula pesto and build on that with 3 easy and delicious meals that provide a little something for everyone. In fact, many of these dishes would make great additions to a holiday table. I hope these recipes will inspire you to dive into the depths of your fridge, think creatively and come up with some tasty saves for those forgotten ingredients and leftover food items that lurk there!

*****

And here’s my little surprise:
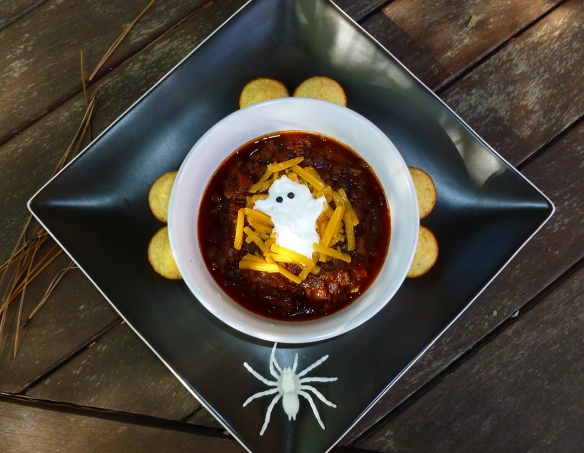
Early this summer I was hired to write my first 450 word food article for a magazine! I’m pleased to share this link to my article on chili beers for use in cooking as well as for pairing with food, featured in the Fall issue of The Beer Connoisseur, a premium web magazine on the BeerConnoisseur.com site. You can read the article and see one of the my recipes at this link, then see the rest for a $2 subscription to the issue or a full subscription to the magazine. It’s an informative and website, chocked full of tasty craft beer, food and travel. I hope you’ll enjoy this little taste for free. Cheers!

*****

This slideshow requires JavaScript.

Even though I know better I tend to limit my thinking to “Basil = Pesto.” Not true, and this time of year that’s especially not true when greens like arugula and kale are in season. The peppery arugula makes a delicious and very versatile pesto as you will see. And unlike basil pesto, arugula pesto keeps retains its bright green color. This is now my “cold weather” pesto of choice.

Arugula Walnut Pesto
Makes about 1 1/4 cup

4 cups baby arugula packed, coarsely chopped
1/2 cup extra virgin olive oil
1/3 cup coarsely chopped walnuts
2 cloves of garlic, chopped
1/2 cup finely grated parmigiano reggiano cheese
1 teaspoon kosher salt

In a food processor or blender, combine the first 4 ingredients and puree until smooth. Transfer the sauce to a medium-sized bowl and stir in the cheese and salt by hand. Any pesto not used immediately can be covered with plastic wrap touching the top of the sauce and another piece of plastic wrap covering the bowl, then refrigerated for several days. You can also make pesto with another green or herb of your choice and nut of your choice, but this combo is dynamite.

*****

pastafinished1B
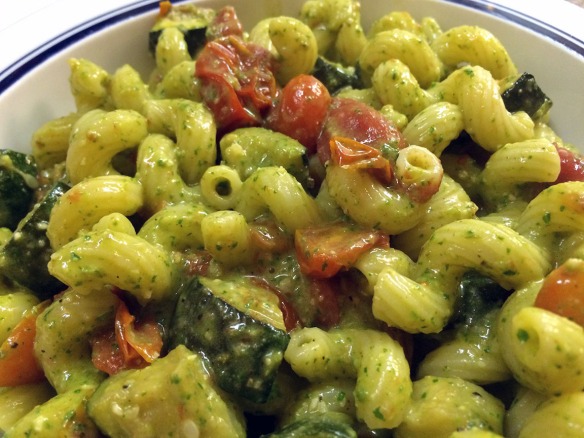
The ridged cavatappi pasta makes a perfect foil for this pesto-based dish. Best of all, it comes together quickly! Pass some extra cheese if you must…I understand.

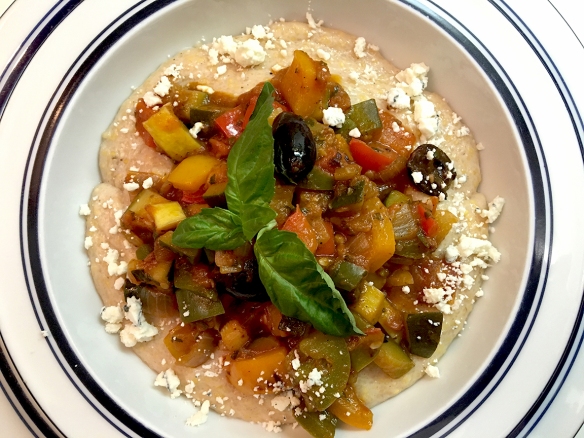
Cavatappi with Arugula Pesto, Roasted Tomatoes and Zucchini
Makes 4-6 servings

16 oz. grape tomatoes, split in half lengthwise
2 medium zucchini squash diced to 1/2″
2 tablespoons extra virgin olive oil
12 oz. dry cavatappi pasta, penne or other hollow pasta with ridges
1/2 to 3/4 cup arugula pesto, or more to taste
Kosher Salt and freshly ground pepper to taste
1/3 cup reserved pasta cooking water

Preheat oven to 375 degrees F. Line a baking sheet with foil, then make a foil tray with the sides folded up that is 1/2 the length of the baking sheet. Place the tomatoes into the tray and the zucchini into the flat space on the sheet beside the tray. Divide the olive oil evenly between the tomatoes and the zucchini and toss to coat. Sprinkle the tomatoes and the zucchini with a pinch of salt and freshly ground pepper. Place the sheet into the oven and roast the vegetables until just beginning to brown and soften, about 20 minutes, stirring halfway through the roasting time.

While the veggies roast, bring a pot of water to a boil and cook the pasta according to the package directions for al dente. When the veggies are done and the pasta is al dente, drain the pasta reserving 1/3 cup of the cooking liquid and return it to the pot. Add the roasted vegetables and any collected juices to the pasta, then gently stir in the pesto. If the sauce and the pasta need to be more moist, add some of the cooking water a little at a time and stir, just until you have the sauce the way you like it. Season to taste with more salt and pepper if needed and serve.

*****

pork chop 2

Really easy to prepare chops. Keep an eye on them and use the cooking time as a guide and you’ll have nice, flavorful and juicy chops. The Brussels sprouts below can roast alongside in the same oven if desired, just check them separately.

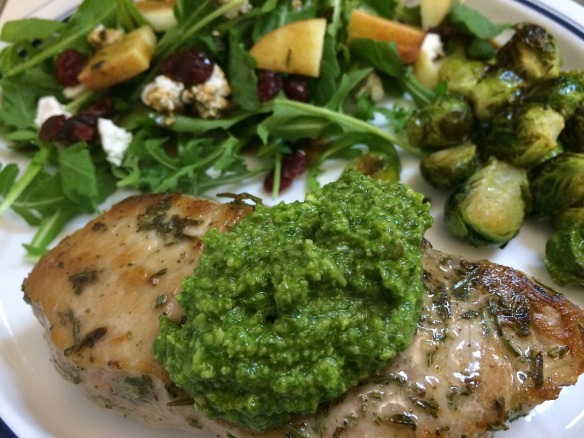
Simple Herbed and Baked Pork Loin Chops with Arugula Pesto
Makes 2 servings

2 – 6 or 8 ounce thick cut (about 1 inch) boneless pork loin chops
1 small clove of garlic, mashed with the flat side of a knife
1/4 teaspoon kosher salt
2 teaspoons of olive oil
1 teaspoon each of finely chopped fresh sage, rosemary and thyme
1/4 teaspoon freshly ground black pepper
2 tablespoons arugula pesto to serve

Preheat oven to 350 degrees F. In a small bowl, combine all ingredients except the pork to form a paste. Evenly divide the paste between the two pork chops and rub them all over to evenly distribute the seasonings. Heat a cast iron skillet over medium high heat. Place the pork chops in the skillet and sear them on each side, turning once, until you have a nice golden crust, about 3-4 minutes per side. Remove from the heat and place into the oven. Bake for about 20 – 25 minutes until the chops are just done through or the thickest part registers 155 degrees, watch carefully and check so as not to overcook. Remove from the oven, cover lightly with aluminum foil and allow the chops to rest for 5-10 minutes. Serve each chop with 1 tablespoon of arugula pesto on top or alongside.

*****

brusselssprouts
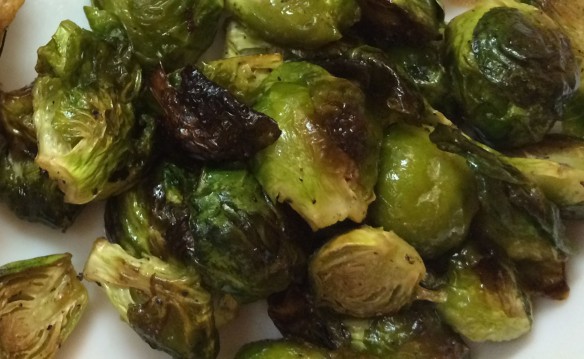
Even if you think you don’t like Brussels sprouts—and I can see why because I hated them for years until I tasted this cooking method—you should give these a try. The dark crispy edges and sweet caramelization that happens to these by simply roasting them, transforms them into…well, almost a snack!

Simple Roasted Brussels Sprouts
Makes 4 servings

1 lb. raw small fresh Brussels sprouts, trimmed of wilted leaves and stem, then cut in half
1 Tablespoon extra virgin olive oil
1/4-1/2 teaspoon kosher salt
1/4-1/2 teaspoon freshly ground black pepper

Preheat oven to 350 degrees F. Line a baking sheet with foil and lightly oil it. Place the cut Brussels sprouts onto the prepared sheet, drizzle evenly with the olive oil, then sprinkle salt and pepper to taste. Toss together with your hands to combine and spread the sprouts evenly in a single layer on the sheet. Place in the oven and roast for about 25 to 30 minutes total, stirring once, until the sprouts are tender and have dark brown caramelization spots as shown in the photos. Remove from the oven and serve.

*****

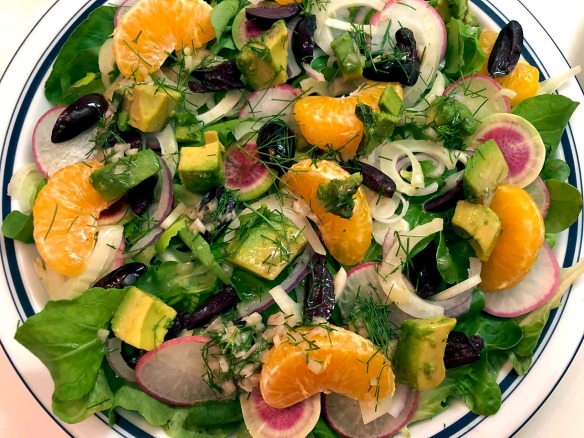
I forget how much I love a good stuffed portobello mushroom. In addition to making use of my forgotten fridge ingredients, these beauties gave me the opportunity to use up some “many days old” bread and the last of some mozzarella cheese that needed to go, too! When served alongside a green salad topped with some apples, dried cranberries, a sprinkle of goat cheese, nuts and a balsamic vinaigrette, you end up with quite an elegant vegetarian meal. Add some roasted Brussels sprouts and you may even have a vegetarian Thanksgiving meal for two!

Stuffed Portobello Mushrooms
Makes 2 servings

2 large portobello mushroom caps, cleaned with a wet paper towel, stems removed, chopped and set aside
2 large shallots, peeled and minced
1 tablespoon extra virgin olive oil
2 slices multigrain and seeded bread, cut into small (about 1/2 inch) cubes
1 teaspoon chopped fresh flat leaf parsley
1 teaspoon chopped fresh basil, any type
2 sun-dried tomatoes packed in oil, finely chopped
1 generous tablespoon arugula pesto
2 tablespoons dry white wine (dry rosé will work as well)
2 tablespoons finely grated parmigiano reggiano cheese
1/2 cup shredded mozzarella cheese, divided
Kosher salt and freshly ground black pepper to taste
Extra virgin olive oil for lightly coating the mushrooms and the stuffing

Preheat the oven to 375 degrees F. Grease a glass baking dish or line a baking sheet with aluminum foil and grease with a tiny bit of olive oil.

Add the olive oil to a medium sized non-stick skillet and heat over medium heat. Add the chopped mushroom stems and the shallots and cook until the shallots are tender and just beginning to turn golden. Remove from the heat. In a large bowl, combine the bread, parsley, basil and tomatoes. Stir in the shallot and mushroom mixture, pesto, wine, the parmesan cheese and 1/4 cup of the mozzarella. Season with some salt and freshly ground black pepper to taste. The stuffing should just barely hold together when pressed with your hands.

Place the two mushrooms on the prepared baking dish gill side up, drizzle about 1/2 teaspoon of olive oil onto each mushroom and coat the cap with your fingers. Very lightly season each mushroom cap with a tiny bit of salt and pepper. Place one half of the stuffing into the gill cavity of each mushroom, pressing and mounding the stuffing to fit into a dome shape. Drizzle the top of the stuffing with about 1/2 teaspoon of olive oil. Sprinkle the top of each mushroom with the remaining mozzarella, dividing evenly. Sprinkle the mozzarella with another grind of black pepper. Place the mushrooms into the oven and bake for about 30-35 minutes. Check to see if the mushrooms are done and bake for up to 5 to 10 more minutes if needed, or until the cheese is golden brown and the mushrooms are tender. Remove from the oven and serve immediately with a green salad, some leftover Brussels sprouts if you got ’em and a knife and fork.

*****

Bon AppĂ©tit magazine used to close every issue by asking a celebrity: “What three items do you always have in your fridge?” The three things I know are in my fridge are good quality parmigiano reggiano cheese, sun-dried tomatoes and nuts of some sort. Without those items, I’m somewhat lost, because WITH those items I can make a world of difference in a lot of dishes. What are your three items?

Apple and Oat Cake with Vanilla Yogurt Cream

finishedcake1With October upon us tomorrow (my birthday!), I’m definitely in the mood for Fall ingredients like butternut squash, leafy kale and fresh apples. Lately I’m trying to cook healthier dishes for a number of reasons and that means lighter cooking without sacrificing flavor or texture. Thanks to the latest edition of Cooking Light magazine, I found some inspiration. Their Whole-Grain Apple Cake with Yogurt Cream sounded so delicious and very easy to make…I just had to give it a try.

As is often the case for me of late, once the time rolled around that I could make the cake—a rainy day last weekend—I started prepping in the kitchen and realized that I did not have what I needed. Time to improvise.

While I didn’t change the recipe a huge amount, what I did change resulted in a pretty magnificent, not-too-sweet and technically gluten-free cake. It was very dense, apple forward and delicious, but with fewer calories than most apple cakes. The vanilla yogurt cream adds just the right touch of creamy decadence that one wants in a topping.

My simple substitutions included making my own “buttermilk” from 1% milk and lemon juice and adding a little extra lemon for some kick, because apples love lemon. I also used oat flour instead of whole wheat, rolled oats instead of quick, candied ginger instead of powdered and a little more cinnamon, please. I loved the resulting texture, which was less airy than the original appeared to be since I didn’t change the leavening to compensate for the denser oat flour. Additionally I made my yogurt cream the way I always do…with 2% Greek Fage yogurt, a little brown sugar and some Madagascar Bourbon Vanilla, and left out the whipping cream called for in the recipe. Very, very yummy and a great sub for whipped cream on most sweets that aren’t opposed to some tang.

slice

It’s that night time shot time of year again.

One of the things I’ve learned on my own about substitutions in baked goods is that one must be extremely careful to not upset the balance of leavening or the liquid to dry ratio in a recipe. If you respect that, you can learn a lot about baking by experimenting…which is basically what I do in my kitchen.

Having said that, the idea of this cake and the method that Cooking Light used to reduce the fat and calorie content in a favorite recipe was very enlightening. One of the most brilliant ideas was that of freezing your butter so that you can then grate a small amount of it into the topping. This allows for excellent distribution of a very small amount of fat, while providing great flavor and crispness in the streusel topping. That’s a trick I’ll keep handy for the future…and my stick of butter is now residing in the freezer just waiting to go.

My only wish for this cake would be to find a good substitution for canola oil. I did use it in the recipe below, but may try a different type of oil next time, even olive oil. I am becoming less and less of a fan of canola oil because it isn’t very pure and doesn’t seem to be as healthy as some other oils on the market. If you have other ideas for substitutions that are healthy and work well in baking, please let me know!

Apple and Oat Cake with Vanilla Yogurt Cream
(Slightly adapted from Cooking Light)
Serves 10

Note: Oat flour is more caloric and has slightly more fat content than whole wheat flour, but is a healthy flour. Technically this recipe is now gluten-free, but if you’re sensitive to gluten you should review the ingredients carefully. Hopefully by not using whipping cream in the yogurt cream, some of the low caloric balance is restored.

Cake:
2/3 cup packed brown sugar
3 Tablespoons fresh lemon juice added to 1% milk in order to make 2/3 cup total of lemon juice and milk “buttermilk” (let mixture to sit for 10 minutes and thicken before using)
1/3 cup canola oil
1 teaspoon Madagascar Bourbon vanilla extract
2 large eggs
1 2/3 cup oat flour
1 teaspoon baking powder
1/2 teaspoon baking soda
3/4 teaspoon ground cinnamon
1/2 teaspoon kosher salt
1/2 teaspoon finely chopped candied ginger
2 cups grated apple such as Honeycrisp or Gala (if not using organic apples, peel the apples before grating)
Baking spray for the pan

Streusel:
3 tablespoons rolled oats
2 tablespoons chopped walnuts
1 tablespoon brown sugar packed
1 1/2 tablespoons frozen unsalted butter, grated
dash of kosher salt

Vanilla Yogurt Cream:
3/4 cup plain 2% Greek yogurt
1 1/2 tablespoons packed brown sugar
1/4 teaspoon Madagascar Bourbon Vanilla

Preheat your oven to 350 degrees F. For the cake, place the first 5 ingredients (thorough eggs) in a large mixing bowl and beat together with a hand mixer on medium speed for 30 seconds until well combined. In a medium bowl combine the flour and the next 5 ingredients (through the ginger) and stir well with a whisk. Add the flour mixture to the sugar mixture and beat at low speed until just combined. Stir in the apple by hand. Pour the batter evenly into a 9-inch non-stick cake pan that has been coated with baking spray.

To prepare the streusel topping, combine the rolled oats and the next 4 ingredients (through kosher salt) in a small bowl and toss to combine. Sprinkle the topping evenly over the batter. Bake at 350 degrees F for 40-45 minutes until a wooden pick inserted in the center comes out with moist crumbs clinging. Cool in the pan on a wire rack for 15 minutes. Run a knife gently around the edges of the cake pan, place a plate on top of the pan and invert the cake onto the plate, then place the rack onto the bottom of the cake and invert back onto the rack to finish cooling, streusel side up. Serve warm or at room temperature.

To prepare the vanilla yogurt cream, place all ingredients into a small bowl and whisk until combined. Slice the cake into 10 pieces and serve each piece with about 1 tablespoon of the cream.

*****

finished cake top view

Cooling Comforts: Roasted Mushroom and Tomato Farro Salad

finished 1“We’re havin’ a heat wave, a tropical heat wave….”

The rest of Irving Berlin’s song doesn’t apply, but the first line has been painfully true here these last few weeks. Close to 100 degrees F in June? Yeah, that’s pretty hot, even for the South. Now it’s July, and we can expect more of the same.

There are many ways to cool off in the heat of Summer. You can enjoy the air conditioning, mercifully. In your free time you can hike along cool streams and rivers and take a dip or jump into a pool…or even a run through a sprinkler will do if you don’t have a water ban. And you can enjoy sipping cooling beverages and eating foods that are appropriate to the season. I’ll take all of the above, but am here to talk about the latter.

Farro had become one of my new best friends. I love its look and really enjoy its chewy texture, especially in a salad. Last summer, I posted a Fruited Farro Salad that you can see by clicking on the name. It’s a savory sweet salad, wonderful as a side dish or a light lunch. This summer I’m into quick one dish meals, particularly if they involve heating anything up other than an outdoor grill. This Roasted Mushroom and Tomato Farro Salad really fits the bill and I never get tired of it.

First off, it features some of my favorite ingredients like meaty portobello mushrooms and fresh grape tomatoes, which are roasted in olive oil with a touch of salt and pepper to intensify and concentrate their flavors. Then I add lots of fresh herbs from my garden, the farro, some chopped Parmesan cheese and a lemon scented dressing. Served at room temperature or cold, this salad is very refreshing while still being hearty enough to eat on its own as a light meal. It also pairs well with grilled meats and other veggies. And best of all, it’s a deliciously cool way to enjoy the season.

Roasted Mushroom and Tomato Farro Salad
Serves 6-8

For the salad:
2 cups uncooked farro
Pinch of kosher salt
6 oz. Portobello mushroom caps, cut into 3/4 inch pieces
1 pint grape tomatoes
2 Tablespoons Olive oil
Kosher salt and freshly ground black pepper
1/4 cup fresh Italian parsley, chopped
1/4 cup thinly sliced fresh basil leaves
1 Tablespoon finely chopped fresh thyme leaves
1/3 cup of finely chopped Parmesan cheese

For the dressing:
3 tablespoons fresh lemon juice
6 tablespoons extra virgin olive oil
1/4 teaspoon kosher salt
1/4 teaspoon freshly ground black pepper

Directions:
Place the uncooked farro in a medium-sized saucepan and cover with water. Allow the farro to sit for 20 minutes, then drain off the water and add more water to cover it by an inch. Add a pinch of salt, bring the water and farro to a boil, then reduce the heat to a simmer and cover, allowing to cook until the farro is just done but still has some chew to it, about 20 minutes. Drain the farro really well and transfer to a large bowl to cool.

While the farro is cooking and cooling, preheat the oven to 350 degrees and line a baking sheet with aluminum foil. Make a second foil packet about half the length of the baking sheet and turn up the edges to make a square “tray” of foil. Toss the portobello mushrooms with a tablespoon of the olive oil and distribute them in one layer on one side of the baking sheet, then toss the grape tomatoes with the other tablespoon of olive oil and place them in the foil tray on the other side of the baking sheet. Season the mushrooms and the tomatoes with salt and pepper. Roast them in the oven for 20 minutes, stirring after 10 minutes, until the mushrooms are cooked through and crispy on the edges and the tomatoes have softened. Remove from the oven when fully roasted and set aside to cool for at least 5 minutes.

Add the cooled roasted mushrooms and tomatoes, parsley, basil and thyme to the cooked farro and toss gently to combine. In a separate small bowl, combine the lemon juice, salt and pepper, then whisk in the 6 tablespoons of olive oil to emulsify. Pour the dressing over the farro mixture and toss gently, then add the parmesan and stir again gently to combine. Taste and add more salt and pepper if necessary. Allow the flavors to blend for 30 minutes at room temperature and serve. Refrigerate any unused salad for up to 3 days.

steakandsalad

Mini, Customizable Quiches. Maximum Flavor!

finishedcloseup-2Whether you make them for a brunch buffet, as a cocktail nibble or to take to a pot luck party, these mini quiches are fun to make and even better to eat!

The best thing about them (in addition to their taste, of course) is that they are so very customizable. Leave out the meat for a tasty vegetarian option, or add a meat of your choice for the carnivores and omnivores in your crowd. You can mix and match your add-in’s for endless combinations, taking advantage of what’s in season as well as making multiple flavors in one batch. And you don’t have to feel guilty about these little pleasures because they are truly two-bite sized, even though they are powerfully large in flavor.

I made these above (click each photo for more detail) to take to a pot luck and they were gone within minutes. Then I started thinking about how great it would be to make them as part of a brunch buffet…my next endeavor, or possibly bake and freeze them…haven’t tried it, but I will.

This batch features caramelized onion on both versions, then broccoli and cheddar cheese in one half of the batch and sautĂ©ed mushrooms with gruyere cheese in the other. Future combos will be Italian sausage or finely chopped chorizo, red bell pepper, onion and a little grated Manchego or mozzarella cheese, and another version will feature ham and/or asparagus and parmesan cheese. What fun! It’s truly like playing with your food.

finished-1Below is the recipe for these, a variation on one of my larger quiche recipes utilizing the same custard base. Enjoy playing with these and making them your own!

***Note, I will continue to be a bit erratic with my posting as I spend time with family on and off for the next few weeks. Bear with me. One of these days I’ll get back on a more regular schedule, I promise!

Caramelized Onion, Brocoli and Cheddar Mini Quiches and Caramelized Onion, Mushroom and Gruyere Mini Quiches
Makes about 32

1 uncooked refrigerated 9-inch pie crust
1 medium sweet onion, quartered and thinly sliced
1 1/2 cups fresh broccoli crowns, blanched in boiling water for 3 minutes, drained and dried
4 ounces button mushrooms, sliced, then halved
2-3 teaspoons olive oil
Generous 1/2 cup of grated extra sharp cheddar cheese
Generous 1/2 cup of grated gruyere or swiss cheese
4 eggs, room temperature
1/2 cup 1% milk
3/4 cup heavy cream
1/8 teaspoon freshly ground nutmeg
kosher salt and freshly ground black pepper to taste

Preheat the oven to 375 degrees F. Place half of the olive oil into a large skillet heated to medium low heat, add the onions and sautĂ© until they are caramelized, about 10 – 15 minutes, stirring frequently. Season with a tiny pinch of salt and freshly ground black pepper. Remove the onions from the skillet when they a nice medium golden brown color and set aside. Add the remaining 1 1/2 teaspoons of olive oil to the skillet, then add the mushrooms, sprinkling with 1/8 teaspoon kosher salt and black pepper, and sautĂ© them over medium low heat until they are done and tender, about another 5-8 minutes. Remove the mushrooms from the skillet and set aside.

Roll your piecrust out on a floured surface as though you were planning to put it into a 9-inch pie plate, about a 14-inch round. Using a 1 1/2-inch biscuit cutter (or a water glass), cut out as many rounds as you can fit out of the rolled pie crust, saving the scraps. Roll each individual round a bit more to ensure that it will just fit into the muffin tin, then place into the tin, fully covering the bottom and sides of each depression. Gather the pie crust scraps and roll out the crust again, using the same cutting and rolling process to fill the remaining muffin tins until all of the crust is used. Layer the onions first into the bottom of each crust. Next add a tiny piece or two of broccoli floret on top of the onion to 1/2 of your total crusts. Add two to three pieces of mushroom on top of the onion to the remaining 1/2 of your total crusts. Sprinkle about a rounded teaspoon of grated cheddar cheese over each broccoli quiche and the same amount of gruyere over the mushroom quiches.

In a blender or food processor, combine the 4 eggs, the milk, the cream, the nutmeg and another small pinch of salt and freshly ground black pepper. Blend until well mixed. Pour the egg mixture over the top of the layered ingredients on all of the mini-quiches, filling to just slightly below the rim of the depression and not above the edge of the crust. (Any leftover add-ins, cheese and custard can be placed into well greased ramekins and cooked alongside the mini-quiches to make small crustless quiches. These may need a little longer to cook than the minis!) Place the filled mini quiches into the oven on a center rack and bake for approximately 20-25 minutes, until the custard is golden, puffed and just set. When the quiches are done, remove from the oven and allow them to cool in the pan on a wire rack for 10 minutes. Pop each one out carefully with a knife and serve warm or at room temperature.

*For other add-ins, just cook or prepare your ingredients prior to the layering stage, then layer them adding the cheese last, then pour the custard.

Easy Curried Butternut Squash Soup

soup5RSoup prepared any time of the year is a welcome repast in our house. One of the things I love about soup is the infinite variety of tastes and textures that it can provide. Whether hot or cold, savory or sweet, thick, chunky or thin…all soups say “comfort” to me.

Spring is here, the trees are blooming and my hellebores are having a banner year. The daffodils and tulips have been in full glory this week and even the azaleas are showing a little color in their buds. Our temps have ranged up to 80 degrees F on and off for the past few weeks and we’ve enjoyed spending a few nights grilling out on our deck…when it hasn’t been raining. Today is another beautiful day—but cold, and it’s due to go back down to freezing tonight. Seems like a perfect time to make a warming pot of soup! Continue reading

Enter…Fall. Roasted Vegetable and Kale Stew

finishedstew1

So here we are…Fall has fallen, so to speak, and October is upon us! (What happened to September??? I don’t have my Fall banner up yet!)

I love Fall, actually, and especially October. I was born in October (today is my birthday, as a matter of fact), and I love the crispness in the air, the changing colors of the leaves and the deep blue of the autumnal sky. And while I do miss all of the summer vegetables, there’s a lot to be said for this season’s variety of fruits and veggies, too.

Even though we still have 80 degree temps this week, here’s a very fall-ish dish for those cooler nights. This roasted vegetable and kale stew is filled to the brim with hearty veggies and earthy greens. Potatoes, carrots, green beans and squash are roasted first to concentrate and caramelize their flavors. Tender leeks are sautĂ©ed with a bit of fresh garlic, salt and pepper. Then a little chicken broth (or vegetable broth or all water) is added to the pot along with some tomatoes, herbs, the roasted veggies and fresh kale. Cook until the flavors blend and you have Fall in a bowl! And as with most soups and stews, it gets better each day after you make it, and freezes well. Continue reading