 Here’s a revamp of one of my favorite comfort foods to enjoy, particularly in cold weather: The Strata.
A Strata is much like a bread pudding…in fact the ingredients are almost the same. In my mind the main difference lies in layering versus mixing the whole together, along with the proportions of egg to milk or cream. The strata is “egg-y,” and the bread pudding has more of a “custard-y” quality. Because of these slight variations, the two are actually a bit different in both texture and taste.
The strata allows you to use thinner pieces of bread and fewer pieces as well, which are then layered with other ingredients. You add just enough moisture from the eggs and milk to hold it together, then top it with cheese. The result is sort of a baked sandwich with a fluffy texture. A bread pudding heavily relies on thick cut or torn chunks of bread soaked in a lot of custard to give the finished product a true pudding texture. Traditionally, bread puddings can be sweet or savory, but strata are most always savory.
And much like the frittata you saw in my last post, you can customize your strata to suit your taste or to accommodate what you have on hand by changing the type of bread, filling and cheese. In the end, the lines between strata and bread puddings can be blurry for sure, but the results are always delicious! And often quite caloric…which brings me back to the “revamp” part of this post.

Given that I am trying to continue the idea of “leaning up” some recipes without sacrificing flavor and texture, I came up with a modified strata, one that’s jam-packed with veggies. But it’s not just lots of veggies that provide the revamp. I’ve also used a flavorful multi-grain and seeded sliced prairie bread as the base, lower fat milk instead of cream, added some sweet spice, a hint of sherry and just a little bit of strongly flavored cheese to round out the taste and mouthfeel. I can tell you that the result is wonderful!
As I said, this leaner version is much more healthful than my usual savory bread puddings. With the adjustments I’ve made, I’d say this strata has 1/2 of the calories and fat, but all of the homey comfort food quality that I have always loved. It’s a meal unto itself and can be served for breakfast, lunch or dinner. You could also enjoy it with a fruit salad, if you like. This reheats well in the microwave, too, so even if there’s just one or two of you around to eat it, leftovers can be kept in the fridge and used as needed. I haven’t tried freezing it because we eat it up quickly, but I think it would freeze well.
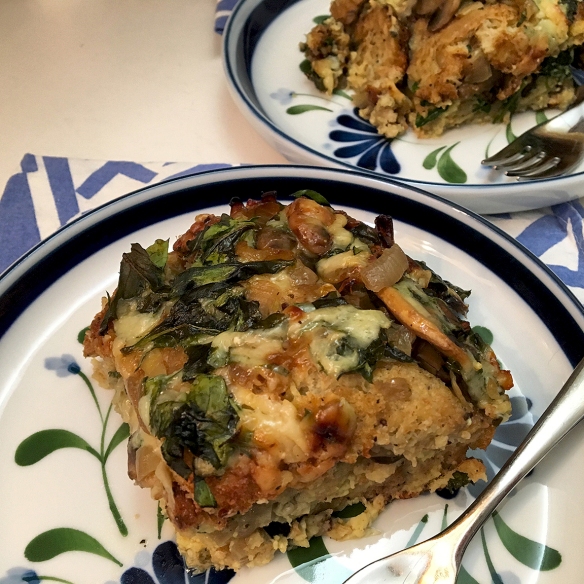
Spinach, Mushroom and Artichoke Strata
Serves 6
1 teaspoon olive oil
1 large onion, peeled and diced
8 oz. fresh mushrooms, cleaned and sliced
a pinch of salt and pepper
1 teaspoon of dry sherry
1 teaspoon of minced fresh thyme leaves
8 slices of prairie bread (I use Whole Foods, but a good quality multi-grain and seeded bread will do)
5 oz. of fresh baby spinach, cleaned and coarsely chopped
1 1/2 cups coarsely chopped frozen and thawed cooked artichoke hearts
4 large eggs
2 cups 1% milk
1/2 teaspoon freshly ground nutmeg
1 teaspoon kosher salt
1/2 teaspoon freshly ground black pepper
4 oz. of gruyere cheese, shredded
Olive oil cooking spray for the pan
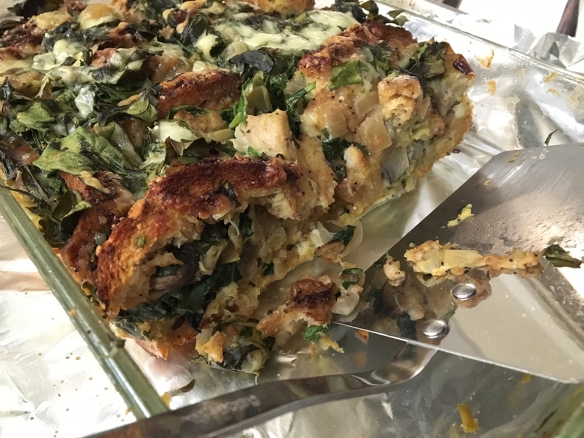
1. Spray a 7 inch by 11 inch glass pyrex casserole with olive oil and set aside.
2. In a non-stick skillet over medium heat, warm the 1 tsp olive oil and then add the chopped onion. Sauté until the onion is tender, translucent and just beginning to caramelize, then add in the mushrooms and cook until they are tender and most of their moisture has evaporated. Sprinkle the mixture with a tiny bit of kosher salt and freshly ground black pepper, the fresh thyme and the sherry. Stir to combine. Remove from the heat and set aside. Line a baking sheet with foil. Lay the slices of bread on the sheet and preheat your broiler. Lightly toast the bread on both sides, remove from the oven and set aside. Turn off the broiler and preheat the oven to 350 degrees F. In a large bowl, whisk together the eggs, milk, nutmeg, 1 teaspoon of salt and 1/2 teaspoon of pepper.
3. Assembly: Dip each piece of toasted bread into the custard mixture to fully coat it, then arrange each slice of the coated bread in the casserole slightly overlapping like a deck of cards. Pour the remaining custard mixture evenly over the bread. Tuck the cooked onion and mushroom mixture, chopped spinach and chopped artichoke hearts in evenly in between the slices. Sprinkle the gruyere cheese over the top and lift the slices with a spatula to allow some of the cheese to slip in between. Press down on the strata to even it out and to allow the bread to soak up the custard.
4. Place the dish with the strata onto a foil-lined cookie sheet to catch any drips. Put it into the oven and bake for about 45 minutes at 350 degrees F., or until golden brown and just set. After 45 minutes if it still need more time, cover lightly with aluminum foil to prevent over browning and continue to cook for 10 more minutes or until done. The strata is done when it is golden brown on top, slightly puffed and a knife inserted into the middle comes out clean, without egg. Remove from the oven. Cut into 6 pieces and serve. Leftovers will keep in the fridge for 3 days.
This can be made the night before, covered and placed into the fridge. Allow it to sit at room temperature for about 20 minutes before baking. Remove covering and proceed as above.