Mini, Customizable Quiches. Maximum Flavor!

finishedcloseup-2Whether you make them for a brunch buffet, as a cocktail nibble or to take to a pot luck party, these mini quiches are fun to make and even better to eat!

The best thing about them (in addition to their taste, of course) is that they are so very customizable. Leave out the meat for a tasty vegetarian option, or add a meat of your choice for the carnivores and omnivores in your crowd. You can mix and match your add-in’s for endless combinations, taking advantage of what’s in season as well as making multiple flavors in one batch. And you don’t have to feel guilty about these little pleasures because they are truly two-bite sized, even though they are powerfully large in flavor.

I made these above (click each photo for more detail) to take to a pot luck and they were gone within minutes. Then I started thinking about how great it would be to make them as part of a brunch buffet…my next endeavor, or possibly bake and freeze them…haven’t tried it, but I will.

This batch features caramelized onion on both versions, then broccoli and cheddar cheese in one half of the batch and sautéed mushrooms with gruyere cheese in the other. Future combos will be Italian sausage or finely chopped chorizo, red bell pepper, onion and a little grated Manchego or mozzarella cheese, and another version will feature ham and/or asparagus and parmesan cheese. What fun! It’s truly like playing with your food.

finished-1Below is the recipe for these, a variation on one of my larger quiche recipes utilizing the same custard base. Enjoy playing with these and making them your own!

***Note, I will continue to be a bit erratic with my posting as I spend time with family on and off for the next few weeks. Bear with me. One of these days I’ll get back on a more regular schedule, I promise!

Caramelized Onion, Brocoli and Cheddar Mini Quiches and Caramelized Onion, Mushroom and Gruyere Mini Quiches
Makes about 32

1 uncooked refrigerated 9-inch pie crust
1 medium sweet onion, quartered and thinly sliced
1 1/2 cups fresh broccoli crowns, blanched in boiling water for 3 minutes, drained and dried
4 ounces button mushrooms, sliced, then halved
2-3 teaspoons olive oil
Generous 1/2 cup of grated extra sharp cheddar cheese
Generous 1/2 cup of grated gruyere or swiss cheese
4 eggs, room temperature
1/2 cup 1% milk
3/4 cup heavy cream
1/8 teaspoon freshly ground nutmeg
kosher salt and freshly ground black pepper to taste

Preheat the oven to 375 degrees F. Place half of the olive oil into a large skillet heated to medium low heat, add the onions and sauté until they are caramelized, about 10 – 15 minutes, stirring frequently. Season with a tiny pinch of salt and freshly ground black pepper. Remove the onions from the skillet when they a nice medium golden brown color and set aside. Add the remaining 1 1/2 teaspoons of olive oil to the skillet, then add the mushrooms, sprinkling with 1/8 teaspoon kosher salt and black pepper, and sauté them over medium low heat until they are done and tender, about another 5-8 minutes. Remove the mushrooms from the skillet and set aside.

Roll your piecrust out on a floured surface as though you were planning to put it into a 9-inch pie plate, about a 14-inch round. Using a 1 1/2-inch biscuit cutter (or a water glass), cut out as many rounds as you can fit out of the rolled pie crust, saving the scraps. Roll each individual round a bit more to ensure that it will just fit into the muffin tin, then place into the tin, fully covering the bottom and sides of each depression. Gather the pie crust scraps and roll out the crust again, using the same cutting and rolling process to fill the remaining muffin tins until all of the crust is used. Layer the onions first into the bottom of each crust. Next add a tiny piece or two of broccoli floret on top of the onion to 1/2 of your total crusts. Add two to three pieces of mushroom on top of the onion to the remaining 1/2 of your total crusts. Sprinkle about a rounded teaspoon of grated cheddar cheese over each broccoli quiche and the same amount of gruyere over the mushroom quiches.

In a blender or food processor, combine the 4 eggs, the milk, the cream, the nutmeg and another small pinch of salt and freshly ground black pepper. Blend until well mixed. Pour the egg mixture over the top of the layered ingredients on all of the mini-quiches, filling to just slightly below the rim of the depression and not above the edge of the crust. (Any leftover add-ins, cheese and custard can be placed into well greased ramekins and cooked alongside the mini-quiches to make small crustless quiches. These may need a little longer to cook than the minis!) Place the filled mini quiches into the oven on a center rack and bake for approximately 20-25 minutes, until the custard is golden, puffed and just set. When the quiches are done, remove from the oven and allow them to cool in the pan on a wire rack for 10 minutes. Pop each one out carefully with a knife and serve warm or at room temperature.

*For other add-ins, just cook or prepare your ingredients prior to the layering stage, then layer them adding the cheese last, then pour the custard.

Advertisement

Happy 4th of July! Happy Weekend!

fireworksIt’s a great day to celebrate our country’s independence, and to celebrate independence in general. We take for granted the rights we have in this country to make our own choices, and to choose those who enact those choices for us. We have the freedom to live where we want, cross our state borders freely, speak our minds and interact with the rest of the world. We should never forget that we are fortunate to be citizens of, and to live in, this country, nor forget the price and the responsibility of protecting our freedom to do so.

Today in America is all about celebrating liberty and freedom. And celebrate we will!

Here are some great dishes to share that are worthy of a celebration…or worthy of a weekend shared with family and friends. Whether you need inspiration for an appetizer, a salad, side, main dish or dessert, you can find it below. Click on the name under each image to link to its recipe.

Cheers, everyone! May those of you in the United States of America have a wonderful and safe Independence Day, and may all of you out there have a fantastic weekend.

eggs1

Deep South Deviled Eggs

You know you want one of these!

You know you want one of these!

Italian Sliders

This is what the patties should look like once off the grill, and see? They are juicy!

Sundried Tomato and Basil Turkey Burgers

Alas, another night shot which really doesn't do these justice, a wrinkle in my cloth, and my little digital camera ran out of space in the middle of shooting...plus I was hungry!

Alas, another night shot which really doesn’t do these justice, a wrinkle in my cloth, and my little digital camera ran out of space in the middle of shooting…plus I was hungry!

Easy Chicken Enchiladas Verdes

Texas Sheet Cake....you know you want it, you know you're gonna make it!

Texas Sheet Cake….you know you want it, you know you’re gonna make it!

Texas Sheet Cake

Ready for the picnic, cookout or pot luck, this salad has outdoor fun written all over it!

Ready for the picnic, cookout or pot luck, this salad has outdoor fun written all over it!

Couscous Salad

Luscious homemade peach ice cream. I mean really, can there be anything better than this? (A daylight picture perhaps?)

Luscious homemade peach ice cream. I mean really, can there be anything better than this? (A daylight picture perhaps?)

The Best Peach Ice Cream

Now THIS is a southern plate of food that makes me grin like a Cheshire Cat!

Now THIS is a southern plate of food that makes me grin like a Cheshire Cat!

Firecracker Slaw and Corn with Chipotle Butter

With such a fiesta of color, this dish just has to be good!

With such a fiesta of color, this dish just has to be good!

Betsy’s Famous Black Bean and Mango Salad

wholeplate

Betsy’s Retro Cheese Olive Bites and Bacon Wrapped Dates with Apricot and Pistachio

chickensalad4

Curried Chicken Salad

Tarragon Pecan Chicken Salad on Brioche Crostini...need I say more? But I will!

Tarragon Pecan Chicken Salad on Brioche Crostini…need I say more? But I will!

Tarragon Pecan Chicken Salad on Brioche Crostini

cornbreadtartlets2

Cornbread Tartlets with BBQ Pork, Sauce and Wickle

tart1

Crustless Summer Squash, Zucchini and Tomato “Pie”

sticksadded

Peach Melba Pops

finished plate3Mock Maque Choux

The 4th of July all wrapped up in a dessert. Happy Independence Day!

The 4th of July all wrapped up in a dessert. Happy Independence Day!

Star Spangled Peach, Cherry and Blueberry Crumble


Try, Try Again-Revival of a Favorite: Artichoke Squares

That’s what they say, if at first you don’t succeed.

Sorry to post this again, but it seems just this one previous post from earlier today may have been corrupted so that you couldn’t comment on that version. Let’s see if you can comment now on this second posting. And if you can, I shall remove the original post from the record once it’s been diagnosed. For sure, I’d never close my comments to you…I do really love hearing from you, it’s part of what makes blogging so fun! Technology is great when it works correctly. Thanks for your patience.

Bathed in that late afternoon cocktail glow.

Bathed in that late afternoon cocktail glow.

The weekend is upon us, and it’s time for a savory little nibble to go with that happy hour cocktail. Enter these delectable Artichoke Squares.

You know you want one!

You know you want one!

This is one of those throwback recipes, circa 1960 or so. I’ve updated it with some fresh ingredients, really tasty extra sharp cheddar cheese, herbs, spices and plain panko breadcrumbs instead of the canned, seasoned, Italian type.

And because I always try to use as few, or as minimally, processed foods and ingredients as I possibly can in my cooking, I decided to make my own marinade for the artichoke hearts instead of using the jarred marinated version. The result was wonderful. Fresh and clean-tasting marinated artichoke, and a commitment to marinate my own from now on for every recipe that calls for them.

Come a little closer...

Come a little closer…

But I digress. These Mad Men-worthy bites of deliciousness are the perfect companion for most any cocktail—from martinis to sweeter concoctions, with a glass of wine or a beer…and they make for some darn good eating without an adult beverage, as well. They’re rich and have a marvelous texture, so I like to cut them into small squares where I can eat more than one…or two…or three.

Now reach in and grab one or three!

Now reach in and grab one or three!

Since these Artichoke Squares can be made ahead and they freeze perfectly, they’re just right for that busy day when you need an appetizer you can pull together quickly and have ready for guests—or for yourself—pronto. Just take out what you need from the freezer, warm them in the oven on a cookie sheet and they’re ready to plate and eat. And they look pretty, too.

Cheers to the weekend!

Artichoke Squares Redux
Makes 54, some to eat now and some to freeze for later!

For the marinade:
1 teaspoon fresh lemon juice
1/4 cup rice vinegar, unseasoned
1/4 cup good quality extra virgin olive oil
1/4 cup water
1/4 teaspoon dried and crushed red pepper flakes
1/4 teaspoon kosher salt

Remaining ingredients:
1-14 oz can of artichoke hearts packed in water, drained, rinsed in water, drained again
1 large sweet onion, peeled and finely chopped
2 large cloves of garlic, peeled and minced
2 Tablespoons fresh flat-leaf Italian parsley, finely chopped
2 cups extra sharp cheddar cheese, grated (I use Cabot)
1/3 cup plain panko (Japanese style) breadcrumbs
1/4 teaspoon dried basil
1/4 teaspoon dried oregano
1/4 teaspoon kosher salt
1/8 teaspoon freshly ground black pepper
1/8 teaspoon dried and crushed red pepper flakes
4 eggs, beaten

In a small bowl, whisk together all of the marinade ingredients. Finely chop the artichoke hearts and add them to the marinade, stirring to coat them well. Allow them to marinate while you prepare your other ingredients.

Preheat the oven to 325 degrees F and lightly grease a 7 inch by 11 inch glass baking dish with olive oil and set aside. Drain the chopped artichoke through a fine meshed sieve, pressing on the artichoke, and reserving the marinade by allowing it to drain directly into a large, non-stick skillet. Set aside the artichoke hearts. Heat the marinade over medium heat, then add the onion and garlic and sauté in the marinade for about 5 minutes, until the onion is softened. Remove from heat.

In a large bowl, combine the artichoke hearts, the sautéed onion and garlic mixture with the marinade, and all of the remaining ingredients. Stir to combine well. Transfer the mixture to the prepared baking dish and smooth the surface, spreading evenly. Bake the mixture at 325 degrees F for 35 minutes. Remove from the oven and cool in the pan. Cut into small squares with a very sharp knife. Serve at room temperature or freeze the squares on a cookie sheet, then transfer to a freezer bag. When ready to use, remove what you need, warm them on a cookie sheet in a 300 degree oven, and serve slightly warm or at room temperature. These should keep a couple of months in the freezer, if they aren’t eaten first.

Revival of a Favorite: Artichoke Squares

Bathed in that late afternoon cocktail glow.

Bathed in that late afternoon cocktail glow.

The weekend is upon us, and it’s time for a savory little nibble to go with that happy hour cocktail. Enter these delectable Artichoke Squares.

You know you want one!

You know you want one!

This is one of those throwback recipes, circa 1960 or so. I’ve updated it with some fresh ingredients, really tasty extra sharp cheddar cheese, herbs, spices and plain panko breadcrumbs instead of the canned, seasoned, Italian type.

And because I always try to use as few, or minimally, processed foods and ingredients as I possibly can in my cooking, I decided to make my own marinade for the artichoke hearts instead of using the jarred marinated version. The result was wonderful. Fresh and clean-tasting marinated artichoke, and a commitment to marinate my own from now on for every recipe that calls for them.

Come a little closer...

Come a little closer…

But I digress. These Mad Men-worthy bites of deliciousness are the perfect companion for most any cocktail—from martinis to sweeter concoctions, with a glass of wine or a beer…and they make for some darn good eating without an adult beverage, as well. They’re rich and have a marvelous texture, so I like to cut them into small squares where I can eat more than one…or two…or three.

Now reach in and grab one or three!

Now reach in and take a bite!

Since these Artichoke Squares can be made ahead and they freeze perfectly, they’re just right for that busy day when you need an appetizer you can pull together quickly and have ready for guests—or for yourself—pronto. Just take out what you need from the freezer, warm them in the oven on a cookie sheet and they’re ready to plate and eat. And they look pretty, too.

Cheers to the weekend!

Artichoke Squares Redux
Makes 54, some to eat now and some to freeze for later!

For the marinade:
1 teaspoon fresh lemon juice
1/4 cup rice vinegar, unseasoned
1/4 cup good quality extra virgin olive oil
1/4 cup water
1/4 teaspoon dried and crushed red pepper flakes
1/4 teaspoon kosher salt

Remaining ingredients:
1-14 oz can of artichoke hearts packed in water, drained, rinsed in water, drained again
1 large sweet onion, peeled and finely chopped
2 large cloves of garlic, peeled and minced
2 Tablespoons fresh flat-leaf Italian parsley, finely chopped
2 cups extra sharp cheddar cheese, grated (I use Cabot)
1/3 cup plain panko (Japanese style) breadcrumbs
1/4 teaspoon dried basil
1/4 teaspoon dried oregano
1/4 teaspoon kosher salt
1/8 teaspoon freshly ground black pepper
1/8 teaspoon dried and crushed red pepper flakes
4 eggs, beaten

In a small bowl, whisk together all of the marinade ingredients. Finely chop the artichoke hearts and add them to the marinade, stirring to coat them well. Allow them to marinate while you prepare your other ingredients.

Preheat the oven to 325 degrees F and lightly grease a 7 inch by 11 inch glass baking dish with olive oil and set aside. Drain the chopped artichoke through a fine meshed sieve, pressing on the artichoke, and reserving the marinade by allowing it to drain directly into a large, non-stick skillet. Set aside the artichoke hearts. Heat the marinade over medium heat, then add the onion and garlic and sauté in the marinade for about 5 minutes, until the onion is softened. Remove from heat.

In a large bowl, combine the artichoke hearts, the sautéed onion and garlic mixture with the marinade, and all of the remaining ingredients. Stir to combine well. Transfer the mixture to the prepared baking dish and smooth the surface, spreading evenly. Bake the mixture at 325 degrees F for 35 minutes. Remove from the oven and cool in the pan. Cut into small squares with a very sharp knife. Serve at room temperature or freeze the squares on a cookie sheet, then transfer to a freezer bag. When ready to use, remove what you need, warm them on a cookie sheet in a 300 degree oven, and serve slightly warm or at room temperature. These should keep a couple of months in the freezer, if they aren’t eaten first.

A Retro Spinach Dip Redo and Some Falafel On the Side

This resulted in a "Thumbs Up" from my pottery peeps and was demolished in short order!

This Retro Spinach Dip Redo resulted in a “Thumbs Up” from my pottery peeps and was demolished in short order!

Note: These two don’t really have anything to do with each other, but are both some good eats to share.

I adore Mediterranean and Middle Eastern flavors, and this week I made a huge batch of baked falafel. I had never had falafel baked before, always fried, but these were terrific in a pita alongside a Greek salad (with feta of course) for dinner, and again topping a lunch salad with tahini dressing drizzled over it. This is another of Mark Bittman’s recipes, and you can find it here. I highly recommend this as well as another recipe he lists at this same link for his Spiked Guacamole, which I made last night but didn’t photograph…it’s awesome, too! I have to say that these falafel are as good baked as those I have had fried, with a nice, crispy texture, a great taste and they freeze beautifully, too!

Drizzled and ready to eat with the tahini dressing!

Drizzled and ready to eat with the tahini dressing!

It’s been feeling very summer-ish here during the past week, and the hot weather has made me crave some cool summer dips, just for fun.  What I particularly had in mind was creating something to take to my pottery class for us to nosh on, and I came up with this Retro Spinach Dip Redo. My inspiration was born of an amalgamation of several yogurt sauces I’ve had—basically a redo of the ancient spinach dip recipe that was so popular when I was growing up. Yes, you know the one I mean, made from the vegetable soup mix combined with mayo and sour cream, served in a bread bowl?

Cool, creamy green goodness.

The result is a lighter, healthier version, that doesn’t taste “healthy” at all. While it does remind you of the old school version, it is a bit different. This one has no water chestnuts, no mayo and no sour cream, but it does have a great mouth feel, and lots of texture and flavors that build as you eat it. Plus, it’s almost as easy to make as the soup mix version, but it’s much better for you! And here’s a little trick: Whenever you combine olive oil with plain yogurt, it emulsifies the yogurt, giving it more of a mayonnaise-like texture and making it less likely for the water to separate. This is a great tip for making tzatziki sauce, too.

The verdict from my pottery class (my test subjects) was that this is a winner, so I promised to share my Retro Spinach Dip Redo on the blog. Enjoy, and I hope that your week has started off swimmingly!

Retro Spinach Dip Redo
Makes about 2 1/2 cups

2 very large shallots finely chopped
1 large clove of garlic, grated
1 1/2 Tablespoons of Extra Virgin Olive Oil
1-10 oz. package of frozen, chopped spinach, preferably organic, cooked according to the package directions (I microwave mine), then drain it and press all the moisture out
1/2 teaspoon Kosher salt
Several grinds of fresh black pepper
1/2 teaspoon of ground coriander
1 3/4 cups of plain Greek yogurt, whole or 2% (I used 2% Fage yogurt)

Put all ingredients in a small bowl and combine until well mixed. Place the dip into the fridge and let the flavors blend for an hour or two. Transfer to a serving bowl and serve with pita or tortilla chips, or raw veggies if you like!

rose1On another note, this is a rose bush my husband gave me many years ago for Valentine’s Day. It has struggled in our front yard all these years, tolerating the drought and maybe giving me one beautiful rose each year…sometimes two when I’m lucky. This year, it has 7 blossoms on it! I think it likes all the rain.

Sadly, I can't remember the name of this rose, but I think it is a tea rose...sweet thing!

Sadly, I can’t remember the name of this rose, but I think it is a tea rose…sweet thing!

*****

Encore! (More party recipes!)

Tarragon Pecan Chicken Salad on Brioche Crostini…need I say more? But I will!

My last post Party On!, was all about tips for planning a party, and specifically a cocktail and heavy hors d’oeuvres party. Now comes the fun part…the food and drink! So this post will be short on chat and long on recipes.

If you missed the first two items on my party menu, the Retro Cheese Olive Bites and the Bacon Wrapped Dates with Apricot and Pistachio, click on the names to link to those recipes and the last post. Another great recipe from the party is this Caramelized Shallot and Blue Cheese Dip from Bon Appétit that’s a tried and true favorite I’ve used for years, and it’s great with crudités as well as potato chips.

Following are the rest of the party recipes, some or all of which I hope you’ll consider for your next entertaining event. And be sure not to miss the cocktails at the end of this post…got to have the festive drinks to go with the hors d’oeuvres, after all!

The flavor of the chicken salad is even better the day after it’s made and once the tarragon has had a chance to blend with the other flavors.

Tarragon Pecan Chicken Salad on Brioche Crostini
Makes about 3 1/2 to 4 dozen

2 large chicken breasts halves, with skin and bone
1 Tablespoon olive oil
Kosher salt and black pepper

1 cup quartered seedless red grapes
1/2 cup finely chopped celery
1/3 cup finely chopped shallot
1/3 cup chopped pecans, lightly toasted
2 Tablespoons finely chopped fresh tarragon leaves (or you can use dried tarragon to taste, start with 1 Tablespoon)
2/3 cup good quality mayonnaise
1/2 teaspoon kosher salt
1/2 teaspoon freshly ground black pepper

Two loaves sliced brioche
1 1/2 inch round biscuit cutter
A few extra tarragon leaves for garnish (optional)

Preheat the oven to 375 degrees F, place the chicken breasts in an ovenproof casserole that has been greased with olive oil, then drizzle 1 Tablespoon of olive oil over the chicken. Sprinkle with a pinch of kosher salt and freshly ground black pepper. Bake the chicken breasts in the oven until just done and the juices run clear when sliced, about 35 minutes. Remove from the oven, cover with foil and allow the chicken to rest for 10 minutes, uncover and cool. Remove the skin and discard, and remove the meat from the bones. Chop the meat into small pieces, about 1/2 inch, and place in a large bowl. Add the remaining ingredients to the chicken, then stir until everything is well mixed and the mayonnaise has coated all the ingredients. Cover and refrigerate the salad until ready to use. It will keep for up to two days in the fridge.

About an hour before you’re ready to compose your crostini, use the biscuit cutter to cut out rounds of brioche, avoiding the brown crusts. You’ll get 2 rounds, sometimes 3 out of each slice depending on how large your brioche loaf is. (I save the crusts and leftover bread, freeze it and make bread pudding, or breadcrumbs.) Spread the rounds on a cookie sheet and toast them under the broiler until lightly golden brown on both sides. Remove from the oven and allow to cool on wire racks. Mound about 1 heaping tablespoon of chicken salad on top of each crostini and garnish with a fresh tarragon leaf, if desired.

It’s hard to stop at three of these lovely little bites.

Goat Cheese and Fresh Basil Stuffed Cherry Tomatoes
(Makes about 4 dozen)

2 lbs. small cherry tomatoes, or about 48, washed and dried
4 oz. fresh soft goat cheese
1/4 cup minced fresh basil leaves

Using a sharp or serrated knife, slice off a tiny sliver on the bottom of each tomato so it will sit without rolling, then slice off the top of each tomato and gently scoop out the seeds and centers of each one. Turn them upside down on a paper towel as you go to drain. Refrigerate if not using immediately, for up to one day, sitting in a deep dish on paper towels and covered with plastic wrap. When ready to stuff, combine the goat cheese and basil in a small bowl, mixing well. Taste and add a tiny pinch of salt and pepper if desired, but I like mine plain. Stuff a small amount of the goat cheese mixture into each hollowed out tomato, mounding slightly on top. Keep cool until ready to serve.

Crab cakes ready for frying…

…and after frying, ready for aioli and eating…or freezing!

Mini Crab Cakes with Lemon Chive Aioli
Makes about 4 dozen
Adapted from Bon Appétit

2 scallions thinly sliced, then run your knife through them, white and light green parts only
1/2 jalapeño pepper, seeded and minced
1/4 cup mayonnaise
1 large egg
1 Tablespoon Dijon mustard
1 1/2 Tablespoons fresh lemon juice
1 1/2 teaspoons Old Bay Seasoning
1 lb. lump crabmeat, picked over very carefully
3/4 cup panko breadcrumbs, plus an additional 3/4 cup reserved for breading
1 1/2 Tablespoons thinly sliced chives
1/4 teaspoon kosher salt
1/8 teaspoon freshly ground black pepper
3-4 Tablespoons olive oil

Aioli:
1/3 cup mayonnaise
zest of 1/2 lemon
1 1/2 teaspoons fresh lemon juice
2 teaspoons thinly sliced chives

1 Tablespoon chives slices 1/8″ long for garnish (optional)

Whisk the first 7 ingredients together in a medium bowl. Gently fold in the crabmeat. Stir in 3/4 cup of panko, 1 1/2 Tablespoons of chives, salt and pepper. Form a scant tablespoon of the crabmeat mixture into a ball. Roll in the remaining 3/4 cup panko crumbs, set on a parchment lined cookie sheet, and very lightly pat the top to make it flat like a crab cake. Repeat with the remaining crab mixture and panko.

In a large non-stick skillet, heat 3 tablespoons of olive oil over medium heat. Add crab cakes in batches, do not crowd the pan. Fry until golden brown and crisp, about 3 minutes per side. Remove the finished crab cakes from heat and drain on paper towels. Repeat until all of the crab cakes are cooked.  If needed, add one more Tablespoon of oil during the frying process. If serving right away, proceed to instructions for the aioli. If freezing, place the crab cakes on a cookie sheet in the freezer uncovered until firm, then transfer to an airtight container and freeze until ready to use, up to 6 weeks.

To serve frozen crab cakes, preheat the oven to 425 degrees F. Place the crab cakes on an un-greased cookie sheet, and bake until heated through, about 10 to 14 minutes. While the cakes are warming, mix together all ingredients for the aioli in a small bowl. Place the cakes on your serving platter and top each one with a tiny dollop (about 1/4 teaspoon) of the aioli. Scatter chives across the platter for garnish.

Pulled pork, Wickle and cornbread…a classic southern combo.

Cornbread Tartlets with BBQ Pork, Sauce and Wickle
Makes about 4 dozen

1 cup yellow cornmeal
1 cup all purpose flour
2 Tablespoons sugar
2 teaspoons baking powder
1 teaspoon kosher salt
1 cup milk
2 large eggs
4 tablespoons (1/2 stick) melted unsalted butter

1 lb. of your favorite BBQ pulled pork
1/2 cup spicy North Carolina Vinegar based BBQ sauce
1/2 cup sweet, thick BBQ sauce
12 Wickle sweet pickles, quartered

For the tartlets, preheat the oven to 375 degrees F. Butter two 24-cup mini muffin pans, or you can use just one and bake in two batches. In a medium bowl, whisk the cornmeal with the flour, sugar baking powder and salt. In a separate small bowl, combine the eggs, milk and butter. Add the wet mixture to the dry mixture and stir just to combine, don’t overmix. Spoon the batter into the muffin cups, filling them halfway. Bake for 10 minutes or until golden. Cool in the pans for 10 minutes and then turn out to cool completely.

If you’re not using the tartlets immediately once they’ve cooled and plan to freeze them, freeze before slicing off the domes. Thaw and bring back to room temperature before using, then slice off the domed tops of the muffins to make a flat surface. Place the pork on a plate and douse the pork with the spicy North Carolina barbecue sauce, allowing it to absorb the sauce. Top each tartlet with some pork, then drizzle a few drops of the sweet sauce over the pork and top the tartlet with a Wickle. Serve at room temperature.

And the drinks! Each recipe makes one cocktail. Cheers!

The Classic Champagne Cocktail is my favorite of the three!

Classic Champagne Cocktail 
1 sugar cube
Angostura bitters
Champagne
Soak the sugar cube in Angostura bitters, drop it into a champagne flute and top with champagne. Serve.

The color change in the layers of the Kir Royale are so subtle, they are hard to photograph. But in this shot you can see that whatever this drink is, it’s a pretty color in candlelight!

Kir Royale
6 ounces champagne
1/2 ounce crème de cassis
Pour the champagne into a flute. Allow it to settle for a moment. Gently pour the cassis down the inside of the glass through the champagne. The Kir should have a layer of cassis at the bottom. Garnish with a lemon twist or with a blackberry if desired.

The Italian Spritzer is usually made with Prosecco, but we made ours with champagne…it’s great either way!

Italian Champagne Spritzer
1 ounce Aperol
4 ounces champagne
Splash of club soda
Pour the Aperol into a large wine glass with ice cubes (we use two large ice cubes), then add the champagne and splash of soda. Garnish with an orange slice or a cherry, or both.

Party On!

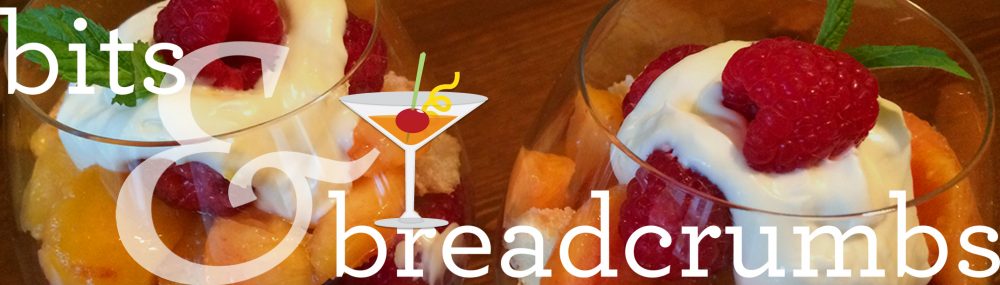
Seriously, I could eat this whole plate of goodies.

Warning, long post (article) ahead!

Parties. There are more kinds than you can “shake a stick at” from hoe-downs and backyard barbecues to formal weddings and balls. Most everyone loves to attend one, and not everyone loves to throw one. Understandably so, since throwing a large or complicated party can be intimidating to say the least, and there can be some expense involved as well. No matter what kind, there’s no such thing as a completely stress-free party…unless it’s someone else’s! But having said that, I love to throw parties. I’m not one to do it too often, but when I do, I want the food to be delicious and I want everyone to have a wonderful time. I’ve also learned the very important art of having a great time at my own parties. All it takes is a little, or a lot of—planning.

At the end of August, we threw a party while on vacation to visit my mom. The occasion was a significant birthday for her, and because we love her and wanted to do something special together, my husband and I decided to host a celebratory party in her honor and invited some of her close friends. Ours was to be a cocktail and hors d’oeuvres party at her home, with yours truly doing all of the food and hubby tending the bar.

I’ve made food for a lot of parties…parties that didn’t require more than a phone call invitation like dinner parties, deck parties, pot-luck parties and Sunday night suppers, and larger parties where I had some help, but never a cocktail party of this nature. I wanted this party to be reminiscent of cocktail parties from days gone by, with mailed paper invitations, lovely food, lively conversation and drink. In my mind’s eye this party would require delicious small bites of food that could be easily consumed with one hand, while holding a festive drink in the other. So in order for me to successfully play the caterer, I had to do some research, and in the process I learned a lot and had fun making everything, too. And the most gratifying part? It was a huge success! Everyone had a great time, hosts and honoree included, and the food and cocktails flowed freely and plentifully.

Now that I’ve returned home triumphant and patted myself on the back, I thought it might be fun to share with you a few of the tips and tricks that I learned while planning and executing this party, especially with the holiday party season rapidly approaching! Some of these tips may seem like common sense, and some of you out there may have far more experience with this type of party than I did, or do now. But I can tell you that no matter what kind of party you choose to have, a few things will sneak up on you, so here are some good basics things to keep in mind that may help you throw a fun and memorable party of this type, too. The single biggest thing I learned is that planning is really key. As my husband put it, my pre-planning rivaled Napoleon’s battle strategy.

3 weeks or more ahead of party time: Figure out the basic party theme, guest list and event details, pick out an appropriate invitation and make sure it gets to the invitees well in advance. 

Seems like a no brainer, eh? But keep in mind that the invitation itself will set the tone. From the invite to the food, to the last drop of drink poured, your party should have the same look and feel throughout. Even the formality of the wording as well as the design of the invitation will set the stage in the minds of your guests. There’s a lot of great info on the internet about themes, ideas and wording, as well as a range of invitation options from printed and pre-printed versions to electronic ones.

But for now, here are a few guidelines on wording that I found most useful. If your party is to be super casual, you can use all conversational and casual language. If you want your party to be a nicely dressed one, but not formal, keep the wording somewhat casual, but traditional. If you want the party to be formal, you need to use formal language (as for a wedding), and indicate dress requirements like black tie only or optional if that’s important, or cocktail attire if it’s a truly formal cocktail party. And if it’s a costume party…well, you’d better let folks know that up front, and whether or not a costume is mandatory.

As for other pertinent information, if you want a hard start and end time, you need to put a time range on the invite. If it’s a party that suggests gift-giving, but you don’t want guests to bring gifts, you need to add that wording in a pleasant, but concise way. And of course, make sure to include the theme of party, the honoree (if it’s that kind of party), date and time, name of the hosts, the address of the party and RSVP or Regrets information with a phone number and email address for less formal parties.

For our party, I decided to use some lovely pre-printed paper invites that I could print information on myself, and mailed them to the invitees 2 1/2 weeks prior to party time with regrets only. Our party was at 6 p.m. with no defined end time, so I planned to have enough food that folks could fill up on for a meal as well as have plentiful drinks. Which brings me to the next tip:

Choose your weapon…um, theme…for your cocktails.

If you have deep pockets or have more than 20 people coming for cocktails and food, you need to hire or engage help. It’s just too hard to keep more than 20 folks supplied with food and drink AND be hosts of the party, in my opinion. But for 16-20 total, it’s quite manageable if you streamline just a bit.

For instance, choose one or maybe two different cocktails to make, and then plan to have wine and/or beer. You can also have on hand some scotch, bourbon and gin with basic mixers, and do definitely have some non-alcoholic options for those not imbibing that evening. Rather than mixing, you can choose to make pre-mixed drinks in pitchers that you or your guests can pour such as Bloody Mary’s and Screwdrivers, which are both made with vodka. Bellini’s and Mimosas are other good options for which one can pour the base juice or mixture from a pitcher and then top with sparkling wine or champagne. Or you could do a punch instead…you get the idea. The main thing is to keep it manageable. What you don’t want to do is mix complicated cocktails for 16 people…unless you’re a professional bartender and a glutton for punishment.

Our featured cocktails were the classic original Champagne Cocktail, Kir Royale, and Italian Spritzer, all with just 2-3 ingredients and easy to prepare, and I’ll share those recipes with you at a later date. We found a very decently priced and mixable champagne to use and tested, tested, tested ahead of time. That testing is VERY important, don’t ya know? Plus we offered wine and the liquors with basic mixers that I mentioned above.

Plan the menu, how much food you’ll need per person and what can be made ahead…and do make some food ahead!

When you’re doing all the food yourself for a party it’s essential to plan some foods you can make in advance. I use this tip for ANY party, much less a cocktail party with fancy food. And particularly with small bites, you’ll save yourself some agony in the end. Just make sure that what you plan to freeze, freezes well and the flavors or textures are not destroyed by the process.

Also, it’s not a bad idea to test the food you plan to make in advance if you haven’t made it before, making sure of whether it needs to be served hot, room temp or cold. I tested everything…I mean, we HAD to have something to eat with all that cocktail testing, my goodness!

For hors d’oeuvres, plan for a range of goodies from meat to vegetarian options, which offers variety and consideration for food issues. I planned items featuring some of my mom’s favorite foods. I thought some “retro” foods might be fun for everyone invited, and being from the south, I wanted my food to have a bit of southern flair to it. I also wanted some items to be cold and some to be hot…or at least room temperature. And lastly, I wanted to have a birthday dessert that fit with the cocktail and small bites theme. Here’s what my final menu looked like:

Retro Cheese Olive Bites (Make ahead, freeze)
Bacon Wrapped Dates with Pistachio and Dried Apricot (Make ahead, freeze)
Maryland-styled Mini Crab Cakes with Lemon-Chive Aioli (Make ahead, freeze)
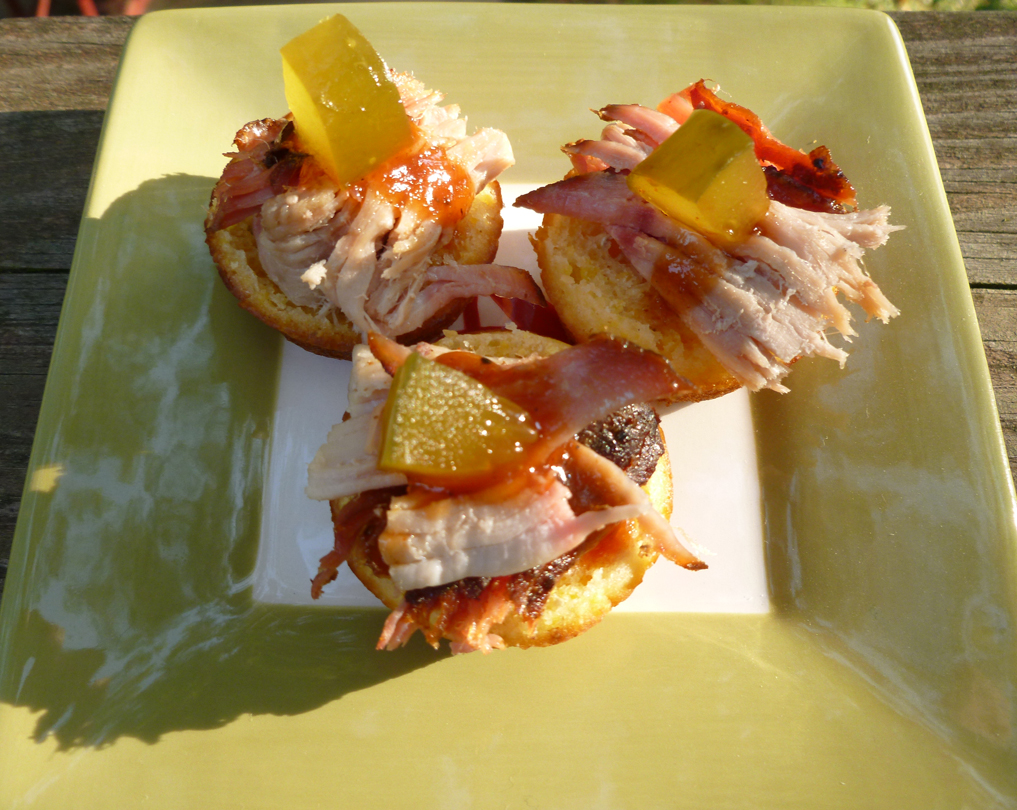
Cornbread Tartlets, BBQ Pulled Pork, Sauce and Wickle (Components made ahead, freeze)
Goat Cheese and Fresh Basil Stuffed Cherry Tomatoes (Components a day ahead)
Tarragon Chicken Salad on Brioche Crostini (Components a day ahead)
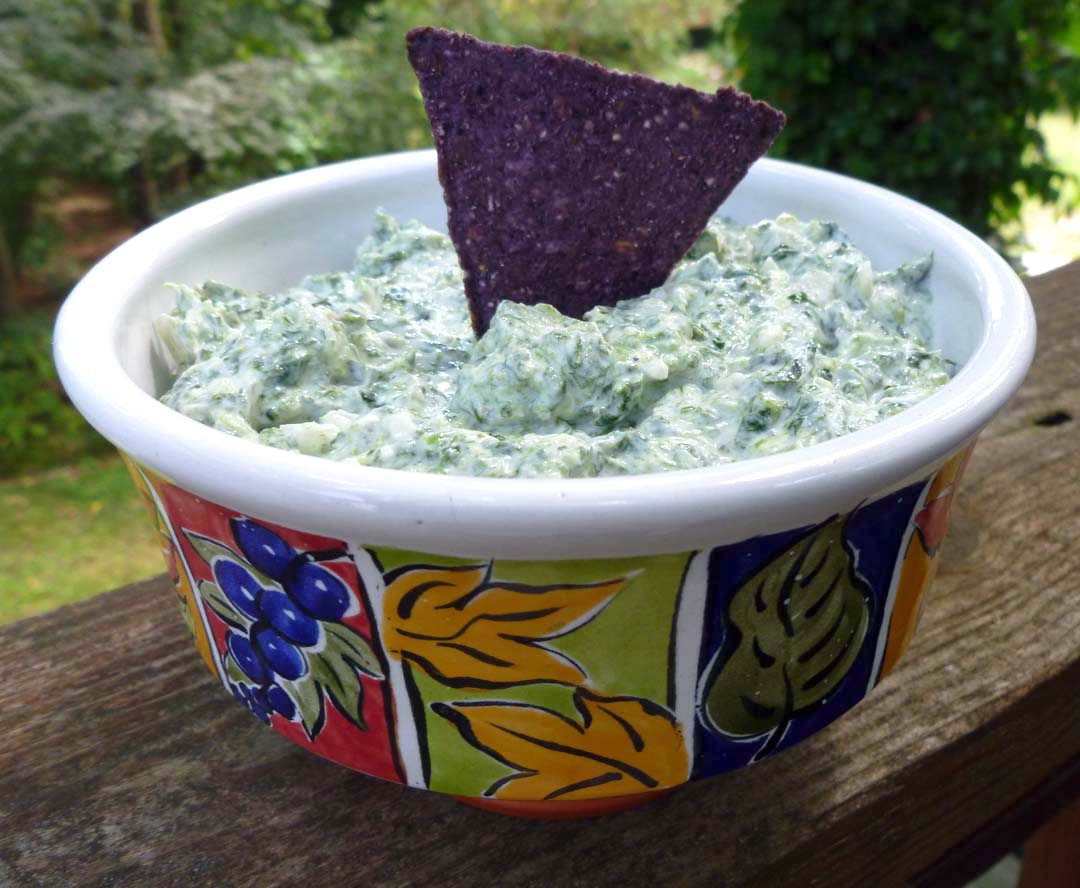
Caramelized Shallot and Blue Cheese Dip with Simple Crudités (Day ahead)
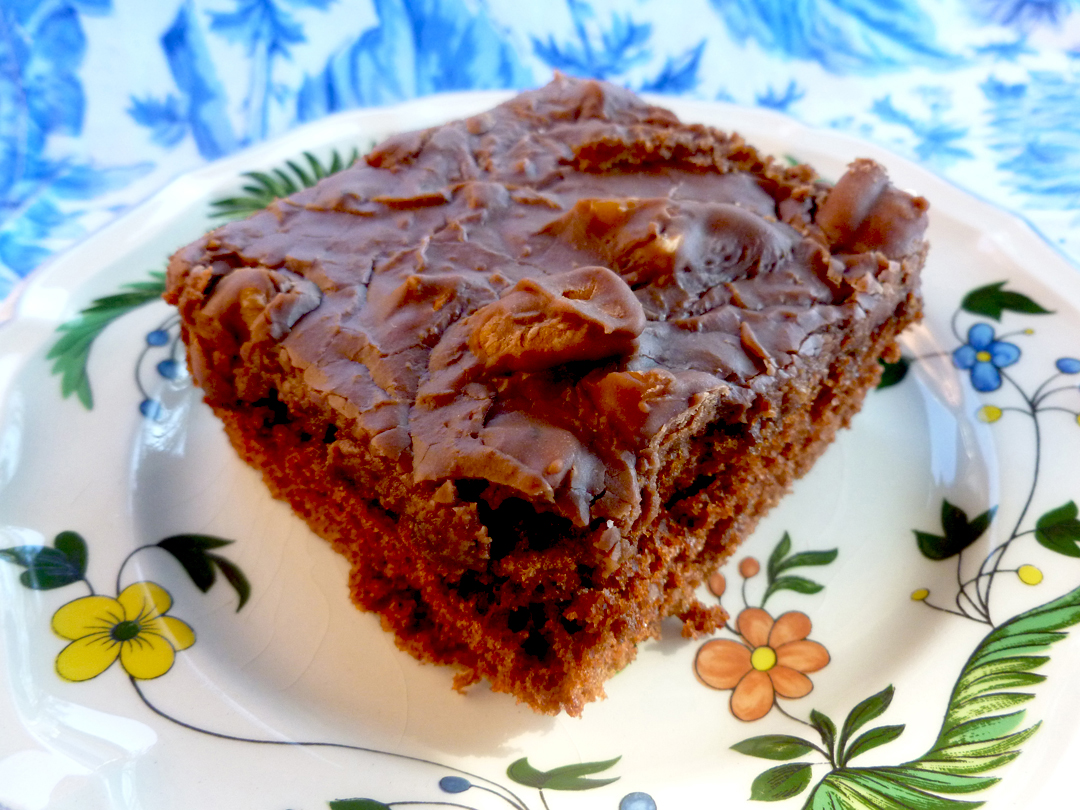
Mini Orange-Flavored Cupcakes with Chocolate Ganache (Day ahead)
Mixed Nuts (Purchased)

General guidelines for how much food you’ll need are as follows: For an early cocktail party before dinner, you should plan on 3-5 different items, 2-3 pieces of each item per person. When the cocktail party is in lieu of dinner, you’ll need to increase that amount to 8-10 different items, 4-6 pieces per person.

Though none of my pictures came out too well, this is my final table of food. Clockwise from the bottom front: Cornbread tartlets with BBQ Pork, goat cheese stuffed tomatoes, bacon wrapped dates, tarragon chicken salad on brioche crostini, caramelized shallot and blue cheese dip and veggies, crab cakes with lemon chive aioli, mini cupcakes and cheese olive bites. The dining room walls were painted by my mom when I was a child…aren’t they pretty?

Marching Orders: Make a cooking and plating schedule, and plan how you want to serve the food.

This is a big deal. Make notes, mark off what you’ve accomplished as you go. Then make notes again. On the day before and the day of the party, have a very detailed “to do” or “to cook” list and get it done.

Since several items on my menu were made ahead and brought with us, I planned when I needed to finish, thaw or heat them just before the guests arrived. The day before the party I planned to make the filling for the tomatoes and hollowed them out, make the dip and prep the crudités, make the chicken salad and the cupcakes. The morning of the party I’d cut out and toast the brioche, stuff the tomatoes and select all my serving dishes early in the day, then bake and finish items in the early afternoon, composing and plating everything just before our guests arrived.

I realized early on that trying to pass trays of hot hors d’oeuvres myself would make it impossible for me to interact with the guests as a hostess and facilitate getting drink orders, so I made it all buffet-style. When serving a buffet-style cocktail party where all the food is on a table, it’s nice to have items at different heights and on serving pieces that enhance the look of the food, if possible. Ours was fairly simple affair using pretty platters and some antique dishes we already had. And due to my lack of experience in plating small bites, I jettisoned the idea of highly decorated platters in favor of getting it all done and plated on time. It was a good move for me, and next time I’ll know how to time any additional plate decor, if necessary.

Just remember, the composing and plating takes the most planning, is the most last minute and time consuming, so keep it realistic for yourself. It’s good to have a helping hand if you can enlist someone close by (husband).

Last minute strategies: Table decoration, serving pieces, glassware, napkins, toothpicks, drink garnishes…and ice, oh my!

You’ve got it all planned and it’s the day of the party…did you forget anything?

Having enough serving pieces available for each of your food items, toothpicks to go into “picked” items, enough cocktail napkins for cocktails and food, enough plates for guests and plentiful and appropriate glassware, cocktail garnishes at the ready, some flowers for the table if desired, and ice, are important to think about ahead of time, too. Maybe your food is the only decoration you’ll need, or maybe you’ll decorate your spaces and table to the hilt. But if what you desire are some flowers for the table, it’s a good idea to use a tallish flower arrangement, or in our case it was a single beautiful orchid plant, which elevates the floral element away from the food, allowing the food to visually stand on its own, as well as keeping foliage out of the way. That’s a good rule of thumb, and something else I learned while researching.

View 2: The entrance to this room is upper right and the room is small, so placing the plates and napkins more towards the center helped keep guests flowing through the door and around the table. Alas, the autofocus on my camera wasn’t cooperating that night and I was in a hurry, but at least you can get an idea.

And that’s it, my friends. With lots of planning and great help from my husband, I was able greet our guests with a cocktail in my hand! I do hope you’ll find some of these tips useful in your party planning this holiday season. Oh, the recipes? Since my post is so long already, I’ll share the recipes for the first two menu items with you today, then share the rest plus our cocktails in a subsequent posting.

Cheers, live long and and may you happily party on!

Betsy’s Retro Cheese Olive Bites
(Makes about 4 dozen, can be halved)

There are so many variations on these 50’s styled bits of goodness, but I think a little spice is nice. The olives provide all the salt you’ll need in these super easy hors d’oeuvres, which surprise and delight guests when they bite into them. They can be served hot, warm or at room temp, and the unbaked dough freezes beautifully. Because of that, I like to keep some in the freezer to have when I need them!

2 cups grated extra sharp cheddar cheese (I use Cabot)
1 cup all purpose flour
1/4 teaspoon ground cumin
1/4 teaspoon ground cayenne pepper, you can add a teensy bit more if you like it
6 tablespoons softened unsalted butter
48 plus small manzanilla olives (pimento stuffed green olives), drained and patted with a paper towel.

Preheat your oven to 400 degrees F if you’re planning on baking these right away. Cover a cookie sheet with aluminum foil, or you can use a Silpat if you prefer. In a medium-sized bowl, combine the cheese, flour, cumin and cayenne until well-mixed. Add the softened butter and mix it into the dry mixture with your hands until a dough forms. Scoop teaspoon to marble-sized pieces of the dough and flatten them into the palm of your hand, making a small disk just large enough to encase an olive. Place an olive in the center of the dough, then wrap the dough around the olive until it’s sealed and ball-shaped. Place the ball on a cookie sheet. Repeat until all of the dough is used, spacing the balls about an inch apart. At this point you can bake them right away, refrigerate for a while and then bake, or freeze the dough on cookie sheets, and then store the frozen balls in a freezer bag for baking at a later date.

If you’re baking these immediately, place the cookie sheet with the dough into the 400 degree oven and bake for 15-20 minutes, watching carefully, or until the dough is lightly browned and firm to the touch. Transfer the bites to a wire rack to cool slightly. Serve warm or at room temperature.

If frozen, they’ll keep about 4-6 weeks in the freezer. When ready to bake, allow the dough to thaw a bit while the oven preheats. You may need to bake them about 5 minutes longer when they’ve been frozen, but it depends on how much they’ve thawed. Just watch them.

Bacon Wrapped Dates
This is a Martha Stewart recipe that is super simple and makes 32 pieces, but can be easily adjusted to make as many as you need. Click the live title link for the recipe. These can also be made ahead, frozen and then baked at the same temperature as the cheese olives, so they’re good companions for a party. I have some of them on hand in the freezer sitting next to the cheese olives!

One quick tip: mine did not take as much time to bake as Martha says, and you need to watch them carefully so the bacon cooks through, but doesn’t burn. Don’t use thick cut bacon because it won’t stay wrapped or cook through.
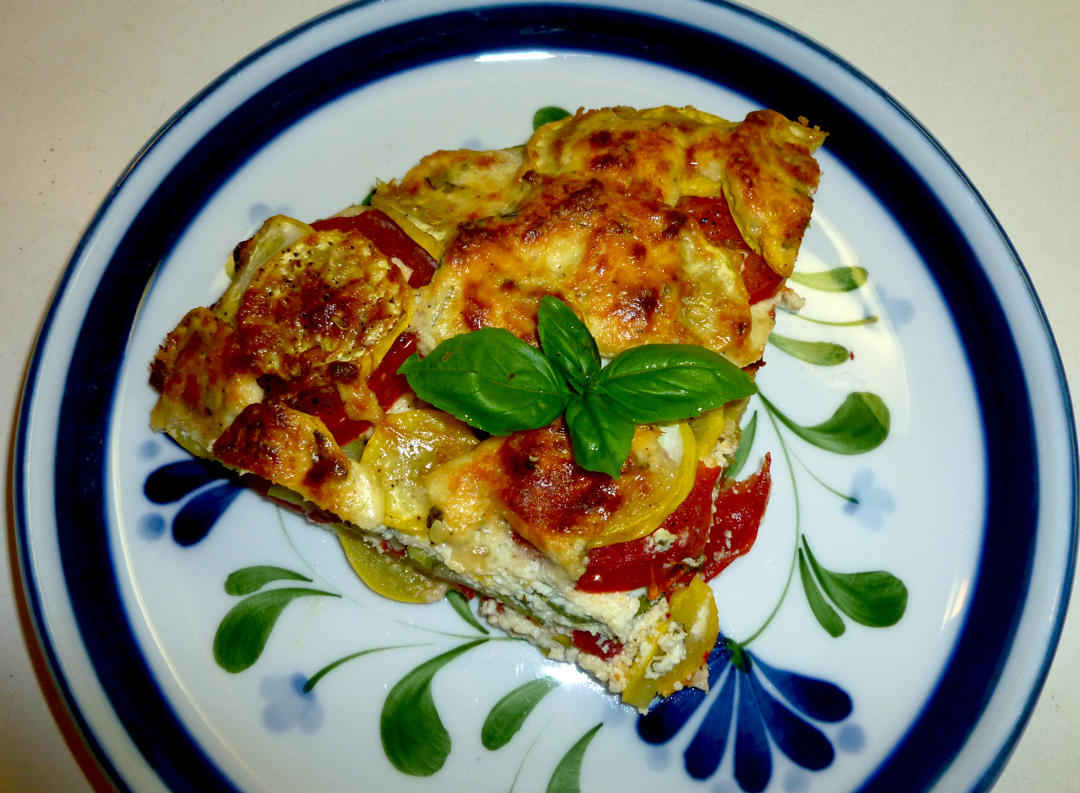