Hurray for Upside Down! Georgia Peach, Bourbon and Cherry-Studded Skillet Cake

cake6***Warning. A healthy, low calorie, vegan or gluten-free post is not ahead.*** 

Not that there’s anything wrong with any of those types of recipes, but this isn’t one. Nope, not even with the fruit. Still with me? Here’s a dessert that’s worth the calories.

Skillet cakes have been around for a long, long time, and inverting skillet cakes to show off a topping dates back as far as the middle ages. Maybe that’s why the mere mention of a pineapple upside down cake or a tarte tatin makes our mouths start to water and our eyes grow wider in anticipation of that very first bite.

The universal appeal of these cakes has been bred into us. This is particularly true in the Southern United States, where pineapple upside down cake has played an integral part in holidays and a served as a symbol of Southern hospitality since Jim Dole’s Hawaiian Pineapple Company ran a nationwide recipe contest in 1925 for utilizing canned pineapple. The response was overwhelming, receiving some 2,500 recipes for the festive cherry-studded pineapple wonder cake alone!

Of course most any fruit can serve as the “upside down” star of a skillet cake. And today it’s time to move over, pineapple, because there’s a new symbol of Southern hospitality in town. PEACHES ARE KING.

cake3

How could you possibly say no to a slice of this peachy keen cake?

Georgia is in the midst of a banner peach season which started in May, so it was only a matter of time before I used some fine local peaches to make a cake. I particularly enjoy fresh peaches with cherries. And when they’re combined with the customary brown sugar and butter topping of an upside down cake, these two fruits take on a lusciously glossy appearance with an absolutely divine light caramel taste. A good measure of cinnamon added to the batter brings warmth and extra flavor to the cake. Splash a little Kentucky bourbon into that batter and sprinkle a bit more over the top of this cake when it’s hot out of the oven, and you’ve got a real winner.

While the warning at the beginning of this post does apply, this cake is actually quite light to eat with an appealing, fluffy crumb. By scaling back on the butter and sugar found in a typical upside down cake recipe, the cake still retains just the right amount of caramelized goodness that one expects, but without the overpowering sweetness. It makes a beautiful and company-worthy cake that really stands alone, but you can guild the lily if you must by adding a dollop of whipped cream alongside—for nostalgic purposes, of course.

Just look at all of that cinnamon goodness and the crumb on this cake!

Just look at all of that cinnamon goodness and the crumb on this cake!

I foresee this basic cake recipe working well in the winter season, too, by using fresh apples and cinnamon scented with some orange zest or fresh pears with lemon, ginger and brandy. Really, the possibilities are endlessly delicious.

cake7Georgia Peach, Bourbon and Cherry-Studded Upside Down Skillet Cake
Makes 8 Generous Servings
Make this cake in a well-seasoned, 10-inch cast iron skillet. It will not be the same made in a cake pan and will be harder to release as well.

Ingredients for the Topping:
1/4 cup (4 Tablespoons) of unsalted butter
1/3 cup packed light brown sugar
2 cups of peeled and sliced fresh peaches, Georgia or other (about 4 medium peaches)
1/2 cup pitted fresh sweet cherries, cut into halves

Ingredients for the Cake Batter:
1 1/2 cups all purpose flour
1 teaspoon ground cinnamon
2 teaspoons baking powder
1/4 teaspoon table salt
6 tablespoons unsalted butter, softened (3/4 stick)
1 cup granulated sugar (I use cane sugar)
2 large eggs
1 teaspoon Madagascar Bourbon vanilla
1 tablespoon Kentucky bourbon, if you’ve got it, or other good quality bourbon
1/2 cup milk (2% is fine)

2 additional tablespoons of Kentucky bourbon to sprinkle over the finished cake

Directions:
Preheat the oven to 350 degrees F. Melt the 1/4 cup of butter in a well seasoned, 10-inch cast iron skillet over medium low heat, then add the brown sugar and stir while the mixture gently simmers for about 4 minutes. Remove the skillet from the heat and lay the peach slices facing in the same direction into the skillet on top of the sugar mixture, creating a circular fan design. Stud the peaches with the cherries, cut side down.

In a small bowl, sift together the first 4 ingredients for the cake batter. In a large mixing bowl, beat the softened 6 tablespoons of butter with a hand mixer until it’s light and fluffy on low, then add the granulated sugar in three additions. Add in the eggs, one at a time, beating after each addition. Add the vanilla and the bourbon and beat to combine, then add half of the flour mixture, beating until just blended. Beat in the milk, then add the remaining flour mixture, beating until just blended. Spoon the batter into the skillet on top of the fruit topping, smoothing until it is evenly spread.

Bake the cake in the middle of the oven for 35-40 minutes, or until the top is a golden brown and a toothpick inserted into the middle of the cake comes out clean. Remove the cake from the oven and allow the cake to stand in the skillet for 5 minutes, then carefully run a knife around the outer edge of the cake and invert the cake onto a large cake plate. Be sure to keep the cake plate and the skillet completely pressed together while inverting, then gently remove the skillet from the cake and replace any fruit that may stick to the bottom. (If your pan is well-seasoned, the fruit shouldn’t stick.) Sprinkle the top of the cake with the 2 tablespoons of bourbon and allow the cake to cool on the plate on a rack. Serve warm or at room temperature as is, or garnish with whipped cream or even vanilla ice cream, if you must…I understand.

*****

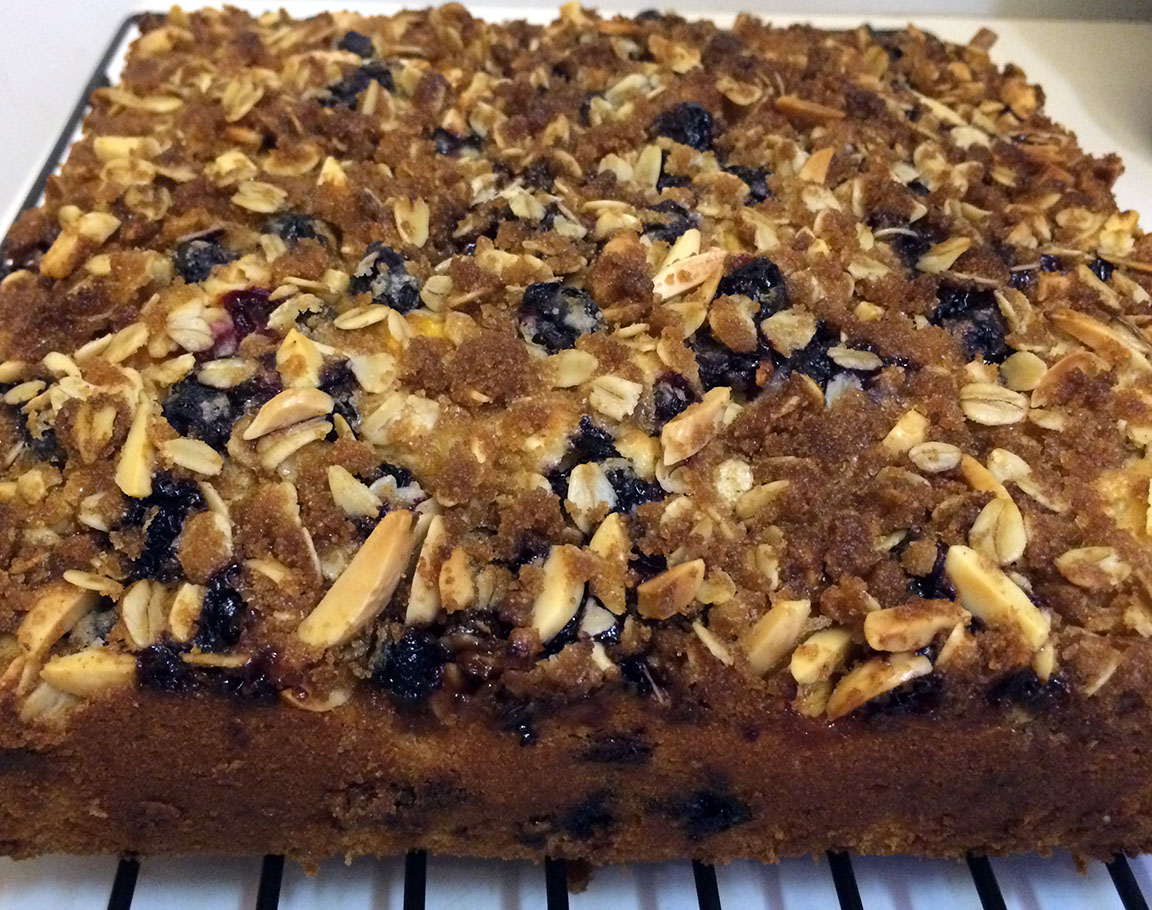
It’s hard to believe something that looks like this when it comes out of the oven can be turned upside down and become a show-stopper.

A Bodacious Birthday Cake!

Well, once again some time has passed since my last post, written on my birthday at the very beginning of this month. Thank you all for the wonderful birthday wishes…it was an awesome birthday! I feel like I’m still celebrating.

Upon request, my husband gave me a new pair of hiking boots and socks for my birthday, along with some other goodies. And additionally, keeping with the hiking theme, a friend gave me a really super day pack as a birthday present. In order to do justice to all of this new gear, we had to go someplace where the hiking was cranked “up a notch,” so to speak, and we spent a lovely weekend in Highlands and Cashiers, North Carolina. Continue reading

Peach and Blueberry Streusel Coffeecake

Ready to cut

Allow the cake to cool completely before you cut it…if you can wait that long!

Coffeecake. It’s not just for breakfast.

Sure, it’s a tasty way to start your work or school day, but this Peach and Blueberry Streusel Coffeecake is so much more a than breakfast food alone.

Peaches and blueberries were made for each other in my opinion, and this cake is chock-full of summer fruity goodness, without incurring too much damage to your waistline. The layered fruit within the cake and the oat, brown sugar and almond streusel topping combine to make this just sweet enough, with a crunchy and satisfying texture on top. It’s a perfect combo. Continue reading

Happy 4th of July! Happy Weekend!

fireworksIt’s a great day to celebrate our country’s independence, and to celebrate independence in general. We take for granted the rights we have in this country to make our own choices, and to choose those who enact those choices for us. We have the freedom to live where we want, cross our state borders freely, speak our minds and interact with the rest of the world. We should never forget that we are fortunate to be citizens of, and to live in, this country, nor forget the price and the responsibility of protecting our freedom to do so.

Today in America is all about celebrating liberty and freedom. And celebrate we will!

Here are some great dishes to share that are worthy of a celebration…or worthy of a weekend shared with family and friends. Whether you need inspiration for an appetizer, a salad, side, main dish or dessert, you can find it below. Click on the name under each image to link to its recipe.

Cheers, everyone! May those of you in the United States of America have a wonderful and safe Independence Day, and may all of you out there have a fantastic weekend.

eggs1

Deep South Deviled Eggs

You know you want one of these!

You know you want one of these!

Italian Sliders

This is what the patties should look like once off the grill, and see? They are juicy!

Sundried Tomato and Basil Turkey Burgers

Alas, another night shot which really doesn't do these justice, a wrinkle in my cloth, and my little digital camera ran out of space in the middle of shooting...plus I was hungry!

Alas, another night shot which really doesn’t do these justice, a wrinkle in my cloth, and my little digital camera ran out of space in the middle of shooting…plus I was hungry!

Easy Chicken Enchiladas Verdes

Texas Sheet Cake....you know you want it, you know you're gonna make it!

Texas Sheet Cake….you know you want it, you know you’re gonna make it!

Texas Sheet Cake

Ready for the picnic, cookout or pot luck, this salad has outdoor fun written all over it!

Ready for the picnic, cookout or pot luck, this salad has outdoor fun written all over it!

Couscous Salad

Luscious homemade peach ice cream. I mean really, can there be anything better than this? (A daylight picture perhaps?)

Luscious homemade peach ice cream. I mean really, can there be anything better than this? (A daylight picture perhaps?)

The Best Peach Ice Cream

Now THIS is a southern plate of food that makes me grin like a Cheshire Cat!

Now THIS is a southern plate of food that makes me grin like a Cheshire Cat!

Firecracker Slaw and Corn with Chipotle Butter

With such a fiesta of color, this dish just has to be good!

With such a fiesta of color, this dish just has to be good!

Betsy’s Famous Black Bean and Mango Salad

wholeplate

Betsy’s Retro Cheese Olive Bites and Bacon Wrapped Dates with Apricot and Pistachio

chickensalad4

Curried Chicken Salad

Tarragon Pecan Chicken Salad on Brioche Crostini...need I say more? But I will!

Tarragon Pecan Chicken Salad on Brioche Crostini…need I say more? But I will!

Tarragon Pecan Chicken Salad on Brioche Crostini

cornbreadtartlets2

Cornbread Tartlets with BBQ Pork, Sauce and Wickle

tart1

Crustless Summer Squash, Zucchini and Tomato “Pie”

sticksadded

Peach Melba Pops

finished plate3Mock Maque Choux

The 4th of July all wrapped up in a dessert. Happy Independence Day!

The 4th of July all wrapped up in a dessert. Happy Independence Day!

Star Spangled Peach, Cherry and Blueberry Crumble


A Camping Trip, A Birthday and A Blogging Anniversary!

Finished2 Happy Summer! 

These last few weeks have been filled with events—a lot of work, a little travel, a little cooking, a little hiking and some little cakes.

My posting has also been a little less frequent lately, so it’s time for a series of “catching up” posts on what’s been going on. Sit down with your favorite warm or cold beverage and come along with me as we explore some of the wonderfully wild and incredibly beautiful National Forests, Recreation Areas and State Parks of Northeast Georgia, United States.

My husband’s birthday was June 5th and he wanted to take a 3-4 day tent camping trip up to the mountains, which has become our ritual around his birthday. It’s a nice time to go because it’s just before the arrival of crowds, pesky insects and the super hot weather.

Full disclosure here: We have a very large tent that we jokingly to refer to as “the condo,” an inflatable queen-sized pillow-top air mattress, a clip on “ceiling fan” with a light, a two burner propane stove top, lanterns, chairs, a grill top for fire pits and an inflatable class IV rapid Sevylor two person travel kayak that we’ve taken out on lakes, rivers and the ocean. We only camp where we can car camp and there’s at least one “facility” close by. So before anyone says “I can’t believe you camp in a tent for fun and relaxation,” this is our version of “glamping!”

On this trip, we spent our time in and around Lake Rabun, camped in a National Forest Recreation Area close to the lake. Lake Rabun is the third of a series of six manmade lakes in North Georgia, owned and operated by Georgia Power who built damns in this area to create lakes that generate hydroelectric energy for Atlanta. Rabun is our favorite of these lakes and we always enjoy some of the small amenities in the area including a couple of restaurants and an inn or two, a grocery store, a marina and a local vineyard. It suits our glamping style quite well! On this trip in addition to swimming in the lake, we did something we don’t normally do up there while camping…trail hiking. As many times as I’ve been in that area, I had no idea there were so many beautiful trails so close by.

Of course the Appalachian Trail runs through Georgia and there are trailheads for it throughout our mountains, but in our case we were interested in smaller looped trails for short day trips. One we discovered that has now become a particular favorite of ours was Warwoman Dell. It’s a beautifully scenic recreation area along Warwoman Creek, featuring a small nature trail that leads to a waterfall surrounded by wildflowers and other fauna, and also access to the 37-mile long Bartram Trail, which runs through this area as well. We packed a picnic and hiked around through the dells along a small section of the Bartram Trail, then headed down the nature trail to the waterfall, snapping pictures as we went. It was so idyllic and peaceful…very “Middle Earth,” and I’d go back there in a heartbeat. Here’s a slideshow of our Warwoman Dell adventure.

This slideshow requires JavaScript.

I hope you’ll take a moment to follow the links associated with the name of each spot and find out more about these scenic areas…and maybe even check them out for yourself if you live in this area. I’ll be sharing the rest of our trip and some sights in the next post, so stay tuned.

We actually had so much fun hiking while on vacation, that we’ve now decided to take one hike a week, but not necessarily in the mountains. You see, we are blessed with such a diversity of ecosystems here in this state, as well as having a plenty of State Parks and National Forest areas. There are actually 60 hikes within 60 miles of Atlanta, and 30 of them are within 30 minutes of our house! We’ve been doing more hiking since we returned from this trip and I’ll share some of the best of those with you over time.

In addition to celebrating my husband’s birthday, last Sunday (the 15th of June) was my 3 year blogging anniversary! My goodness, what a full 3 years this has been. And while my posting has suffered a bit lately, let me assure you that I’m here to stay and I hope you’ll keep on reading and commenting with me for the next 3 years. Thank you for joining me on this wonderful blogging journey!

This post just wouldn’t be complete or true to the tagline of this blog: “Where all trails lead to good food,” if I didn’t share these deliciously quick and festive mini-cupcakes I made upon our return home to celebrate my husband’s birthday and my bloggiversary. This devil’s food is rich and dark, with the addition of coffee to really liven up and enhance the chocolatey flavor. And my easy Vanilla Buttercream frosting is a recipe I’ve made since I was a child. It’s a perfect foil for the devil’s food cake.

Cheers, happy eating and happy hiking!

Easy Devil’s Food Mini-Cupcakes with Easy Vanilla Buttercream Icing
Makes 32 mini-cupcakes or about 8 regular-sized cupcakes

For the cupcakes:
2 ounces of unsweetened baking chocolate
1 scant cup of granulated cane sugar
3/4 cup of all purpose flour
1/4 plus 1/8 teaspoon of baking soda
1/4 teaspoon sea salt
1/2 cup of hot brewed coffee
1/4 cup light sour cream
1/4 cup canola oil
1 egg, lightly beaten
1-24 cup mini muffin tin and 32 mini muffin paper cups

For the icing:
1 3/4 cup confectioner’s (powdered icing) sugar, plus a bit more if needed for consistency 2 Tablespoons unsalted butter, softened
2-3 Tablespoons of milk
1/4 teaspoon good quality vanilla extract, I use Madagascar Bourbon vanilla

Preheat the oven to 350 degrees F. Line your tin with 24 muffin cups, reserving the remaining 8 muffin cups for the second batch (I do this in two batches, but if you have two pans by all means do one batch.) Melt the chocolate over very low heat, stirring constantly, then remove it when it is smooth and set aside. Sift the sugar, flour, baking soda and salt together into a medium bowl. In a large bowl, whisk together the coffee, sour cream and canola oil. Gradually whisk in the egg, then stir in the chocolate. Add the dry ingredients to the wet ingredients, stirring until smoothly blended. Drop the batter by tablespoonfuls into the muffin cups, filling them 3/4 of the way full. Bake the cupcakes in the oven for 15 minutes, or until a toothpick inserted into the cake comes out clean. (Larger cupcakes will take 20-25 minutes.) Remove the cupcakes from the pan and allow them to cool upright on a wire rack, until they are completely cooled. If doing two batches, repeat the process with the remaining batter and cups.

When the cupcakes are completely cooled, make the frosting. Place the softened butter into a small bowl. Beat a small amount of the powdered sugar into the butter with a hand mixer fitted with beaters and on low speed, until well blended. Continue to add the sugar alternating with the milk until the icing is smooth but stiff enough to spread. Add the vanilla and mix well. Add more sugar if the mixture is too soft, or a tiny bit more milk if it’s too stiff. Use a small spatula to spread about a scant tablespoon of icing onto each cupcake. Serve with celebratory candles, sprinkles and ice cream! These will keep at room temperature well covered in plastic for a couple of days…if you have any left.

A Happy Halloween Treat!

spookycakes3BTomorrow marks the end of October, and at long last we have completed all of the work on the house—no trick! Yesterday, our heating and air systems were professionally cleaned, which resulted in two filters worth of soot and grime pulled from the systems by a huge and very loud industrial strength Hepa Filter machine. We are literally breathing easier around here now, and should have all put right and in its place soon…say, around Christmas!

But for now, it’s time to move on and enjoy one of my favorite holidays. You know it—it’s Halloween.

These hauntingly good little mini cupcakes have been my go-to standard for many a party and birthday event, and they seem very appropriate and timely as a Halloween treat to share with you. The cake itself is a light and moist pale yellow cake with pretty flecks of orange zest. And that hint of that orange flavor is a perfect foil for the deep, dark chocolate ganache frosting. Orange, black and white = Halloween…see? I made these last weekend to take to a “significant decade” birthday party for a friend, and I think they would be the hit of any Halloween party, too.

This slideshow requires JavaScript.

Did I hear you say that you need a little something to warm you up before trick or treating? Check out my Spooktacular Beef and Italian Sausage Chili recipe from last year. Make a pot of chili and these mini cupcakes, and let the party begin.

chili1

Have a safe and Happy Halloween!

Mini Orange Cupcakes with Chocolate Ganache Frosting
(Adapted from The Gourmet Cookbook)
Makes 4 dozen

2 cups flour (not self rising)
2 teaspoons baking powder
1/2 teaspoon table salt
8 Tablespoons unsalted butter (I stick) softened
1 cup granulated cane sugar or white sugar
1 generous tablespoon finely grated fresh orange zest
3 large eggs at room temp
1 teaspoon madagascar bourbon vanilla extract
3/4 cup whole milk

24 count mini muffin baking tin(s)
mini muffin paper baking cups (optional)

Preheat the oven to 350 degrees F. Lightly butter your muffin tin(s) and line with one mini muffin paper cup per slot, if using, or lightly flour the tins if not using paper baking cups, tapping out any excess flour.

Sift together the 2 cups of flour, baking powder and salt into a bowl. In a mixing bowl, beat the sugar, butter and orange zest together with an electric mixer (fitted with a whisk attachment if using a stand mixer) on medium high speed until the mixture is light and fluffy, about 3 minutes. Beat in the eggs, one at a time, then add the vanilla and continue to beat for another 3-5 minutes, until the mixture is thoroughly blended. Reduce the speed to low, and add the flour mixture and milk alternating in 3 batches, beginning and ending with the flour. Mix until the batter is just smooth, do not over mix.

Drop batter by teaspoonfuls into each of the 48 mini muffin tins lined with baking cups, filling each cup about 1/2- 3/4 full. Bake for 13-15 minutes until the cakes begin to pull away from the sides of the tin and a toothpick inserted into the middle of one comes out clean. The cakes should stay pale in color, not golden brown. Remove from the oven and allow the cakes to cool for 5 minutes in the tins and set on a wire rack. After 5 minutes, remove the cupcakes from the tin and allow them to finish cooling completely on the wire rack before frosting.

Chocolate Ganache Frosting
Makes about 2 cups

3/4 lb. good quality bittersweet or semi-sweet chocolate, finely chopped or in chip form
1 cup heavy whipping cream

Place the chocolate in a heat proof bowl. Heat the cream in a small saucepan over low heat, bringing it to a simmer. Remove the pan from the heat and pour the hot cream over the chocolate, whisking until smooth. Allow the ganache to cool slightly, about 3-5 minutes at room temperature. Take each mini-cupcake and dip the top of the cupcake into the ganache just to the edge of the paper cup, or just to the edge of the dome of the cake. Turn the cupcake a little bit to cover the top well, lift it out of the chocolate and allow it to drip a moment, then place back on the rack to firm up. Repeat with the remaining cupcakes until all are frosted. Allow the cupcakes to sit at room temperature until the ganache firms up, about an hour or so. You can enjoy these now, or they will keep at room temperature for a day, or carefully stored in the refrigerator for up to two days.

You can also decorate them if you please with purchased decorating icing, or make your own very quickly (as I did) combining a tablespoon of softened butter, a cup of powdered sugar, two or three drops of vanilla extract and just enough milk mixed together to make a smooth icing consistency. If you plan to color the icing, do so now. Place the icing in a piping bag with a tip, or into a plastic bag and cut off the very tip of it, then slowly squeeze out the icing to decorate your cupcakes in the desired pattern. I’ve used a person’s initials, spelled out greetings and made patterns. I didn’t make spooky spiderwebs on these because they were for a birthday event, but the shape of these certainly lends itself to that.

Note: Leftover ganache is a wonderful thing! You can store it in the fridge until solid, scoop out balls of it with a melon scoop and mold quickly with your fingertips into truffles, then roll in powdered cocoa or nuts to give as gifts. You can also reheat it slow and low until just liquid again and use it as a sauce for ice cream, berries or cake. Be careful in reheating because if allowed to simmer it will break the cream and you’ll have a chocolate mess!

Our first fire in the newly rebuilt fireplace and chimney...home sweet home!

Our first fire in the newly rebuilt fireplace and chimney…home sweet home!

Breaking the Fast: Raspberry Almond Coffee Cake

A slice of this cake is just the right way to start off your day!

A slice of this cake is just the right way to start off your day!

It’s very hard for me to believe that it’s now October. Summer came and went. Fall swept in before we knew it, and now my birthday has come and gone and the leaves are turning and falling.

I’ve always thought that life was like—and indeed I’ve experienced it as—a series of waves. There are the crests, when you are flying so high and all of your neurons are firing…you’re so excited to get up each day and see what life brings. And then there are the troughs, when you’re riding so low you can’t see the horizon anymore.

These crests and troughs can take many forms, and there’s much that can be learned from both of these life phases. Without the one, you can’t fully appreciate the other. It’s important to remember this. It’s what will get you through the tough times.

From the moment that the lightning exploded on the morning of June 26th until now, our lives have been a roller coaster of emotions, health issues, disruptions, delays, frustration and expense. A trough cycle. But at the same time, we were so incredibly blessed that no life was lost, no item couldn’t be replaced. The house and our day to day lives and health could be restored. And, much was learned. Hopefully it’s information I won’t have to utilize again in the future! As far as the house is concerned, we still have carpet to be installed this week, furniture and books to move back into place, our repaired and restored paintings to hang, cleaned rugs to put down and HVAC cleaning at the end of the month. But at long last, we see that light at the end of the tunnel approaching, and if feels good. Very good indeed.

So I think the best way to break this little fast from posting is to start with the dawn of a new day. A happy little cake that’s just the ticket for a morning breakfast treat, a brunch addition, or to have with your tea in the afternoon. This Raspberry Almond Coffee Cake with Streusel Topping is rich with flavor and texture. The fresh raspberries make a tart, colorful and lively foil for the underlying almond flavored cake and the sweet crunch of the streusel topping. A little hint of lemon zest brightens the flavors and adds some zing, binding the whole together into one delicious bite!

We’ve enjoyed this as a pick me up this week for breakfast, and even for dessert. It will sit for a day at room temperature, and refrigerates well for up to 3 more days. I think you will like it a lot, too.

Thank you all for staying with me during this summer of rather erratic posting and seemingly endless references to our calamity in June. I hope your Fall season has started off well, and may you all be on the “crest” of life right now.

Cheers to happy days, good health and good eating ahead!

Raspberry Almond Coffee Cake with Streusel Topping
Makes 24 slices

Topping:
1/2 cup rolled oats, pulsed in a food processor until they are roughly ground
1/2 cup packed light brown sugar
3 Tablespoons cold unsalted butter
1/2 teaspoon ground cinnamon

For the cake:
2 scant cups granulated cane sugar
12 Tablespoons (3/4 cup) unsalted butter, softened
3/4 cup buttermilk
4 eggs
1 teaspoon grated lemon zest
1/2 teaspoon almond extract
2 1/2 cups all purpose flour
1/4 teaspoon table salt
12 ounces fresh raspberries, washed and very gently patted dry

Preheat the oven to 350 degrees F, and butter an 8 1/2 x 13 inch cake pan.

In a small bowl, combine the pulsed oats, brown sugar cinnamon. Cut the 3 tablespoons of cold butter into the dry mixture, then combine with your hands until it makes a crumbly texture. Set aside.

In a large mixing bowl, combine the granulated sugar and softened butter, beating it with a hand or stand mixer on medium low speed until it is smooth and creamy. Add the buttermilk, eggs, lemon zest and almond extract and beat on low speed until well blended and smooth, then add the flour and salt and mix on low until just blended and all the dry ingredients are well moistened and the mixture is just smooth. Don’t over mix. Pour the cake batter into the prepared pan and smooth it with a knife or spatula to even it out. Sprinkle the fresh raspberries evenly across the top, then sprinkle the streusel mixture evenly over that.

Bake in the 350 degree F. oven for 28-30 minutes until the cake is done, slightly golden on top, and a wooden toothpick inserted into the center comes out clean. Place the cake on a wire rack to cool for an hour, then cut into 24 slices.

Let Them Eat Cake!

Texas Sheet Cake....you know you want it, you know you're gonna make it!

I think I mentioned at some point, probably in one of the 10 question posts, that when I was a kid I loved to bake. Fast forward well into adulthood, and I really don’t bake that often. I guess it’s partly due to the fact that if I bake sweets, I’ll eat ’em, and if I eat ’em, well, let’s just mention that slow metabolism once again and leave it at that! The other problem though, and the reason I don’t bake bread, is that my oven has issues. The main issue has been a broken seal, which my dear husband just replaced. “Why don’t you just get a new oven,” one might ask? Time and hassle, but it’s coming, yes it’s coming… Meanwhile, this relatively simple fix seems to have transformed my oven into a decent space to bake once again, and so this week I did just that with a vengeance. Continue reading