 I’m starting to wrap up another busy week here, and it has turned cold outside once again. A perfect time to make a warm, rich and delicious risotto for dinner.
Risotto is such a luxurious dish to me. Truly it is all about the essence of a few fine ingredients, allowing each one to shine through. The texture is so creamy, the rice so enriched with the chicken stock it has absorbed over time, along with a little bit of some sweet shallot and just a dash of wine. I always finish mine by stirring in some finely grated Parmigiano Reggiano for that extra depth of nutty richness and creaminess that only cheese can bring. A dish fit for a king. Or company. Or just you. We can’t get enough of it.
I think lots of folks believe that risotto is hard to make, and really it isn’t. You do need to prep all of your ingredients ahead of time, so you can concentrate on stirring in the broth, little by little. But stirring is really the hardest part…and that’s not hard at all, anyone can do that. And the results of making your own hot risotto are sublime. A taste that is truly out of this world good.
So I challenge those of you out there who have never made it to give it a try. You won’t be sorry you did, and the reward will be well worth your time. In fact, you’ll be wishing you made more so that you’d have leftovers for risotto cakes, but we’ll go down that road at a later date. Here’s how I made my risotto. Mangia!
I really wish I had some of this right now.
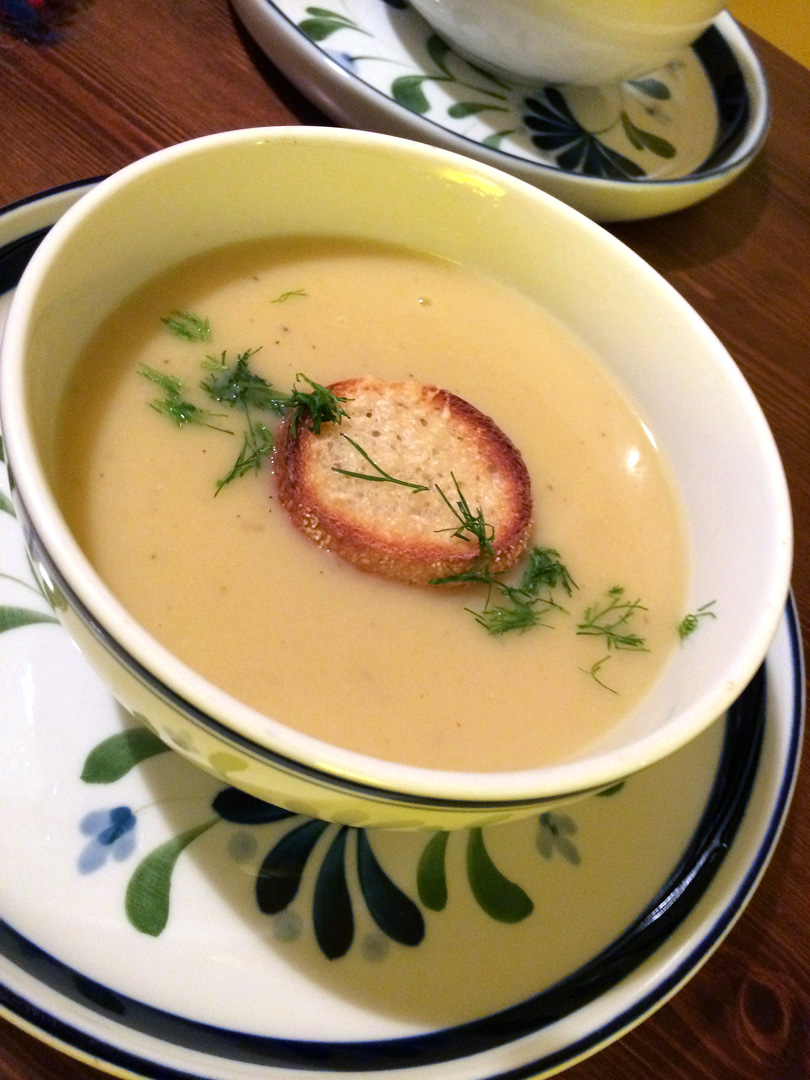
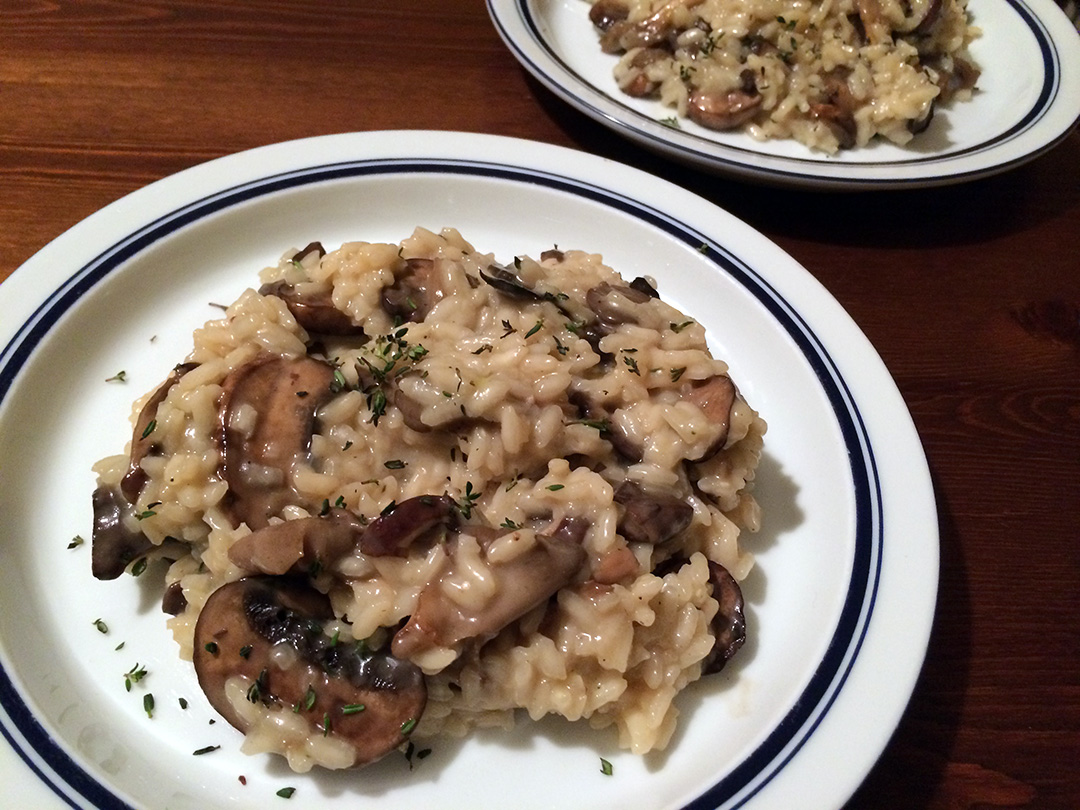
Earthy Wild Mushroom Risotto
Makes 2 very generous dinner-sized portions or serves 4 as a primo
For the Mushrooms:
1 Tablespoon olive oil
8 oz. mixed wild mushrooms, thinly sliced (I used baby bellas, oyster and shiitake)
1 Tablespoon dry sherry
1 teaspoon fresh thyme leaves
A pinch of kosher salt
For the Risotto:
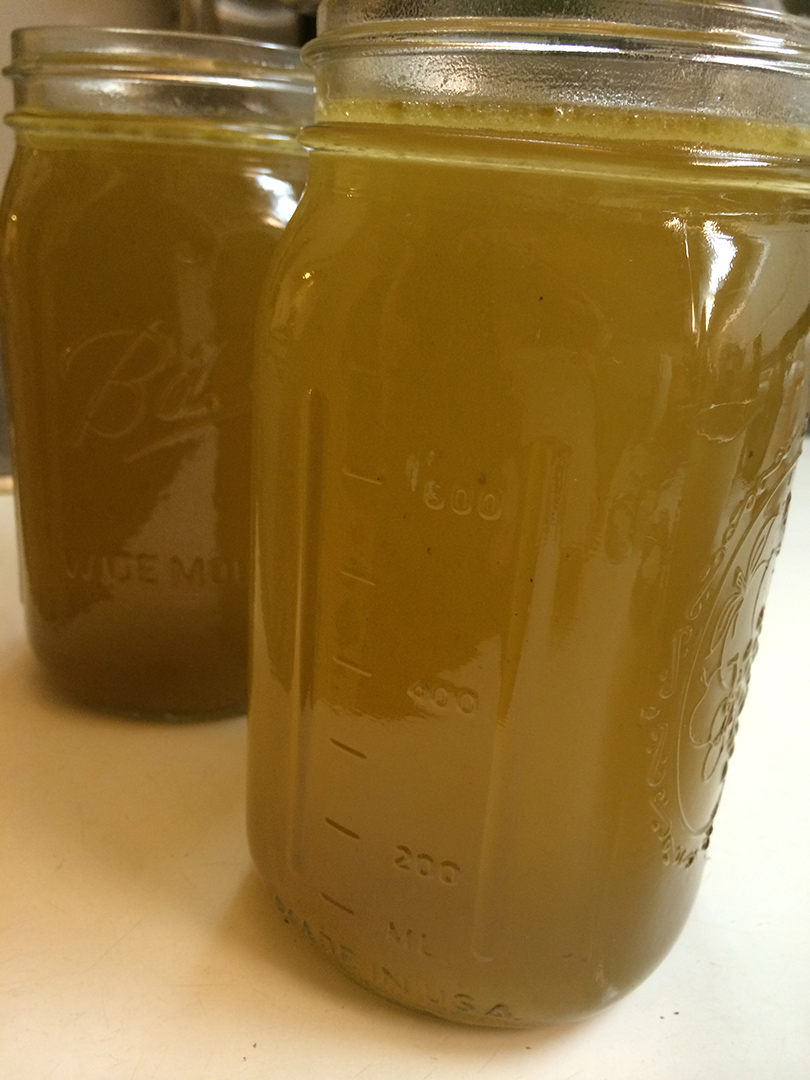
6 cups of very good quality homemade or purchased chicken stock (I used my homemade roasted chicken stock)
2 Tablespoons unsalted butter
1/4 cup minced shallot
1 cup arborio rice
2 Tablespoons dry sherry
A pinch of kosher salt
1/2 cup finely grated Parmigiano Reggiano
A sprinkle of fresh thyme leaves for garnish (optional)
Bring the broth just to a simmer in a small sauce pan and keep warm over low heat, do not boil.
Place the 1 Tablespoon of olive oil in a large nonstick skillet and heat over medium heat. Add the mushrooms and sauté until they have released their liquid, just begun to brown and most of the liquid has reabsorbed. Sprinkle with a pinch of kosher salt and the thyme leaves. Add the 1 Tablespoon of sherry off the heat, then return the pan to the heat and cook, stirring frequently, until the sherry has just been absorbed. Remove the mushrooms from the heat and set aside.
Melt the butter in a large saucepan over medium heat. Add the shallot to the pan and cook for about 5 minutes, stirring frequently, until the shallot is soft and just beginning to lightly brown, then sprinkle with a tiny pinch of kosher salt. Add the rice to the pan and stir constantly for 30 seconds, then add the sherry and cook about 15 seconds more. Add 1/2 cup of the hot broth, cook for about 2 minutes, stirring constantly or until the broth is absorbed by the rice, but not dry. Add the remaining broth 1/2 cup at a time, stirring constantly until the liquid is absorbed but the rice is not dry, each time before adding the next 1/2 cup. This will take about 20-25 minutes total.
When the last amount of liquid is absorbed and the risotto is creamy, remove from the heat and stir in the Parmigiano Reggiano cheese until well combined, then stir in the cooked mushrooms. Serve the risotto immediately, finishing with a sprinkle of fresh thyme leaves, if desired.


*****
Not a mushroom fan? Eat your risotto without the mushrooms…it’s wonderful, or check out my Caramelized Onion Risotto with Aged Balsamic Drizzle.