Pizza Bolognese

Pizza1

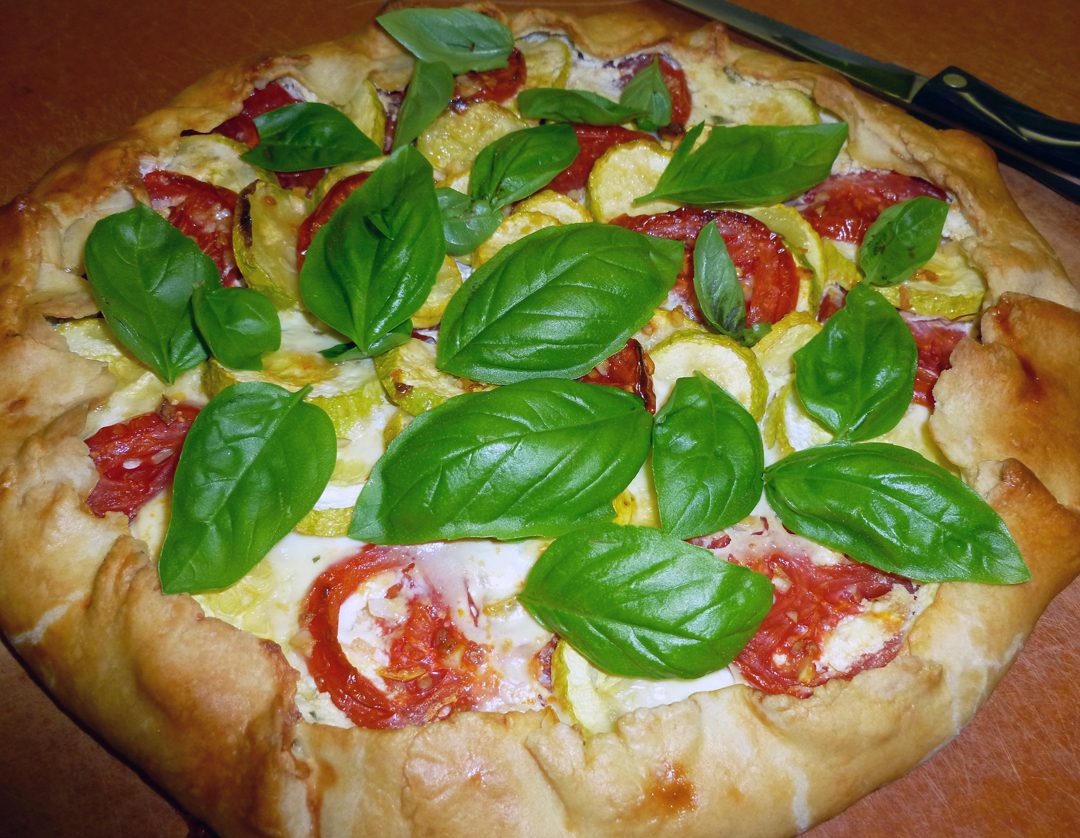
Seriously, I could eat this pizza every day and be a very happy camper! It is the ultimate comfort food.

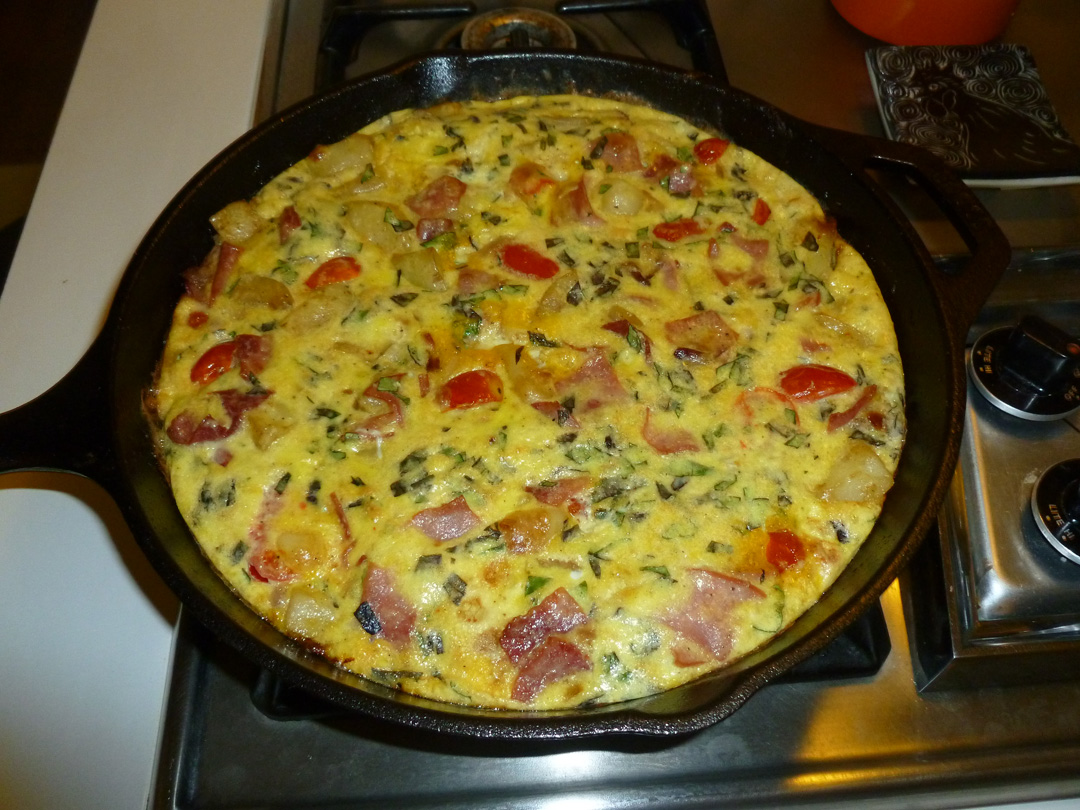
When you have a really busy day or work day and you find yourself facing starting dinner at 7:30 p.m., what do you do? Well, you can go out for dinner—and sometimes that’s the best way to decompress from your day. Or you can make what you’d planned to make and eat at about 9:30 or 10 p.m. But, if you have some pre-made pizza dough or crust in your fridge or freezer, a delicious pizza can be only a few short minutes away. I love making pizza, either planned in advance or as a quick go-to because, much like a frittata, it is a great way to use and enjoy leftover meats and veggies in your fridge.

The pizza I’m going to show you today, however, happens to be one that is far from using leftovers, because this little pizza features the most amazing bolognese sauce I’ve ever tasted. And why wouldn’t it be? After all it’s a family recipe from one of my favorite bloggers, Chicago John of the Bartolini Kitchens, and I really encourage you to click on his Sugo alla Bolognese to see how to make it for yourself. John’s instructions are easy and thorough, so I will just show you the three stages of my sauce below, the beginning meat and veg, the middle simmer and the decadent and rich finished sauce. It’s a relaxing process, one during which I felt almost like I had John and Zia in the kitchen with me looking over my shoulder, and the result is SO worth the time. Making this sugo has completely changed my ideas about how a truly great pasta sauce really deserves a homemade pasta to go with it. So now I’m looking forward to trying John’s method for different homemade pastas and breaking in my new pasta machine…stay tuned.

Meanwhile, back to how this sauce and the pizza came together. I made this fabulous bolognese for the first time last weekend and we enjoyed it so much that it was hard not to just eat it straight out of the pot when it was done! After we feasted on this sugo with purchased pasta, I froze some for later (hopefully to go with my own homemade pasta) and I also put about a cup or two of it in the fridge to have ready for a quick lunch or dinner when I needed it. Then I started thinking about all the dishes I’d ever tasted that involved Bolognese sauce, and how inferior they were to the real deal. Most recently, I’d had a pizza “Bolognese” from a local pizzeria, which was nothing of the sort since it didn’t actually have a meat sauce on it. That’s when it hit me. I could stretch out my cup of sauce by trying it on a pizza. (John, I hope this doesn’t make you cringe.) And it was truly transformative! Even using a pre-made crust on a busy night, it tasted better than you could possibly imagine…unless you’ve made this bolognese sauce yourself.

So here’s my version of a Pizza Bolognese, and I hope you will try it by making some of John’s Bolognese. It really ticks all the little comfort food boxes for me. From now on, whenever I make Sugo alla Bolognese, there will be a portion assigned to a pizza, too!


Pizza Bolognese
Makes 6 slices

1 – 12-inch ready to use pizza crust
1/4 teaspoon olive oil
1 cup of Chicago John’s Sugo alla Bolognese, warmed, (or in a pinch, you can use a high quality purchased bolognese meat sauce, or a marinara with your own cooked and crumbled Italian sausage added to it, which will be good, but not Pizza Bolognese!)
6 sun-dried tomatoes packed in oil, drained and small diced
1/3 to 1/2 red onion, peeled and thinly sliced crosswise
4 oz. white button mushrooms, cleaned and thinly sliced
4 oz. buffalo mozzarella cut into small pieces, about 3/4 – 1 inch in size
A fresh grating of fresh parmigiano reggiano (optional)

Garnish: A sprinkling of fresh arugula leaves (optional)

Preheat your oven to 475 degrees F with your pizza stone in the center of the oven, or if you’re using a cookie sheet or pizza pan, place your rack in the center of the oven.

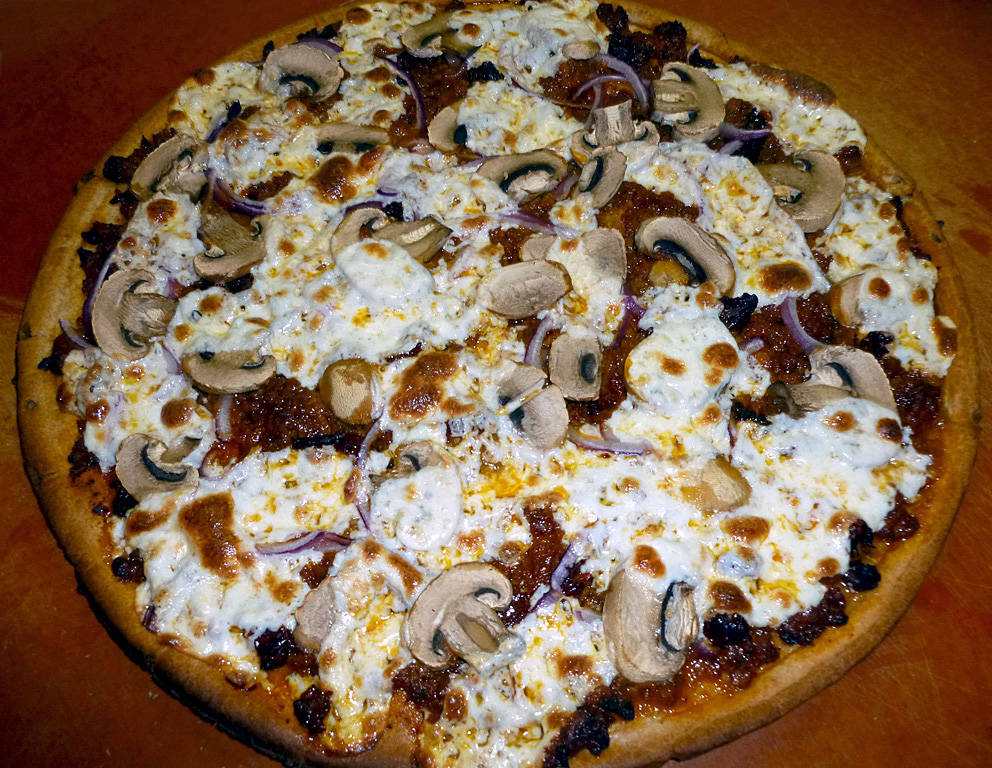
Place your prepared crust on a pizza peel sprinkled with a little cornmeal, or directly on the cookie sheet or pizza pan, if using that. Sprinkle the olive oil onto the crust and rub it around the edges with your hands and over the surface, distributing as evenly as possible. Next, spread your Sugo alla Bolognese sauce evenly over the pizza. I like to spoon mine out in quadrants, then spread it. Sprinkle the sun-dried tomatoes evenly over the sauce, then the red onion slices, then the mushrooms. Top the pizza with the mozzarella, spacing it evenly across the surface. Grate some parmigiano reggiano over the top of the pizza, if you like, it is terrific with and without.

Place the pizza onto the hot stone (I usually sprinkle a little more cornmeal on the hot stone before I place the pizza on it to bake), or place your cookie sheet or a pizza pan with the pizza into the oven. Bake the pizza for 10-12 minutes, until the cheese has browned but not burned and the crust is a golden brown, too. Remove the pizza from the oven (with the peel if you’re using one), and slide it onto a cutting surface. Cut into 6 slices and serve.

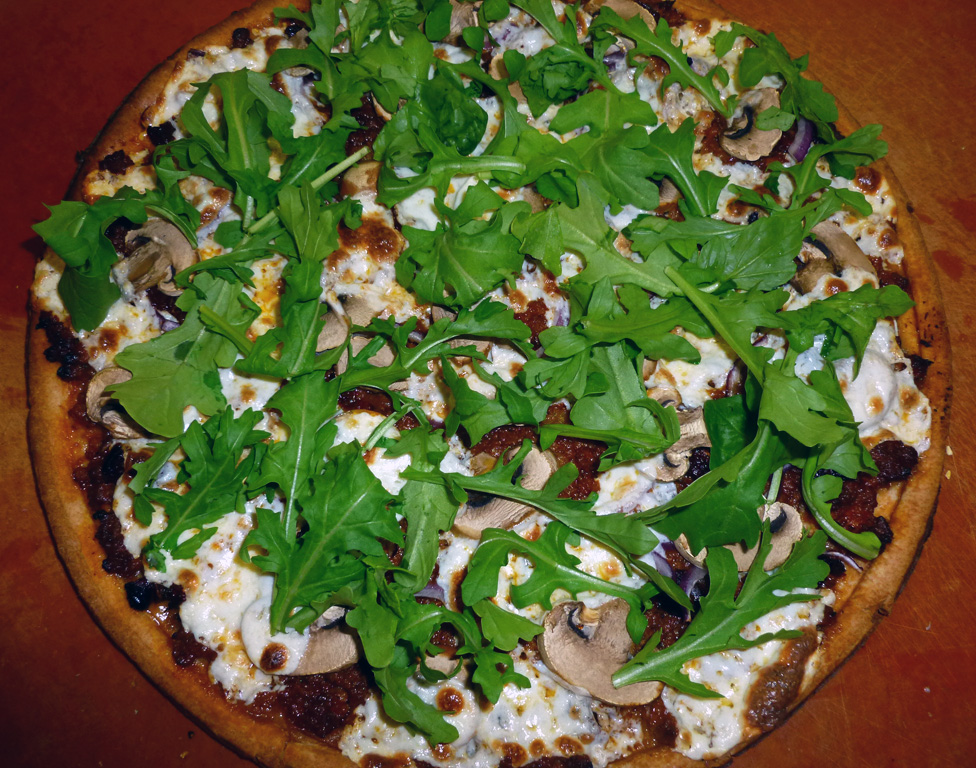
Note: If you like a little salad on your pizza, you can sprinkle the top with a few leaves of peppery fresh arugula…again it’s nice with, or without!

If you like, you can add a sprinkle of fresh arugula leaves to the finished pizza for a little peppery bite!

*****
And on another note: Tomorrow we actually start work on replacing the chimney…two weeks after I said it would begin. All should go fast now, relatively speaking, which means about 4-5 weeks of work and contractors coming and going. Fortunately we have our kitty kids to help us put this in perspective!

When your feeling stressed and like your world is upside down, it's good to have Thumbelina help you put things into perspective!

When you’re feeling stressed and like your world is upside down, it’s good to have Thumbelina help you put things into perspective!

Call me Corny

The tang of lime and the smoky heat of the chipotle pepper really makes the sweetness of this Chipotle Lime Skillet Corn sing!

The tang of fresh lime juice and the smoky heat of a chipotle pepper really makes the sweetness of the corn shine through in this Skillet Corn with Chipotle and Lime!

I have been a bit absent for the last two weeks and I apologize. We finally got our 100 foot tall heroic, lightning-struck tree down safely on Friday, which involved a crane because it was almost cracked in half at the topmost 20 feet of it and couldn’t support a man’s weight. Another blessing to count that we didn’t have a storm take it down before we could. Unfortunately, the beautiful azaleas that you saw me post in spring, and that are part of the header on the blog right now, have taken some hits. I hope they won’t become casualties when it is all said and done.

All of the contractors are behind in our area this summer due to these storms and the damage they have wrought. It’s hard to believe that our strike was June 26th, and here we are just barely beginning to start work with repairs, replacement and so on. But next week we hope to start rebuilding the chimney and after that, replacing half the roof. When all of that is done, hopefully a month from now, we will get into painting. Since this process is invasive, ongoing and fluid—and we both work from home—this may cause some erratic timing of posting and commenting on other posts, as I’m sure you may have noticed already! So I ask you to please bear with me. 🙂

On another more palatable note, all this rain must be really good for growing corn! We’ve had some spectacularly sweet corn coming in here lately and, being that sweet corn is a favorite around our house, I’ve been preparing a lot of it.

A very traditional and typically Southern preparation of sweet corn is to cut it off the cob, scraping all of the corn “milk” into the pot, season it simply with salt and pepper, and cook it in a cast iron skillet with some butter (or you can prepare it in the microwave) until it is tender and sweet. I love using the cast iron skillet because it causes the sugars to caramelize a bit, much like when whole cobs are cooked on the grill, but without the char or smokiness. I love corn on the cob, especially grilled, but this is my new favorite way to enjoy it. And since it’s rained more than it’s been sunny around here, it’s nice to have an alternative to the grill.

As truly fabulous as skillet corn is plain, why stop there? A couple of simple variations can elevate your corn to new heights, and allow you to mix and match with a bounty of summer meals. I love spicy Mexican corn and herbed corn on the cob, and both of those flavors are wonderful with skillet corn, too.

While I think I will call this a “method” rather than a recipe, here is this terrific way to enjoy fresh sweet corn off the cob, and some lively variations to try as well. I’m telling you, if you don’t try making sweet corn in a skillet, you’re really missing one of life’s great eating pleasures. Cheers!

Southern Skillet Corn
Skillet Corn with Chipotle Butter and Lime (Queso Fresco optional)
Skillet Corn with Fresh Herb Butter

This slideshow requires JavaScript.

Southern Skillet Corn and Variations
Makes 4-6 Servings

5-6 ears of fresh yellow, white or mixed sweet corn, husk and silks removed and rinsed
2 1/2 to 3 Tablespoons of unsalted butter
1 teaspoon kosher salt and 1/2 teaspoon black pepper, or to taste

In a large bowl, remove the corn kernels off each cob with a sharp knife by running it down the length of the cob. Turn the knife and scrape down the empty cob with the back of the knife, allowing the liquid “milk” to run into the bowl with the corn. (This is a key ingredient in the preparation…do not skip this step!)

Melt the butter in a cast iron skillet over medium heat. Add the corn and corn milk to the butter and stir until the corn is well coated. Add the salt and pepper and mix through. Continue to cook the corn in the pan, stirring frequently, until it is tender and barely starting to caramelize in some places, about 5-8 minutes. Taste for seasoning and adjust if needed. At this point you can remove the corn from the stove and serve, or add in the additions below.

Skillet Corn with Chipotle and Lime
To the base cooked skillet corn above, squeeze the juice of 1/2 lime and stir in 1 chipotle pepper in adobe sauce that has been minced. Taste and add more salt and pepper if needed. Serve. You can also sprinkle on a little crumbled queso fresco or crumbled feta if you like.

Skillet Corn with Fresh Herbs
To the base cooked skillet corn above, add 1 1/2 teaspoons fresh thyme leaves and 10 fresh basil leaves cut into thin ribbons cross-wise (chiffonade). Stir into the corn to mix well, adjust seasonings adding a bit more salt and pepper if needed, and serve.

Peachy Pops!

PeachGingerMintpop

Frozen fresh Peach, Ginger and Mint Pops are refreshing and light!

Peach "Melba" Pops are so colorful....they take me to my happy place.

Peach “Melba” Pops are so colorful and cool….they take me to my happy place.

Peaches!

I don’t know if I even need to write much more than that word to evoke salivation, do I?

Peach season is in full force here right now. This year I wanted to try making some new peachy delights and I just happened to have some popsicle molds I bought on sale at the end of last summer that were crying out to be used.

Enter these two homemade frozen peachy pops! So easy to make, and endless variations can, and will, be explored.

PeachGingerMintpop2

Frozen delights on a stick!

First up is a refreshingly light Peach, Ginger and Mint combo…the perfect antidote to a hot and steamy summer day! With August just around the corner and July heating up exponentially each passing moment, this particular frozen pop is on my short list for the next couple of months. It reminds me of an ice cold peach tea, but is more toothsome from using the whole fruit.

My second and latest frozen concoction is a Peach “Melba” Pop. Peaches and raspberries are truly a match made in heaven, and this pop exemplifies that. The only variation on this one that I might try is to stir the raspberry mixture through the pop with a stick before freezing, just to swirl those flavors throughout. But honestly, this pop is lip-smacking and tongue-tinglingly good just as I’ve written it. The tiny bit of Grand Marnier in the raspberry puree really amps up the peach and the raspberry flavor, adding a richness to the pop that might otherwise be missing. And it’s, well, a winner…there’s no other way to say it!

This slideshow requires JavaScript.

There’s an added bonus to this peach melba recipe, too. If you use the four-pop molds that I use, you’ll have a little extra peachy goodness left over to pop into an ice cube tray and add to your next tea or cocktail. Of course you could just make more puree to start with to ensure having some leftover for this very purpose. Peachylicious!

Peach, Ginger and Mint Pops
Makes 4 – 6 oz. pops

1/2 cup water
1/4 cup granulated sugar (I use cane sugar)
3 slices of fresh, peeled ginger, about 1/16  inch thick
1 1/2 cups fresh peeled and sliced peaches (about 3-4 depending on size)
1 tablespoon coarsely chopped fresh mint leaves
4 – 6 oz. pop molds or 4 small paper cups and wooden popsicle sticks

Prepare the sugar syrup by placing the water, sugar and ginger in a small saucepan over low heat. Bring the mixture to a simmer and stir until the sugar is dissolved. Remove from the heat and set aside to cool for 5 minutes.

In a food processor, combine the peaches, mint and sugar syrup and puree until smooth. Pour the puree into 4 – 6 oz. pop molds or 4 small paper cups, dividing evenly. Place the pop mold stick tops into the molds and secure, or place your popsicle sticks into each cup. Freeze until hard and well frozen, about 6-8 hours. Unmold by carefully submerging each pop in a bowl of hot water for just a few seconds, to loosen the pop from the sides of the mold, taking care not to allow the water to get into the mold or touch the frozen pop. Remove the pop from the mold or cup and enjoy.

Peach “Melba” Pops
Makes 4 – 6 oz. pops

1/4 cup granulated sugar (I use cane sugar)
1/2 cup water
1 cup fresh raspberries
2 more tablespoons granulated sugar
1 tablespoon Grand Marnier
1 1/2 cups peeled and sliced fresh peaches
4 – 6 oz. pop molds or 4 small paper cups and wooden popsicle sticks

Prepare the sugar syrup by placing the water and sugar in a small saucepan over low heat. Bring the mixture to a simmer and stir until the sugar is dissolved. Remove from the heat and set aside to cool for 5 minutes.

Prepare the raspberry puree by placing the raspberries, 2 tablespoons of sugar and 1 tablespoon of Grand Marnier into a small saucepan over low heat and cook until the sugar dissolves and the mixture becomes a puree, about 5 minutes, pressing the berries with the back of the spoon to help them break down. Remove from the heat and set aside to cool for about 5 minutes.

In a food processor, combine the peaches, and sugar syrup and puree until smooth. Pour 1/3 of the peach puree into each of the 4 – 6 oz. pop molds or 4 small paper cups, dividing evenly. Divide the raspberry puree between the 4 pop molds, gently spooning it on top of the peach puree. Pour the remaining peach puree on top of the raspberry, filling to just below the top of the mold. (At this point you can take a small skewer and run it through the whole mixture if you want to swirl the raspberry throughout, or just leave it layered as shown.)

Place the pop mold stick tops into the molds and secure, or place your popsicle sticks into each cup. Freeze until hard and well frozen, about 6-8 hours. Unmold by carefully submerging each pop in a bowl of hot water for just a few seconds, to loosen the pop from the sides of the mold, taking care not to allow the water to get into the mold or touch the frozen pop. Remove the pop from the mold or cup and enjoy.

Want more? Here are some other delectably peachy recipes of mine to try once you have your pops in the freezer: Just Peachy Ice Cream (possibly the best peach ice cream ever!), Star Spangled Cherry Berry Peach Crumble, Mom’s Easy Peach and Blueberry Crisp, A Very Short Little Peach Cake, Susan’s Nectarine (or Peach) Lemon Buttermilk Sorbet with Bourbon.

Crustless Summer Squash, Zucchini and Tomato “Pie”

tart1

A savory slice is oh so nice!

What a couple of weeks it has been…

This is our tree, you can see how the lightning circled it before it jumped to the chimney cap.

This is our tree, you can see how the lightning circled it before it jumped to the chimney cap.

When lightning strikes it does such weird things. Our experience has run the gamut from the usual burnout of electronics which one would expect, to the current running through the metal spines of a silk lampshade and tearing the silk out of it…which one would not expect! We’ll be repairing, cleaning soot and painting here for the next few months, and we were so lucky it wasn’t any worse.

Our chimney...8 feet of it is on the ground!

Our chimney…8 feet of it is on the ground! We sleep with our heads right next to where the chimney meets the top roof line.

Life goes on and mercifully we are here to experience and talk about it. And eventually you get back into the kitchen again and things begin to feel more normal.

Layers, layers and more layers are the key to this crustless pie.

Layers, layers and more layers are the key to this crustless pie.

Today I’m sharing a tasty and easy dish using some of summer’s bounty. This squash, zucchini and tomato pie is crustless, which makes it lighter than a traditional tart or pie, and perfect to serve as an entree with a salad or as a side dish for a meal. The “crust” in this dish is made by the slight caramelization of the bottom and sides of the squash in the oiled skillet, and the melted cheese. It holds together very well and has a wonderful, fresh flavor. I do love squash and am always looking for ways to feature it when it’s in season, and this little dish made me very happy…plus I got to use my cast iron skillet, which is always a bonus!

Pan pie, c'est tout!

Pan pie, c’est tout!

I hope you all have been doing well while I was away, and that you had wonderful and relaxing weekends and holidays. I am slowly getting around to visit all of you and catch up, so bear with me. Have a great week, and happy eating.

Crustless Summer Squash, Zucchini and Tomato Pie
Serves 4

This pie was inspired by my Squash and Tomato Galette from last year, but is much quicker and lighter because there’s no crust!

1 lb. yellow summer (I used crookneck) squash, trimmed and thinly sliced
1 large zucchini, trimmed and thinly sliced
3-4 roma tomatoes, trimmed and thinly sliced
1 cup ricotta cheese
3/4 cup freshly grated parmesan cheese, divided
zest of one lemon
1 Tablespoon lemon juice
1 1/2 teaspoons of chopped fresh thyme leaves
2 Tablespoons chopped fresh basil
1 egg
1 clove garlic, minced
4 teaspoons extra virgin olive oil
Kosher salt and freshly ground black pepper
Sprigs of fresh basil for edible garnish (optional)

Preheat the oven to 400 degrees F. Place 1 teaspoon of the olive oil in the bottom of a 10-inch cast iron or ovenproof skillet and grease the bottom and sides well.

In a small bowl, combine the ricotta cheese, 1/2 cup of the parmesan cheese, the lemon zest, lemon juice, thyme, basil and egg until well blended.

Place 1/2 of the yellow squash slices into the bottom of the pan in a single layer, slightly overlapping each other. Sprinkle with a little salt and pepper, then dollop 1/3 of the cheese and herb mixture over the layer of squash, spreading it slightly to cover. Next, layer 1/2 of the roma tomato slices over the squash layer and sprinkle with 1/2 of the minced garlic, a pinch of salt and some pepper, and drizzle over 1 1/2 teaspoons of olive oil. Make a single layer of the zucchini over the tomato layer, overlapping the slices. Sprinkle with a tiny bit of salt and pepper, dollop 1/3 of the cheese and herb mixture on top, spreading as before.

Make one more layer of the tomatoes, garlic, salt, pepper and olive oil, then top with a final layer of yellow squash mixed with any remaining zucchini, salt, pepper and the remaining cheese and herb mixture. Sprinkle the top with the remaining parmesan cheese and bake in a 400 degree oven for about 35 – 40 minutes, watching closely, until the top is browned, the whole is bubbling and the vegetables are tender when a knife is inserted through to the bottom. Remove from the oven and allow to rest for 5 minutes. Cut into four wedges and serve with a sprig of fresh basil on top.

A Little Bolt and Jolt

We’re experiencing a little delay in our regular programming here at Bits and Breadcrumbs this week. We’ve had a hiccup in the form of a freakish storm yesterday morning and a bolt of lightning hitting a tree and then jumping to our chimney, resulting in a big mess and lots of soot.

All inhabitants of the house are okay, no fire (luckily), and we got power back on late yesterday. The damaged tree hasn’t come down so far, but we have a chimney missing up top and much of its interior wall and firebox came down into the living room. We have clean up crews for the soot and mortar all over the interior of the house, some zapped electrical systems and equipment to deal with…and so on. And did I mention clean up crews? Lots and lots of clean up and contractors, to be followed by lots of construction to rebuild the chimney, firebox and surround, then plastering and paint.

And yet, we were very, very lucky. Had the tree not taken the bolt and if the lightning had struck the chimney cap first, I wouldn’t be sitting here typing, most likely, as the top of the house would have been in flames. Or had the chimney fallen into our bedroom (which is right next to it and where we were at the time), the story would be quite different. Thank you big tree.

Since this happened (and it seems like a week has passed since yesterday morning), my reading and commenting on others’ posts has been non-existent, the cooking has been interrupted, and our days are filled with folks coming and going. But I will be back online and returning to our regular programming soon. We are thankful it wasn’t any worse and that none of us were actually hit. I will try and share some pictures in my next post once I get my main computer back online, and in the mean time, I hope you all have a pleasant and safe weekend.

A Retro Spinach Dip Redo and Some Falafel On the Side

This resulted in a "Thumbs Up" from my pottery peeps and was demolished in short order!

This Retro Spinach Dip Redo resulted in a “Thumbs Up” from my pottery peeps and was demolished in short order!

Note: These two don’t really have anything to do with each other, but are both some good eats to share.

I adore Mediterranean and Middle Eastern flavors, and this week I made a huge batch of baked falafel. I had never had falafel baked before, always fried, but these were terrific in a pita alongside a Greek salad (with feta of course) for dinner, and again topping a lunch salad with tahini dressing drizzled over it. This is another of Mark Bittman’s recipes, and you can find it here. I highly recommend this as well as another recipe he lists at this same link for his Spiked Guacamole, which I made last night but didn’t photograph…it’s awesome, too! I have to say that these falafel are as good baked as those I have had fried, with a nice, crispy texture, a great taste and they freeze beautifully, too!

Drizzled and ready to eat with the tahini dressing!

Drizzled and ready to eat with the tahini dressing!

It’s been feeling very summer-ish here during the past week, and the hot weather has made me crave some cool summer dips, just for fun.  What I particularly had in mind was creating something to take to my pottery class for us to nosh on, and I came up with this Retro Spinach Dip Redo. My inspiration was born of an amalgamation of several yogurt sauces I’ve had—basically a redo of the ancient spinach dip recipe that was so popular when I was growing up. Yes, you know the one I mean, made from the vegetable soup mix combined with mayo and sour cream, served in a bread bowl?

Cool, creamy green goodness.

The result is a lighter, healthier version, that doesn’t taste “healthy” at all. While it does remind you of the old school version, it is a bit different. This one has no water chestnuts, no mayo and no sour cream, but it does have a great mouth feel, and lots of texture and flavors that build as you eat it. Plus, it’s almost as easy to make as the soup mix version, but it’s much better for you! And here’s a little trick: Whenever you combine olive oil with plain yogurt, it emulsifies the yogurt, giving it more of a mayonnaise-like texture and making it less likely for the water to separate. This is a great tip for making tzatziki sauce, too.

The verdict from my pottery class (my test subjects) was that this is a winner, so I promised to share my Retro Spinach Dip Redo on the blog. Enjoy, and I hope that your week has started off swimmingly!

Retro Spinach Dip Redo
Makes about 2 1/2 cups

2 very large shallots finely chopped
1 large clove of garlic, grated
1 1/2 Tablespoons of Extra Virgin Olive Oil
1-10 oz. package of frozen, chopped spinach, preferably organic, cooked according to the package directions (I microwave mine), then drain it and press all the moisture out
1/2 teaspoon Kosher salt
Several grinds of fresh black pepper
1/2 teaspoon of ground coriander
1 3/4 cups of plain Greek yogurt, whole or 2% (I used 2% Fage yogurt)

Put all ingredients in a small bowl and combine until well mixed. Place the dip into the fridge and let the flavors blend for an hour or two. Transfer to a serving bowl and serve with pita or tortilla chips, or raw veggies if you like!

rose1On another note, this is a rose bush my husband gave me many years ago for Valentine’s Day. It has struggled in our front yard all these years, tolerating the drought and maybe giving me one beautiful rose each year…sometimes two when I’m lucky. This year, it has 7 blossoms on it! I think it likes all the rain.

Sadly, I can't remember the name of this rose, but I think it is a tea rose...sweet thing!

Sadly, I can’t remember the name of this rose, but I think it is a tea rose…sweet thing!

*****

Longer Days, Lighter Meals and a Little Anniversary!

Kicked back watching the fisherman on Lake Winfield Scott.

Kicked back watching the fisherman on Lake Winfield Scott.

The longer and hotter days of Spring and Summer always make me feel that it’s time to start lightening up a bit! While I like fall and winter produce and the dishes inspired by those seasons, I do so look forward to this sunny time of year and all the juicy fruits, berries and summer vegetables that come with it. I get very excited anticipating the delicious and more veggie-and-fruit-centric dishes I can make and eat for the next 3 or 4 months.

Recently, my husband and I decided that eating more fruit and veggies during the day, and adding meat and dairy to that with our evening meal, is a great way to help us stay healthy. Mark Bittman*, a respected American food writer, one of my favorite cookbook authors and a columnist with the New York Times, has just published a book to that effect called VB6 (Eat Vegan Before 6). In the book, he proposes that eating a mostly plant-based diet can have massive health benefits for people and the planet, and his sustainable approach for achieving this goal is to eat no animal products or by-products before 6 p.m., then eat whatever you want after that. Of course there’s a bit more to it, but that’s the concept, plain and simple. If you find this idea as intriguing as I did, you can read more about his strategy in his book or on his website. We all know that eating plenty of vegetables, fruits and whole grains is good for our bodies and may aid in maintaining our weight or even losing some, so spending two-thirds of my eating day focused on that idea as a habit, then getting my cheese and/or meat fix at dinner—possibly with a dessert or an adult beverage—sounds like a win-win situation to me!

If left to my own devices, I will end up looking just like this!

Getting enough sleep is important, too, as is rolling around on ones’ back.

Perhaps what I like best about Mr. Bittman’s sensible approach is that he recognizes the fact that we all know we will stray sometimes…like when you’re on vacation or have circumstances where you just can’t eat this way for a day, or a week. Or you may find that you stray all the time because you just can’t live without dairy in your coffee and nut milk doesn’t do it for you. And that’s okay, it’s a personal choice and part of enjoying your life and food, in general. My take away from all of this is that it’s something I can easily enjoy doing, something I think I can live with and hopefully enjoy some health benefits in the process.

All this to say that you may, or may not, notice a slight sea-change to the recipes featured on this blog. In fact I think that mostly you won’t notice much change, other than perhaps a higher fruit and veggie-to-meat ratio within certain dishes as time goes on.

Unless, of course, we are on vacation, in which case all bets are off!

So vibrantly colored...and vibrantly flavored, too!

So vibrantly colored…and vibrantly flavored, too!

Today I’m sharing a version of the universally beloved Tabbouleh salad, for which everyone has their own variation. This one is slightly adapted from a Mark Bittman recipe and it’s terrific for lunch or dinner, has lots of flavor, texture and crunch. We took this on our annual June mountain trip for my husband’s birthday this past weekend—along with some cheese and sausages of course—and enjoyed it picnic-style while lounging near Lake Winfield Scott in North Georgia. Add some fish or meat to this dish if you like, but I generally prefer my Tabbouleh either straight up as a salad, as a component of a mezze platter or as a side to a meat, chicken or fish entree. Regardless of how you choose to eat this, I hope you enjoy.

*Please Note: I am not promoting Mark Bittman, his book VB6, or being compensated to mention either one! I’m just sharing because I want to do so.

Tabbouleh (Slightly adapted from Mark Bittman’s recipe)
Makes 4 generous servings

3/4 cup medium-grind bulgur
1/4 cup olive oil
Juice of two juicy lemons
1/2 teaspoon kosher salt or more to taste
1/2 teaspoon freshly ground black pepper or more to taste
1 dry pint grape tomatoes, quartered lengthwise
1 large English cucumber, peeled, seeded and chopped
3 large celery stalks, trimmed and chopped
6 scallions, thinly sliced white and pale green parts, plus 2 tablespoons of green
10 pitted green Greek olives or other, chopped
1 1/2 cups coarsely chopped fresh flat leaf parsley
1 cup coarsely chopped fresh mint

Bring 1 1/2 cups of water to a boil in a small saucepan with a cover. Remove the water from the heat, stir in the bulgur and cover. Allow it to sit until the grain is tender, about 15 minutes. If any water remains in the pot, strain it, pressing on the bulgur to remove as much water as possible. Place the bulgur in a large mixing bowl and toss with the olive oil and lemon juice. Add the salt and pepper and toss again. Add the remaining ingredients and toss well to combine and coat. Taste for seasoning and add a bit more salt and pepper and lemon juice if desired. Serve at room temp. Keeps in the fridge for 3 days.

Thumbelina and Cinderella say "Happy Anniversary, Mom" and "Keep the dairy coming!."

Thumbelina and Cinderella say Happy Anniversary, Mom, and keep the dairy coming!

And on another important note, this week marks my 2-year blogging Anniversary!

Wow, how the time does fly. I do hope that you all have enjoyed the first two years of this blog, and that you will stay with me for another two and see where the trail leads us next. Here’s a look back at some of my favorite dishes from this past year with links to the recipes, just in case you missed a few. Cheers!

Did I mention this is great for breakfast, too?

Did I mention this is great for breakfast, too?

Blackberry, Lemon and Almond Snackin’ Cake!

Lentils

French Lentilicious Salad.

Now THIS is a southern plate of food that makes me grin like a Cheshire Cat!

Now THIS is a southern plate of food that makes me grin like a Cheshire Cat!

Firecracker Slaw and Corn with Chipotle butter…perfect for the 4th of July!

With such a fiesta of color, this dish just has to be good!

With such a fiesta of color, this dish just has to be good!

The now infamous Betsy’s Famous Black Bean Mango Salad…a pot luck special.

Fresh from the oven, Clafouti is puffed and bubbly!

Fresh from the oven, Clafouti is puffed and bubbly!

Julia Child’s classic Clafouti with cherries was a perfect way to celebrate what would have been her 100th birthday.

I look at this and all I can think about is making the next one!

I look at this and all I can think about is making the next one!

This Summer Squash and Tomato Galette features some of my favorite veggies and an olive oil crust to boot.

wholeplate

Betsy’s Retro Cheese Olive Bites and Martha Stewart’s Bacon Wrapped Dates, the MOST pinned recipes from this past year!

Tarragon Pecan Chicken Salad on Brioche Crostini...need I say more? But I will!

Tarragon Pecan Chicken Salad on Brioche Crostini…need I say more? But I will!

Probably my second most pinned recipe from this past year, Tarragon Pecan Chicken Salad on Brioche Crostini.

The color change of the layers in the Kir Royale are so subtle, they are hard to photograph, but you can see whatever it is, it's a pretty color in candlelight!

The color change of the layers in the Kir Royale are so subtle, they are hard to photograph, but you can see whatever it is, it’s a pretty color in candlelight!

Kir Royale…a very celebratory cocktail.

Almost ready!

Almost ready!

Kitchen Sink Sloppy Joes…great for camping!

chili1

Spooktacular Beef and Italian Sausage Chili is a great dish for Fall…and a little bit scary, too…it’s so delicious.

Home-styled comfort from the cold...or a cold!

Home-styled comfort from the cold…or a cold!

My homemade Chicken Noodle Soup, for whatever ails you.

These are a classic!

These are a classic!

My mom’s fantastic Drop Sugar Cookies are a traditional holiday fave.

Is there anything more inviting than a freshly baked pie? No, perhaps not.

Is there anything more inviting than a freshly baked pie? No, perhaps not.

Chocolate Bourbon Pecan Pie…well, there you go!

*****


An Adieu to Strawberries: Individual Strawberry Crisps

They weren't plentiful this year, but they sure were pretty and sweet!

They weren’t plentiful this year, but they sure were pretty and sweet!

Although it seemed unusually short, we did have a brief strawberry season here and the few I was able to procure were very sweet and lovely. They were from North Carolina and Florida, not Georgia berries. I think we had too much rain for a good local crop this year, in fact.

The first round of berries were consumed for breakfast in short order. The second round involved a big blowout berry sale, and I felt compelled to make a dessert. Thinking I would still have more berries coming to make a shortcake this year, I decided to do a crisp first. Alas, I was wrong about the first part of that statement, but this new little twist on my older version of a crisp was absolutely outstanding! Good enough to revisit and share with you today, I think. Making individual servings versus a large pan of crisp concentrated all the flavors of the berries, juices and even the crisp component, into a truly divine dessert. Even if you don’t have fresh and local strawberries, this is a great way to enjoy any berry or peach crisp. But hopefully you do have some strawberries coming your way and can give the following recipe a try!

This slideshow requires JavaScript.

But before I post the modified recipe below, I must show you the last of the spring flowers from both my garden and my mom’s garden. I know we still have a couple of weeks of Spring left, but it sure feels more like Summer around here right now, and the spring flowers are gone for this year. Above is another little slideshow of flowers for your enjoyment. Have a happy Monday!

The key to this recipe is definitely individual servings. The smaller delivery vehicle concentrates the flavors!

The key to this recipe is definitely individual servings. The smaller delivery vehicle concentrates the flavors!

What? No strawberries? No worries, this will work with apples, peaches, cherries or berries. The Grand Marnier is good with cherries, but you can change up the liqueur to suit the fruit and yourself…peaches and a splash of amaretto or bourbon, perhaps? Or you can omit the alcohol altogether. You can also try lemon zest instead of orange…it’s all good!

Individual Strawberry Orange and Almond Crisps
Makes 6

For the berries:
2 1/2 lbs. fresh strawberries, stems removed and sliced
zest of one orange
1/3 cup sugar, preferably cane sugar
2 Tablespoons Grand Marnier
1 Tablespoon flour

For the topping:
3/4 cup flour
1/3 cup cane sugar
1/3 cup light brown sugar
1/8 teaspoon kosher salt
1/2 cup rolled (not quick cooking) oats
1/4 cup blanched slivered almonds, coarsely chopped
1/4 lb. (I stick) unsalted butter, cold and diced

Preheat the oven to 350 degrees F. Butter six 1-cup baking ramekins generously and set aside.

In a large bowl, combine the berries, zest, sugar, Grand Marnier and flour, stirring to mix well and set aside while you make the topping.

In a small bowl combine the flour, both sugars, salt, oats, almonds and the butter, and use your hands to lightly work the butter into the dry ingredients until it just becomes crumbly with pea-sized pieces of butter.

Transfer the berries and their juices to the prepared ramekins and divide evenly. Top each evenly with the crumble topping. Place the ramekins on a cookie sheet that has been completely covered in aluminum foil and place the whole in the oven and bake for about 30-35 minutes at 350 degrees until the filling is bubbling and the topping is a light golden brown and crisp.  Remove from the oven and allow it to sit for about 5-10 minutes. Serve warm or at room temperature with vanilla bean ice cream.

The full Strawberry Moon!

This post wouldn’t be complete without an unedited picture of the full Strawberry Moon!

*****

Happy Grilling and Views from My Back Door

We’re in the midst of our holiday weekend here in the U.S. and it’s time to break out the grill if you haven’t already, get out in the sunshine and cook up a storm.

Grilled pork tenderloin with chipotle orange glaze, Mexican rice with cilantro dressing and avocado and tomato salad with toasted cumin seed dressing make for one big Fiesta!

In honor of our long weekend I want to share perhaps my most favorite recipe for grilling pork tenderloin and two nice sides to go with it. I can’t take credit for the recipes, but I can send you their way and tell you that these are not to be missed for your summer, or any time, for pure grilling and eating pleasure.

The trifecta of Grilled Pork Tenderloin with Chipotle Orange Sauce, Mexican Rice with Cilantro Dressing and Avocado Salad with Tomatoes, Lime, and Toasted Cumin Vinaigrette makes for one happy plate! The tenderloin and rice recipes come from Bon Appétit magazine and I’ve been making them for years. The salad is a new-to-me Bobby Flay recipe and it is my newest favorite salad…you just can’t imagine what a difference toasting whole cumin seed can make. The pork recipe is listed below for your enjoyment and you can find the other two by just clicking the links on each name above and it will take you to these recipes…they are keepers! Please do try them on for size.

Pork Tenderloin with Orange Chipotle Sauce
Bon Appétit, May, 2003
Serves 10
(I always half this recipe.)

3 1/2 pounds pork tenderloin
6 cups orange juice
2 teas. salt
2 Tbs. butter
3 large shallots, finely chopped
1 cup dry white wine
2 3/4 cup low-salt chicken broth
2 Tbs. chopped fresh cilantro
1 Tbs. chopped fresh chives
1 Tbs. minced canned chipotle chiles

Divide pork between 2 resealable plastic bags. Pour 1 cup orange juice and 1 teas. salt into each bag; seal. Turn to coat. Chill at least 3 hours or overnight.

Melt butter in large saucepan over medium-high heat. Add shallots; saute until soft but not browned, about 2 minutes. Add wine; boil until reduced to glaze, about 10 minutes. Add 4 cups orange juice and broth; boil until reduced to 1 3/4 cups, about 45 minutes. (Can be made one day ahead. Cool, cover & chill).

Prepare BBQ (medium-high heat). Drain pork; pat dry. Grill to desired doneness, turning often, about 18 minutes for medium. Transfer to work surface; tent with foil and let stand 5 minutes.

Meanwhile, bring sauce to a simmer; mix in cilantro, chives and chipotle chiles. Slice pork. Serve with sauce.

******

And on another note, Cecilia over at The Kitchens Garden recently issued a challenge to her fellowship of readers to show the views from our respective back doors. She shows us her daily view from her back door as well as into the life of her farm, which is quite interesting to see. And the images from her back door view challenge have resulted in some truly amazing views from all over the world. While our view is not an exotic one, it is quite idyllic and we enjoy it! So with wishes for you to have a lovely day, a happy Memorial Day if you are in the U.S., and some very happy grilling in general…here is my view. Cheers!

This is the view standing in our doorway looking onto the back deck...we'd just had a storm so it's a little messy!

This is the view standing in our doorway looking onto the back deck…we’d just had a storm so it’s a little messy!

This is looking out over the deck railing into the back yard. My raised bed garden is just below this view.

This is looking out over the deck railing into the back yard. My raised bed garden is just below this view.

My favorite view, looking into the entrance to our little "forest" of paths and shade garden.

My favorite view, looking up from the last shot and into the entrance to our little “forest” of paths and shade garden. Some of our trees are 100 feet tall.

*****

Garden Tour Number 1, a Frittata and Some Mighty Tasty Green Beans

What an interesting Spring we have had thus far! It’s wafted from extremely cold to Summertime and back to Spring again, with periods of intense rain to take us out of our long draught conditions. By Tuesday it’s supposed to be 89 degrees here…what??? Today is another classic example of our recent pattern of rainy and stormy weekends. But after losing so much of my flowers to draught over these past few years, I will take the rain, thank you very much. It’s actually wonderful to see the rivers and lakes full once again.

This slideshow requires JavaScript.

I’d promised you a garden tour and, in going through my images, I realized I actually have enough for 2-3 separate tours, so today’s will be an organized garden tour that I enjoyed taking with my mom a few weeks ago in my home town of Florence, Alabama. This one was sponsored by the local Master Gardener’s Association, and featured many types of gardens in the area including private walled gardens, country shade and forested gardens, river view gardens and city gardens. The day was overcast and cool, but it was still a wonderful tour, so put on your walking shoes and take a peek at the slideshow. This is my first attempt at the slideshow feature, and it’s not quite what I had in mind, but you can see the images…so we’ll just roll with it!

Frittata2

And what better dish to enjoy after a garden tour than a frittata? I say this because they are so quick to put together, great for breakfast, lunch or dinner and you can make one from ingredients you have on hand, both leftovers and fresh items from the garden! While I have shown you frittatas before (see here), this particular one was inspired by a recent post from Chicago John of the Bartolini Kitchens, where he shows you step by step how to make wonderful frittate. You can click the link and see his method and I know you’ll enjoy his blog as well. He’s a master of all things Italian in the cooking world and a true inspiration!

One of the things that struck me about John’s frittata-making was that he used a cast iron skillet to make them, which is a brilliant idea. Since one of my Christmas presents last year just happened to be a Lodge 10″ cast iron skillet—something I’d wanted forever—this seemed like a perfect thing to make in it. And as is so often the case for me, I had things to use up in the fridge, and that’s how this ham, potato, onion and tomato frittata came into being.

We enjoyed this with some roasted green beans. If you haven’t tried roasting green beans, your really missing something super easy and very special. Since we’ll soon be harvesting fresh green beans around here, the method below is perfect for a quick and delicious preparation.

When I say these are simple...I mean it!

When I say these are simple…I mean it!

I hope you all had a lovely weekend. Next post I’ll be back with more flowers, including some from my own garden and my mom’s, more food, as well as some ideas for the upcoming Memorial Day holiday weekend and the grilling season in general. Meanwhile, I hope you all have a great week.

Ham, Potato, Onion and Tomato Frittata
Serves 6

1 large sweet onion such as Vidalia or red, peeled, halved and thinly sliced
5 small Yukon Gold potatoes, scrubbed and cut into 1/2 inch chunks
1 1/2 Tablespoons olive oil and 2 Tablespoons unsalted butter
7 ounces ham, cubed
1 cup grape or cherry tomatoes, halved
7 large eggs
12 fresh basil leaves coarsely chopped
3/4 cup Parmigiano Reggiano cheese, finely grated
kosher salt and freshly ground pepper

Preheat your oven to 350 degrees F. Melt the butter and heat the oil together in a 10-inch cast iron or non-stick oven proof skillet over medium heat. Add the onions and saute for about 3 minutes, until they begin to soften and turn transparent. Add in the potatoes and cook, stirring frequently, until they become tender, about 10 minutes. Sprinkle the veggies with a pinch of salt and a few grinds of black pepper. Add in the ham and cook another 3 minutes, allowing it to brown and warm through. Add in the tomatoes and cook, stirring frequently, about 5 more minutes until the tomatoes soften.

While the tomatoes are softening in the skillet, crack your eggs into a medium-sized bowl and whisk to combine well. Add the basil and Parmigiano Reggiano, a good pinch of kosher salt and some freshly ground black pepper. Stir to combine. When the tomatoes are soft, pour the egg mixture evenly over the veggie and ham mixture in the skillet. Using your spoon, insert the end down towards the bottom of the pan in a few spots to allow the egg mixture to get through the veggies. Turn the heat to medium low and cook for about 5 minutes, until the eggs begin to set. Take off the stove and place the pan into the 350 degree oven and allow the eggs to cook through until the top of the frittata is set (no jiggling or visible liquid left) and very lightly golden browned on top, about 5 minutes. Remove from the oven. Allow it to sit about 5 minutes, then cut into 6 pieces and serve. Frittata can be served at room temperature or refrigerated and reheated in the microwave.

Roasted Green Beans
Serves about 4

1 lb. fresh green beans, rinsed well and trim both ends lightly
1 Tablespoon extra virgin olive oil
1/2 teaspoon kosher salt and freshly ground black pepper, or to taste

Preheat your oven to 400 degrees F. Line a cookie sheet with aluminum foil and place the trimmed green beans on it. Drizzle the olive oil over the beans, then salt and pepper and toss to coat. Place the beans in the oven and roast for 8 minutes. Shake the pan and stir the beans, then roast another 6 minutes or until the beans are tender and have begun to just brown. Remove from the oven and serve.